


Models
>
7MKTWS300DW0
7MKTWS300DW0 Kenmore Washer
Jump to:
Find Part by Name
Keep searches simple, eg. "belt" or "pump".
Diagrams for 7MKTWS300DW0
Viewing 5 of 5


 Diagram and Parts List for Kenmore Washer")

Keep searches simple, eg. "belt" or "pump".

$15.26
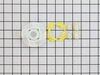
This is an authentic OEM agitator cam kit for your washing machine. The kit includes a bearing, the cam holder, and four individual cams. You may need to replace the agitator cam if you find your wash...
In Stock
Order now and your part arrives by Apr 10

$9.79
Also known as an O-Ring. This black o-ring seal is three inches in diameter.
In Stock
Order now and your part arrives by Apr 10

$39.63
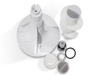
The washer drive pulley kit is also known as a replacement clutch assembly, or a cam kit. The drive pulley is found at the bottom of your washing machine, mounted to the drive shaft. Common symptoms i...
In Stock
Order now and your part arrives by Apr 10

$29.98
The drive belt works with the pulley in your washer in order to spin the tub. If you notice a burning rubber smell, your washer has become excessively noisy, or it will not spin, it could indicate an ...
In Stock
Order now and your part arrives by Apr 10

The O-Ring is included with this cap. It can be purchased separately as Part #WPW10072840.
In Stock
Order now and your part arrives by Apr 10

$160.15
This agitator kit does NOT include the fabric softener dispenser (part 8575076A). That must be ordered separately.
In Stock
Order now and your part arrives by Apr 10

$11.98
This 18 ml bottle of white appliance touch-up paint is used to cover scratches or marks on your appliance. The white touch-up paint can be used on refrigerators, microwaves, ranges, clothes dryers, an...
In Stock
Order now and your part arrives by Apr 10

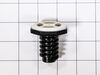
This shift actuator helps your washer switch between washing and spinning, and controls the agitator. It fits many Whirlpool and related brand models. If your washer isn’t spinning or agitating, this ...
In Stock
Order now and your part arrives by Apr 10

In Stock
Order now and your part arrives by Apr 10

In Stock
Order now and your part arrives by Apr 10

This washing machine cleaner includes three time-release tablets designed to remove odor-causing residues, grime, and buildup from high-efficiency and top-load washing machines. The tablets work by cl...
Special Order

This drive block connects the spin basket to the drive shaft in large-capacity washers, allowing proper spinning during cycles. At 2-5/16 inches high, it’s easy to install with basic tools. Replace if...
In Stock
Order now and your part arrives by Apr 10
Questions and Answers
We're sorry, but our Q&A experts are temporarily unavailable.
Please check back later if you still haven't found the answer you need.
Common Problems and Symptoms for 7MKTWS300DW0
Viewing 13 of 13Will not agitate
Fixed by these parts

How to fix it
Spinning Issues
Fixed by these parts


How to fix it
Leaking
Fixed by these parts


How to fix it
Spins slowly
Fixed by these parts
How to fix it
Noisy and Marks Left on Clothes
Fixed by these parts
How to fix it
Burning smell
Fixed by these parts
How to fix it
Does not dispense fabric softener or detergent
Fixed by these parts


How to fix it
Will Not Start
Fixed by these parts

How to fix it
Will not drain
Fixed by these parts
How to fix it
Shaking and Moving
Fixed by these parts
How to fix it
Cycle Not Advancing
Fixed by these parts
How to fix it
Marks left on clothes
Fixed by these parts
How to fix it
Lid or door won’t close
Fixed by these parts

How to fix it


Keep searches simple. Use keywords, e.g. "leaking", "pump", "broken" or "fit".
- Customer:
- David from Los Alamos, NM
- Parts Used:
- WPW10006355
- Difficulty Level:
- A Bit Difficult
- Total Repair Time:
- 30 - 60 mins
- Tools:
- Nutdriver, Screw drivers
Lid Lock light blinking, machine will not start
A detailed Service Technician Service Manual is hidden inside the machine on the front panel. It is hidden by the bleach dispenser input. It gives a list of fault codes and instructions for calibration after repair, resetting fault codes, and a manual test mode for stepping the machine through each mode on command. The Tachometer faile
... Read more
d which would not let the machine come up to maximum spin speed. The tachometer is part of the solenoid actuator that shifts the transmission. It is not specifically called out in the manual. Any failure causes the lid lock light to blink which gives the appearance of a lid lock failure
Read less
Was this instruction helpful to you?
Thank you for voting!
- Customer:
- shawn from la jolla, CA
- Parts Used:
- 285809
- Difficulty Level:
- Easy
- Total Repair Time:
- 15 - 30 mins
- Tools:
- Screw drivers, Socket set
Dog ears worn down; upper agitator not moving
Pulled off the dispenser. Used socket set to remove bolt. Removed entire agitator out of washer. Placed both feet on bottom of agitator and then pulled up on the upper agitator. It took some muscle due to the years of washer use. I used a flat-head screwdriver to weaken the plastic clips holding down the old bearing-driven cam. Once
... Read more
I got the upper agitator off, the guts were easy to pull out. Then I just re-assembled with the 3 new parts (the Cam Driven, the Dog Ears, and the Bearing-Driven Cam).
Read less
Was this instruction helpful to you?
Thank you for voting!
- Customer:
- Jerry from WALLA WALLA, WA
- Parts Used:
- WPW10006384, W10721967
- Difficulty Level:
- Really Easy
- Total Repair Time:
- 15 - 30 mins
- Tools:
- Nutdriver, Screw drivers, Socket set
Noise on bottom of Washer louder as time went on. 1 1/2 years
Well, first investigated and found loose nut on drive clutch. First take off the two screws with nut drive then cover off using a screwdriver blade to snap off the cover. Then socket ratchet to take off the nut on drive clutch. take off belt by slowly rotating the drive gear. two screws that hold the electronics to the upper drive clutch
... Read more
and put aside, so you can snap off the cover for drive clutch on upper part with screwdriver and off the parts come and install whole unit back as took it apart. Line up the new upper clutch so that is position as was before. (Using parts diagram helps a lot as www. partsselect.com has for you or Maytag.com.) Then put the electronic part board back on and the gear and nut. Make sure it is tight by several attempts to make sure it's snugged up good and then slowly roll belt back on the pulley and motor drive. Put your cover guard back on with two screws and done.
Read less
Was this instruction helpful to you?
Thank you for voting!