


Models
>
106482394
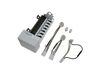
106482394 Kenmore Ice Maker
Jump to:
Find Part by Name
Keep searches simple, eg. "belt" or "pump".
Keep searches simple, eg. "belt" or "pump".

$129.81
The ice maker works by filling with water from the inlet valve, freezing it into cubes, and then dispensing the cubes into the storage bucket. It will then refill with water and repeat this process un...
In Stock
Order now and your part arrives by Aug 1

In Stock
Order now and your part arrives by Aug 1

In Stock
Order now and your part arrives by Aug 1


Special Order


Common Problems and Symptoms for 106482394
Viewing 7 of 7Ice maker not making ice
Fixed by these parts
How to fix it
Leaking
Fixed by these parts
How to fix it
Ice maker won’t dispense ice
Fixed by these parts
How to fix it
Ice maker dispenses too little ice
Fixed by these parts
How to fix it
Ice maker dispenses too much ice
Fixed by these parts
How to fix it
Won’t start
Fixed by these parts
How to fix it
Not dispensing water
Fixed by these parts

How to fix it

Keep searches simple. Use keywords, e.g. "leaking", "pump", "broken" or "fit".
- Customer:
- Max from Green Castle, IN
- Parts Used:
- 4317943
- Difficulty Level:
- Really Easy
- Total Repair Time:
- 15 - 30 mins
- Tools:
- Nutdriver, Screw drivers
Ice Maker quit working, I could manually cycle unit but then the water would overflow when unit was re-filling.
I backed out the 2 top screws about a quarter inch and then removed bottem screw with a quater inch nut driver. I then lifted Ice Maker clear of the two top screws and lowered it enough to unclip the power connection with a small screwdriver. The new Ice Maker was wired correctley for my refrigeator so all I had to do wea reconnect the
... Read more
power connection and mount new Ice Maker on the two top screws and install the bottem screw. It took e while for the new Ice Maker to start it's cycle but after it did, it worked GREAT. Part Select service was OUTSTANDING, ordered part one day and received the next. THANKS!!!!
Read less
Was this instruction helpful to you?
Thank you for voting!
- Customer:
- Chris from Duluth, GA
- Parts Used:
- 4317943
- Difficulty Level:
- Really Easy
- Total Repair Time:
- Less than 15 mins
- Tools:
- Socket set
No Ice in the Ice Maker
I am NOT a handyman, and my family laughed at me when I said I was going to fix the ice maker all by myself. I ordered a replacement ice maker. When it arrived, I opened the box and read the instructions. It seemed easy. I removed the old ice maker, with a socket set. I then took off the shut off lever from the old one and placed it
... Read more
on the new one, since the new one didn't come with it. I then put the new one in place. All the parts fit perfectly. The ice machine was making ice within an hour. My family was amazed... and I got the last laugh!
Read less
Was this instruction helpful to you?
Thank you for voting!
- Customer:
- John from Oberlin, LA
- Parts Used:
- 4317943
- Difficulty Level:
- Really Easy
- Total Repair Time:
- Less than 15 mins
- Tools:
- Nutdriver
icemaker leaking infreezer compartment
first I backed off top two screws and removed bottom screw. unplugged wire harness. removed old icemaker. harness on new icemaker was the same. plugged in hung new icemaker on top two screws installed bottom screw. turned water on job complete and very easy. I was very satisfied with the whole process.
Was this instruction helpful to you?
Thank you for voting!