


Models
>
10689489993
10689489993 Kenmore Ice Maker
Jump to:
Find Part by Name
Keep searches simple, eg. "belt" or "pump".
Keep searches simple, eg. "belt" or "pump".

$27.83
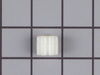
This is the replacement water tube kit for your refrigerator. This tubing is made of plastic, is 1/4 inch in diameter, and comes with 2 inserts. This tube may be longer than the original tube, and may...
In Stock
Order now and your part arrives by Jul 26

$74.30
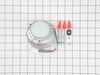
If your ice maker keeps running or isn’t making ice like it should, this small sensor might be the reason. It sits in the ice bin and keeps track of the temperature, helping your fridge know when to m...
In Stock
Order now and your part arrives by Jul 26

$50.36
There is approximately 10'of wire.
Note:2 kits are needed to replace both directions.
In Stock
Order now and your part arrives by Jul 26

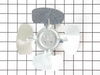
This is an ice cutter grid assembly for your ice maker. If your machine is not producing ice properly, the assembly may need replacing. You will find this part in the main unit of the ice maker. The t...
In Stock
Order now and your part arrives by Jul 26

$163.55
NOTE: As per the manufacture the part does not come threaded. A self tapping screw will need to be used to make threads.
In Stock
Order now and your part arrives by Jul 26

In Stock
Order now and your part arrives by Jul 26

$11.98
This is a compression nut for your refrigerator/freezer. The compression nut is used with the plastic water line for the icemaker assembly. It is the connection between the water supply line and the o...
Special Order

In Stock
Order now and your part arrives by Jul 26

Special Order

In Stock
Order now and your part arrives by Jul 26

In Stock
Order now and your part arrives by Jul 26

In Stock
Order now and your part arrives by Jul 26
Common Problems and Symptoms for 10689489993
Viewing 7 of 7Leaking
Fixed by these parts


How to fix it
Noisy
Fixed by these parts
How to fix it
Fridge too warm
Fixed by these parts
How to fix it
Ice maker not making ice
Fixed by these parts
How to fix it
Freezer section too warm
Fixed by these parts
How to fix it
Fridge and Freezer are too warm
Fixed by these parts
How to fix it
Not dispensing water
Fixed by these parts
How to fix it


Keep searches simple. Use keywords, e.g. "leaking", "pump", "broken" or "fit".
- Customer:
- Louis from Cheyenne, WY
- Parts Used:
- WP2217220
- Difficulty Level:
- Really Easy
- Total Repair Time:
- 30 - 60 mins
- Tools:
- Nutdriver
Lack of frequent cleaning resulted in pump failure due to buildup from hard water mineral deposists
This ice maker is really a Kitchenaid appliance.
1. Remove all ice and drain water pan by removing drain cap.
2. Disconnect waterline and unplug ice maker
3. Set icemaker on a work bench unless you like working on your knees, head down.
4. Remove flip out chute and ice scoop bracket.
5. Remove water pan ... Read more by removing thumb screws
6. Remove single 1/4" head cap screw that holds plastic cover over pump.
7. Remove discharge hose from pump. Pull clear plastic 1/8" diameter water supply line from notch in left edge of pump base.
8. Remove three cap screws holding pump. Two are visible. The third one is behind the pump and requires an 8" extension on the socket.
9. After the three screws are removed the pump drops down. The electric connection must be unplugged. Pinch the tabs on either side to release the plug.
10. Reverse procedure to install new pump. Unless you have really small hands or love being frustrated, don't bother to reinstall the third screw that is behind the pump. The pump stays in place just fine without that screw.
11. After reinstalling the icemaker, clean thoroughly by washing all inside surfaces with a strong bleach solution.
12. Run a cleaning cycle with one quart of strong bleach solution in the water tray. At the conclusion of the cleaning cycle, drain the water tray. Place unit into service. DON'T FORGET TO CLEAN REGULARLY. If the water supply is not chlorinated molds and algae will develop in recirculation hose.
Read less
Was this instruction helpful to you?
Thank you for voting!
- Customer:
- Nicholas from Frankfort, IN
- Parts Used:
- W10822259
- Difficulty Level:
- Easy
- Total Repair Time:
- 30 - 60 mins
- Tools:
- Nutdriver, Pliers, Socket set
Believed the condensor motor was defective and causing strange odor
First disconnected the quick release electrical connection. Then loosened the three screws that were holding the motor in the bracket. However, space is limited and even with small hands it was rather difficult as the screws were in there very tight. There are a few sharp edges on the bracket and in the surrounding area of the motor ar
... Read more
ea, and nicked myself a couple of times. Removed the fan blade from the old motor and attached it the new motor with the old flat washer/screw. Reconnected the electrical connection and that was that. All-in-all an easy repair.
Read less
Was this instruction helpful to you?
Thank you for voting!
- Customer:
- William from Centreville, VA
- Parts Used:
- W10822259
- Difficulty Level:
- Really Easy
- Total Repair Time:
- 15 - 30 mins
- Tools:
- Nutdriver, Screw drivers, Socket set
Noisy and the Fan wasn't blowing like it should
I saved my Whirlpool Refrigerator (Model ET21GKXHN00) and learned a lesson. Don’t put off cleaning the refrigerant coils underneath the refrigerator. I replaced the refrigerator about 10 years ago and began to notice that the sound of this one running had changed slightly. I remembered that’s what happened to the first one just before
... Read more
it died. I removed the panel on the bottom front and saw that the refrigerant coils were covered with dust. It was really bad. I vacuumed them with the “radiator attachment” on the vacuum cleaner and plugged the refrigerator back in. It still didn’t sound right and I couldn’t feel the air blowing out like it should. So I rolled the refrigerator out and removed the back lower cover to see the compressor and the cooling fan. The fan was clogged with dust so I vacuumed that as well. But the fan wouldn’t spin freely by hand. The fan motor only had 3 screws holding it onto the plastic fan bezel and was easily removed by unsnapping the electrical connector on the motor. I removed the fan motor and tried to clean it with a few drops of WD40 on the shaft. But when I put it all back and plugged it in the fan just barely started turning. I unplugged the refrigerator and ordered the fan motor from PartSelect.Com (Item Number PS371043). The picture looked exactly like the motor that was in my refrigerator. I threw everything away in the refrigerator, cleaned it out and left it unplugged until the motor came. The motor arrived in a few days and it looked exactly like the one I had removed. It had the same electrical specifications stamped on the back and the electrical connector was the same and in the same location on the motor. I put the fan blade on the new motor and installed it exactly like the old one was. It only took 15 minutes or so and was very easy to install. When I plugged the refrigerator in the compressor started right away and so did the fan. It ran like a champ. In a few hours the refrigerator got cold and began to cycle on and off like normal and the fan blows like new. The sound is normal and the total running sound is quiet again like a new refrigerator. So for $84.67 I saved my $1300 refrigerator and learned not to neglect checking the build up of dust in the compressor fan section. I’m sure that’s what happens to most of the refrigerators people put out for trash pickup in front of their houses. The cause of the problem is when air flow is restricted across the refrigerant coils too much heat returns to the compressor and eventually causes the compressor to fail. I appreciate that we live in a time when you can order exactly what you need on the internet and make home repairs when you need to. Thanks Part Select for sending me the correct part. It’s nice to have milk and cold drinks again.
Read less
Was this instruction helpful to you?
Thank you for voting!