


Models
>
1335-0-580328300
1335-0-580328300 Craftsman Generator
Jump to:
Find Part by Name
Keep searches simple, eg. "belt" or "pump".
Keep searches simple, eg. "belt" or "pump".

$6.25
This is an authentic Murray replacement part that has been sourced from the original manufacturer to be used with riding lawnmowers. The metal washer is used to provide spacing between the steering sp...
In Stock
Order now and your part arrives by Mar 26

$26.70
This fuel valve with bushing fits a variety of outdoor equipment and allows the fuel to smoothly flow into the gas engine. The bushing part is pressed into the hole provided in the fuel tank and the f...
In Stock
Order now and your part arrives by Mar 26

This is a genuine manufacturer-sourced part which is specially designed for use with Craftsman lawn tractor spreader attachments. The control cable controls the flow of the material being dispensed. I...
Special Order

$15.10
This part is an original part from Briggs & Stratton and Snapper for use in generators and welders. The circuit breaker goes inside the control box and helps to control electricity flow. A screwdriver...
Special Order

In Stock
Order now and your part arrives by Mar 26

$9.55
It is a genuine item that is supplied directly from the original equipment manufacturer for use with Briggs and Stratton generators and pressure washers. The purpose of this component is to reduce the...
In Stock
Order now and your part arrives by Mar 26

$6.25
This is an authentic OEM part from Briggs and Stratton and Snapper for use with Generators. The fuel tank mounting grommet forms a cushion between the fuel tank and the fuel tank mounting bolts. The m...
In Stock
Order now and your part arrives by Mar 26

$150.45
This is a genuine manufacturer-sourced replacement part which is designed for use with Snapper and Briggs and Stratton portable generators. Over time batteries will become weaker and eventually will n...
Special Order

Special Order

$34.35
This item is available as an individual replacement part. The outlet is made out of metal and plastic. It may require a wrench during installation. This item will need to be replaced if it breaks. It ...
In Stock
Order now and your part arrives by Mar 26

Special Order

Special Order
Questions and Answers
We're sorry, but our Q&A experts are temporarily unavailable.
Please check back later if you still haven't found the answer you need.
Common Problems and Symptoms for 1335-0-580328300
Viewing 1 of 1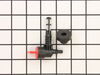
Keep searches simple. Use keywords, e.g. "leaking", "pump", "broken" or "fit".
- Customer:
- James from PICAYUNE, MS
- Parts Used:
- 192980GS
- Difficulty Level:
- Very Easy
- Total Repair Time:
- Less than 15 mins
Dry rotted rubber
Put some dish soap on the rubber, push into the tank hole, slip 1x2 into the handle of the tank and over the new part and pry down pushing it into the hole. Took about 2 minutes.
Was this instruction helpful to you?
Thank you for voting!
- Customer:
- Alan from RADFORD, VA
- Parts Used:
- 192980GS
- Difficulty Level:
- A Bit Difficult
- Total Repair Time:
- 1- 2 hours
- Tools:
- Pliers, Screw drivers
old valve dripped gas when opened on cold sub zero day
old valve easily pulled out with screwdriver and pliers
install difficult due to 40 degree cold temp and bushing didn't want to squeeze into fuel tank hole
install required lots of liquid soap on bushing, which popped into place by using upward prying pressure from 3"X24" plywood braced into under-shelf of gas tank ... Read more r />
used same technique to insert valve upward into bushing
works great!
Read less
Was this instruction helpful to you?
Thank you for voting!
- Customer:
- John from LEES SUMMIT, MO
- Parts Used:
- 192980GS
- Difficulty Level:
- Really Easy
- Total Repair Time:
- 15 - 30 mins
- Tools:
- Nutdriver, Pliers
major gas leak on my generator
popped out the old-----the bushing failed. replaced as per the included instructions
Was this instruction helpful to you?
Thank you for voting!