


Models
>
1924-2
1924-2 Briggs and Stratton Generator
Jump to:
Find Part by Name
Keep searches simple, eg. "belt" or "pump".
Diagrams for 1924-2
Viewing 6 of 6


Keep searches simple, eg. "belt" or "pump".

$26.70
This fuel valve with bushing fits a variety of outdoor equipment and allows the fuel to smoothly flow into the gas engine. The bushing part is pressed into the hole provided in the fuel tank and the f...
In Stock
Order now and your part arrives by Mar 22

$56.96
This is an authentic OEM sourced part which is designed for Briggs and Stratton and Snapper generators. It is an important part that keeps the fuel in the tank and the gauge shows a user the level of ...
On Order

$6.88
The exhaust gasket attaches to the exhaust manifold and helps to form a seal. It is an authentic OEM sourced part which is specially designed for use with Briggs & Stratton generators and engines, plu...
In Stock
Order now and your part arrives by Mar 22

This is a genuine OEM sourced replacement part designed for use with generators. This assembly includes a plastic brush holder, two (2) carbon brushes with a lead wires and springs attached. Carbon b...
No Longer Available

This is a genuine part which is supplied directly from the original equipment manufacturer. This leg support is used to stabilize a Briggs and Stratton generator while it is in use. Please refer to t...
No Longer Available

$110.86
This is an authentic manufacturer made replacement part which is specially designed for use with Craftsman pressure washers. The wheels are attached to the bottom of the pressure washer and are used f...
In Stock
Order now and your part arrives by Mar 22

$6.57
Keep in mind that this high-quality part is made of metal and is sold individually. A set of pliers might be helpful during the installation of this part. The e-ring fits onto the wheel and will need ...
In Stock
Order now and your part arrives by Mar 22

$69.10
This authentic OEM supplied trigger-throttle is designed for Briggs and Stratton and Snapper generators. It is designed to provide a user with a comfortable grip to operate the unit. This is an identi...
In Stock
Order now and your part arrives by Mar 22

$16.89
This is an OEM part sourced directly from the manufacturer. The vibration mount kit is commonly found in portable generators. This item includes the mounting bracket as well as a screw and three fla...
Special Order

In Stock
Order now and your part arrives by Mar 22

In Stock
Order now and your part arrives by Mar 22

$20.63
This is an authentic OEM sourced part which is specially made for DeWALT planers. It functions as a safety device. When the circuit becomes overloaded, this circuit breaker switch interrupts the trans...
Special Order
Questions and Answers
We're sorry, but our Q&A experts are temporarily unavailable.
Please check back later if you still haven't found the answer you need.
Common Problems and Symptoms for 1924-2
Viewing 1 of 1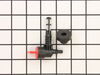
Keep searches simple. Use keywords, e.g. "leaking", "pump", "broken" or "fit".
- Customer:
- James from PICAYUNE, MS
- Parts Used:
- 192980GS
- Difficulty Level:
- Very Easy
- Total Repair Time:
- Less than 15 mins
Dry rotted rubber
Put some dish soap on the rubber, push into the tank hole, slip 1x2 into the handle of the tank and over the new part and pry down pushing it into the hole. Took about 2 minutes.
Was this instruction helpful to you?
Thank you for voting!
- Customer:
- Alan from RADFORD, VA
- Parts Used:
- 192980GS
- Difficulty Level:
- A Bit Difficult
- Total Repair Time:
- 1- 2 hours
- Tools:
- Pliers, Screw drivers
old valve dripped gas when opened on cold sub zero day
old valve easily pulled out with screwdriver and pliers
install difficult due to 40 degree cold temp and bushing didn't want to squeeze into fuel tank hole
install required lots of liquid soap on bushing, which popped into place by using upward prying pressure from 3"X24" plywood braced into under-shelf of gas tank ... Read more r />
used same technique to insert valve upward into bushing
works great!
Read less
Was this instruction helpful to you?
Thank you for voting!
- Customer:
- John from LEES SUMMIT, MO
- Parts Used:
- 192980GS
- Difficulty Level:
- Really Easy
- Total Repair Time:
- 15 - 30 mins
- Tools:
- Nutdriver, Pliers
major gas leak on my generator
popped out the old-----the bushing failed. replaced as per the included instructions
Was this instruction helpful to you?
Thank you for voting!