Models > GSS25GGHJCBB

GSS25GGHJCBB General Electric Refrigerator

Jump to:

Find Part by Name

Keep searches simple, eg. "belt" or "pump".

Diagrams for GSS25GGHJCBB

Viewing 9 of 9
Keep searches simple, eg. "belt" or "pump".
In Stock
Order now and your part arrives by Aug 3
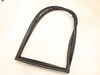
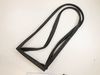
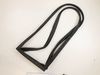
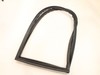
This part is the replacement fresh food door gasket for your refrigerator. It is made of black rubber and is sold individually. The fresh food door gasket runs along the circumference of your refriger...
In Stock
Order now and your part arrives by Aug 3
$396.33
In Stock
Order now and your part arrives by Aug 3

Questions and Answers

Be the first to ask our experts a question about this part!

Common Problems and Symptoms for GSS25GGHJCBB

Viewing 7 of 7
Door won’t open or close
Fixed by these parts
Fixing Fixing
How to fix it
Door Sweating
Fixed by these parts
Fixing Fixing
How to fix it
Frost buildup
Fixed by these parts
Fixing
How to fix it
Freezer section too warm
Fixed by these parts
Fixing
How to fix it
Fridge too warm
Fixed by these parts
Fixing
How to fix it
Too warm
Fixed by these parts
Fixing
How to fix it
Fridge and Freezer are too warm
Fixed by these parts
Fixing
How to fix it
Keep searches simple. Use keywords, e.g. "leaking", "pump", "broken" or "fit".
Customer:
Joe from Succasunna, NJ
Parts Used:
WR24X20456
Difficulty Level:
Really Easy
Total Repair Time:
Less than 15 mins
Gasket wasn't sealing
Replaced gasket. No tools requires. Just pull the old one out and press new one in channel with hands. TIP: heat the new one slightly with a hair dryer or a heat gun on low. Makes it more flexible
52 of 60 people found this instruction helpful.
Was this instruction helpful to you?
Thank you for voting!
Customer:
Sherrie from COTTLEVILLE, MO
Parts Used:
WR24X20455
Difficulty Level:
Very Easy
Total Repair Time:
30 - 60 mins
Worn out gasket on freezer
I received part. I then used a hair dryer to smooth out kinks. Took about 15 minutes. Pulled off old gasket and replaced with new one. Used hands only.
9 of 13 people found this instruction helpful.
Was this instruction helpful to you?
Thank you for voting!
Customer:
Bryan from LANDING, NJ
Parts Used:
WR24X20455
Difficulty Level:
Very Easy
Total Repair Time:
15 - 30 mins
Freezer Gasket was torn in some spots, freezer had condensation inside and could not maintain zero degree temperature.
Ordered gasket. Laid out gasket near sunlit window untangled and flat on carpet for 24 hours to insure it was pilable and correct shape. Removed the old gasket manually easily without any tools and cleaned the door's seal groove with a paper towel slightly soaked with Simply Green. Installed new gasket starting at the upper corners then inserting upper edge by tilting the gasket toward the inside of the door with my fingers. Then installed the lower corners along with the bottom edge. Proceeded installing the side edge working from the set corners inserting the gasket's inner tongue into the door groove with my fingers again tilting the gasket inside the door. Once the gasket was installed, I closed the door and guided my fingers along the gasket to insure the magnetic edge formed a firm seal. This is wear the DIY videos suggested applying petroleum jelly but I did not need it since the gasket was pliable enough. Overall, the effort took 15 minutes because I think laying out the gasket for 24 hours allowed it to settle into its desired form..
2 of 2 people found this instruction helpful.
Was this instruction helpful to you?
Thank you for voting!