


Models
>
51270-W0
51270-W0 General Electric Washer
Jump to:
Find Part by Name
Keep searches simple, eg. "belt" or "pump".
Diagrams for 51270-W0
Viewing 6 of 6


Keep searches simple, eg. "belt" or "pump".

In Stock

$11.21
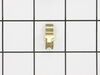
This screw is designed to fit washers and dryers. Refer to the diagram provided by the manufacturer for further installation instructions and accurate application of screw in your tool.
In Stock


$11.75
This is a screw and it is used with a variety of home appliances. It is less than 1/2 an inch long, and is #8-18 x 3/8. This part is a pan head, sheet metal, screw. It is made of metal.
In Stock

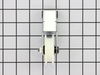
Mounting bracket on this part replaces old style ( You may need to drill off old bracket before mounting new lock).
No Longer Available

In Stock

In Stock

In Stock

This pump sucks the water out of your washers tub with one of its valves, and drains the water into a drain hose with the other valve.
No Longer Available


In Stock

Special Order
Questions and Answers
We're sorry, but our Q&A experts are temporarily unavailable.
Please check back later if you still haven't found the answer you need.
Common Problems and Symptoms for 51270-W0
Viewing 8 of 8Door won’t close
Fixed by these parts
How to fix it
Leaking
Fixed by these parts


How to fix it
Will not drain
Fixed by these parts

How to fix it
Burning smell
Fixed by these parts
How to fix it
Will not agitate
Fixed by these parts
How to fix it
Noisy
Fixed by these parts

How to fix it
Will Not Start
Fixed by these parts
How to fix it
Spins slowly
Fixed by these parts
How to fix it


Keep searches simple. Use keywords, e.g. "leaking", "pump", "broken" or "fit".
- Customer:
- Jenessa from Tacoma, WA
- Parts Used:
- 134101800
- Difficulty Level:
- Easy
- Total Repair Time:
- 15 - 30 mins
- Tools:
- Screw drivers
Lid Lock Assembly broke
The Lid Lock Assembly came super fast! The install would have been flawless, but the "pre-drilled" holes on the new Lid Lock Assembly were way to small. We found that out after we had reconnected the wires and gotten it into place. Aside from that small set back, the install went great! This repair is definitey not one that you would
... Read more
need to pay a repair person to do!
Read less
Was this instruction helpful to you?
Thank you for voting!
washer leaking
removed front body panel (2 screws at bottom and pulled down panel), then used pliers to squeeze pinch clamps and pull back the two hoses off the pump. then removed the two pump clips that secure the pump in place and used screw driver to gently pry the old pump off the motor shaft, under that was the rubber pump slinger which was pulled
... Read more
off the motor shaft. The next step was to sand the rust off the motor shaft and apply some vasoline to lubricate the shaft and install the new pump slinger and pump on the motor shaft,put the pump clips back on and push the hoses on the new pump and slide the pinch clamps back into place, run test to check for leaks then re-install the front body panel.
Read less
Was this instruction helpful to you?
Thank you for voting!
- Customer:
- Heath Harris from Arnold, MO
- Parts Used:
- 134101800
- Difficulty Level:
- Really Easy
- Total Repair Time:
- Less than 15 mins
- Tools:
- Screw drivers
washing machine will not drain or spin
removed upper cover, removed front cover, tested switch with digital VOM, removed and replaced!
2 screws, 4 wires! saved over $100 when compared to a bill from a repair service!
fast shipping too! will recommend others!
2 screws, 4 wires! saved over $100 when compared to a bill from a repair service!
fast shipping too! will recommend others!
Was this instruction helpful to you?
Thank you for voting!