



Models
>
MTX18HABNRWW
MTX18HABNRWW General Electric Refrigerator
Jump to:
Find Part by Name
Keep searches simple, eg. "belt" or "pump".
Diagrams for MTX18HABNRWW
Viewing 3 of 3


Keep searches simple, eg. "belt" or "pump".
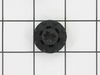
This grommet is found on both the front and back of the fan motor assembly for the condenser and the evaporator in your fridge. It is used to provide a buffer between the fan motor and the mounting br...
In Stock
Order now and your part arrives by Aug 8
$21.95
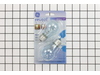
This 40-Watt light bulb is sold individually.
It is specially designed to withstand extreme temperatures, so this bulb is compatible with a variety of appliance types including refrigerators, ranges,...
In Stock
Order now and your part arrives by Aug 8
$64.95
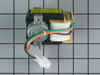
This fan motor circulates the air through the refrigerator grille and cools the compressor and condenser coils. It also helps to evaporate extra water in the drain pan.
In Stock
Order now and your part arrives by Aug 8
$53.95
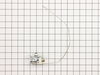
This part establishes and maintains the internal temperature of the refrigerator.
In Stock
Order now and your part arrives by Aug 8
$81.53
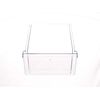
This is a replacement crisper drawer for your refrigerator. The drawer is approximately 17 inches long, 13 inches wide, and 9 inches tall. It is made of clear plastic and is sold individually. The cri...
In Stock
Order now and your part arrives by Aug 8
$15.26
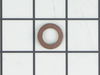
This is the replacement hinge washer for your refrigerator. The hinge washer is mounted on the top of the door hinge pin, and supports the refrigerator door, allowing it to open and close easily. The ...
In Stock
Order now and your part arrives by Aug 8
$40.65
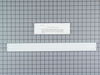
This door shelf retainer bar is a manufacturer-approved replacement part for your refrigerator. This bar is made of white plastic and is about 21 1/4 inches in length and 2 inches deep. It helps keep ...
In Stock
Order now and your part arrives by Aug 8
In Stock
Order now and your part arrives by Aug 8
In Stock
Order now and your part arrives by Aug 8
Special Order
In Stock
Order now and your part arrives by Aug 8
Common Problems and Symptoms for MTX18HABNRWW
Viewing 9 of 9Noisy
Fixed by these parts
How to fix it
Fridge too warm
Fixed by these parts
How to fix it
Fridge too cold
Fixed by these parts
How to fix it
Door won’t open or close
Fixed by these parts
How to fix it
Fridge and Freezer are too warm
Fixed by these parts
How to fix it
Will Not Start
Fixed by these parts
How to fix it
Fridge runs too long
Fixed by these parts
How to fix it
Freezer section too warm
Fixed by these parts
How to fix it
Clicking sound
Fixed by these parts
How to fix it
Keep searches simple. Use keywords, e.g. "leaking", "pump", "broken" or "fit".
- Customer:
- Thomas from Germantown, TN
- Parts Used:
- WR09X20002
- Difficulty Level:
- Very Easy
- Total Repair Time:
- Less than 15 mins
- Tools:
- Screw drivers
Everything was freezing in the bottom and top
Pulled out the control sensor on the ceiling of the fridge. (2 screws) Took a picture with phone on how everything was installed. Unplugged all wires and pulled out Control Temp sensor. Installed new one and attached all wires. Installed back in fridge and plugged it back in. Everything works like new.
Was this instruction helpful to you?
Thank you for voting!
- Customer:
- john from Philadelphia, PA
- Parts Used:
- WR09X20002
- Difficulty Level:
- Really Easy
- Total Repair Time:
- Less than 15 mins
- Tools:
- Screw drivers
malfunction of the cold control (wearing out after 15 years)
1. Disconnected 120 VAC power supply from refrigerator. 2. Removed 2 philip screws from horizonal panel containing the thermostat. (Panel is in refrigerator section). 3. Removed plug module from panel which freed the pa
... Read more
nel which allowed me to remove panel to do repair. 4. Removed wires from thermostat (cold control), and mechanically removed thermostat from panel and installed new cold control (thermostat). Replaced wires on control. 5. Replaced panel and reinstalled 2 philips screws. 6. time to repair about 15 minutes.
Read less
Was this instruction helpful to you?
Thank you for voting!
- Customer:
- Leo from TWIN FALLS, ID
- Parts Used:
- 40A15
- Difficulty Level:
- Really Easy
- Total Repair Time:
- Less than 15 mins
- Tools:
- Nutdriver
Interior light needed replaced
Unplugged the appliance for safety. Removed two 1/4" screws that held the assembly in place. Carefully removed the wire guard that retains the glass shield. Unscrewed old light bulb and replaced with new part. Reversed the steps after cleaning glass cover.
Was this instruction helpful to you?
Thank you for voting!