



Models
>
GTS18IBSWRCC
GTS18IBSWRCC General Electric Refrigerator
Jump to:
Find Part by Name
Keep searches simple, eg. "belt" or "pump".
Diagrams for GTS18IBSWRCC
Viewing 6 of 6


Keep searches simple, eg. "belt" or "pump".
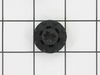
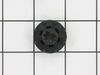
This grommet is found on both the front and back of the fan motor assembly for the condenser and the evaporator in your fridge. It is used to provide a buffer between the fan motor and the mounting br...
In Stock
Order now and your part arrives by Aug 6
$21.95
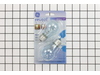
This 40-Watt light bulb is sold individually.
It is specially designed to withstand extreme temperatures, so this bulb is compatible with a variety of appliance types including refrigerators, ranges,...
In Stock
Order now and your part arrives by Aug 6

$36.42
The light switch in your refrigerator is used to turn the light on and off when the fridge door opens or closes. This is considered a closed switch, which means that when the fridge door depresses the...
In Stock
Order now and your part arrives by Aug 6
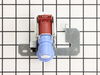
This single outlet valve has 1/4 inch compression fittings, and is intended for use with refrigerators that have ice makers that make crescent shaped ice cubes.
NOTE: As per the manufacturer this v...
In Stock
Order now and your part arrives by Aug 6
$15.26
This OEM compression ring is used to hold the evaporator fan motor in place. Signs that you may need to replace the compression ring are if the fan is noisy, or your fridge or freezer are too warm. We...
In Stock
Order now and your part arrives by Aug 6
$85.53
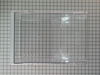
This part has slanted at the back and also known as a 1/2 pan. Sold individually.
In Stock
Order now and your part arrives by Aug 6
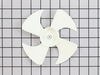
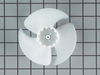
The condenser fan blade assembly helps to regulate the temperature in your refrigerator or freezer. This fan assembly has 4 blades, but other fans may have 3 blades, so be sure to check the number of ...
Special Order
$15.26
This is the replacement hinge washer for your refrigerator. The hinge washer is mounted on the top of the door hinge pin, and supports the refrigerator door, allowing it to open and close easily. The ...
In Stock
Order now and your part arrives by Aug 6
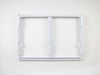
Replace your refrigerator’s vegetable pan cover with this sturdy white plastic frame, measuring about 26 by 18 inches. It sits above the crisper drawer and helps keep fruits and vegetables fresh. This...
In Stock
Order now and your part arrives by Aug 6
$34.27
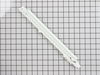
This part is the replacement snack pan slide rail for your refrigerator. It is made of white plastic and is approximately 16 inches by 2 inches. The crisper draw will slide in and out along this rail....
In Stock
Order now and your part arrives by Aug 6
In Stock
Order now and your part arrives by Aug 6
On Order
Common Problems and Symptoms for GTS18IBSWRCC
Viewing 14 of 14Noisy
Fixed by these parts
How to fix it
Light not working
Fixed by these parts

How to fix it
Ice maker not making ice
Fixed by these parts
How to fix it
Fridge too warm
Fixed by these parts
How to fix it
Leaking
Fixed by these parts
How to fix it
Freezer section too warm
Fixed by these parts
How to fix it
Door won’t open or close
Fixed by these parts
How to fix it
Freezer not defrosting
Fixed by these parts
How to fix it
Ice maker won’t dispense ice
Fixed by these parts
How to fix it
Not dispensing water
Fixed by these parts
How to fix it
Will Not Start
Fixed by these parts
How to fix it
Clicking sound
Fixed by these parts
How to fix it
Frost buildup
Fixed by these parts
How to fix it
Door Sweating
Fixed by these parts
How to fix it

Keep searches simple. Use keywords, e.g. "leaking", "pump", "broken" or "fit".
- Customer:
- Jonathan from Lilburn, GA
- Parts Used:
- WR23X37285
- Difficulty Level:
- Really Easy
- Total Repair Time:
- Less than 15 mins
- Tools:
- Pliers, Screw drivers
Sticking Light Switch
I applied some tips learned by reading other reviews. So before I started I grabbed my trusty vise grip pliers and a small screw driver. I locked onto the switch actuator, the part that the refrigerator door pushes in, with the vise grips and pulled on it just hard enough to get the screw driver inserted in the right side to push in the c
... Read more
atch clip so the switch could be pulled out further each time the catch clip was depressed to the next detent. Then I used the screw driver on the left site to encourage the switch past the detents on the left and very quickly the switch was out of the mount. The wires from the refrigerator pulled out with the old switch. I unplugged the old switch from the wires and plugged in the new switch and shoved the new switch back into the mount, wiggled it a couple of times to make sure it was secure and the job was done. Once I applied the vise gripes at first, the whole job took less than a minute.
Read less
Was this instruction helpful to you?
Thank you for voting!
- Customer:
- thomas from richmond, VA
- Parts Used:
- WR57X10033
- Difficulty Level:
- Easy
- Total Repair Time:
- 30 - 60 mins
- Tools:
- Nutdriver, Screw drivers
not making ice
when the ice maker runs through its cycle, you should be able to hear the solinoid valve open, letting water into the ice maker. this was not happening for me. you can dissconnect the plug on the valve and put the two probes from a multimeter in the plug and set for AC volts. when the ice maker runs its cycle, at the end you should see t
... Read more
he meter jump as power is applied to the valve then turns off. this means you do have power to the valve so the valve is defective. turn off water supply to the valve, disconnect the water supply tube to the valve, remove the screw holding the valve, disconnect supply tube to icemaker then hook up supply tube to bottom of valve, screw braket back to refrig, install suppy back to valve, turn water back on and check for leaks and your ice maker should be working properly again.
these guys were really fast on delivery too!
these guys were really fast on delivery too!
Read less
Was this instruction helpful to you?
Thank you for voting!
- Customer:
- Larry from Dallas, TX
- Parts Used:
- WR57X10033
- Difficulty Level:
- Really Easy
- Total Repair Time:
- 1- 2 hours
- Tools:
- Screw drivers, Wrench set
water appearing under refrigerator
Unplugged the refrigerator and turned off the water to the ice maker valve. Removed the water line at both ends (small crescent wrench). Removed the cover from the water valve area (two Phillips head screws). Removed the valve (two screws - small nut driver) and pulled off the two electrical connections.
Installed the new valve ... Read more with the reverse procedure though the holding screws didn't line up with the existing holes in the refrigerator metal frame. I let it go with one screw holding ... didn't have a drill with me to make a second screw hole.
Replaced the old water line (from the wall to the valve) with a steel-reinforced hose.
Cut the female metal connector from the old water line up to the freezer and it fit nicely into the push-in outlet from the new valve. Turned everything back on and waited for the ice maker to cycle.
To my dismay, the leak had been coming from the plastic line that goes from the valve up to the ice maker. It had split, spraying water. Replaced that and everything works fine.
Lesson learned: Don't assume water near the icemaker valve actually is from the valve or its water connections. Watch the whole system cycle a couple of times to see what's really happening. Glad to have a new valve but the basic problem was the icemaker tubing.
Installed the new valve ... Read more with the reverse procedure though the holding screws didn't line up with the existing holes in the refrigerator metal frame. I let it go with one screw holding ... didn't have a drill with me to make a second screw hole.
Replaced the old water line (from the wall to the valve) with a steel-reinforced hose.
Cut the female metal connector from the old water line up to the freezer and it fit nicely into the push-in outlet from the new valve. Turned everything back on and waited for the ice maker to cycle.
To my dismay, the leak had been coming from the plastic line that goes from the valve up to the ice maker. It had split, spraying water. Replaced that and everything works fine.
Lesson learned: Don't assume water near the icemaker valve actually is from the valve or its water connections. Watch the whole system cycle a couple of times to see what's really happening. Glad to have a new valve but the basic problem was the icemaker tubing.
Read less
Was this instruction helpful to you?
Thank you for voting!