



Models
>
RTT16EBMBRCC
RTT16EBMBRCC General Electric Refrigerator
Jump to:
Find Part by Name
Keep searches simple, eg. "belt" or "pump".
Diagrams for RTT16EBMBRCC
Viewing 3 of 3


Keep searches simple, eg. "belt" or "pump".
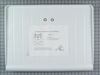
$73.79
The crisper drawer cover contains the rails that your crisper drawers slide in and out on, as well as acting as a shelf to store other items in your fridge. If your drawers are difficult to open and c...
In Stock
Order now and your part arrives by Aug 13
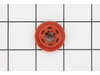
$16.95
The evaporator fan grommet is used to provide a cushion between the fan motor and the motor mounting bracket in your freezer. This genuine OEM part is about one inch in diameter and is red in color. I...
In Stock
Order now and your part arrives by Aug 13
This grommet is found on both the front and back of the fan motor assembly for the condenser and the evaporator in your fridge. It is used to provide a buffer between the fan motor and the mounting br...
In Stock
Order now and your part arrives by Aug 13
$21.95
This 40-Watt light bulb is sold individually.
It is specially designed to withstand extreme temperatures, so this bulb is compatible with a variety of appliance types including refrigerators, ranges,...
In Stock
Order now and your part arrives by Aug 13

$36.42
The light switch in your refrigerator is used to turn the light on and off when the fridge door opens or closes. This is considered a closed switch, which means that when the fridge door depresses the...
In Stock
Order now and your part arrives by Aug 13
$15.26
This OEM compression ring is used to hold the evaporator fan motor in place. Signs that you may need to replace the compression ring are if the fan is noisy, or your fridge or freezer are too warm. We...
In Stock
Order now and your part arrives by Aug 13
$15.26
This genuine OEM replacement part is a bumper for your refrigerator. The bumper is made of orange rubber and measures less than half an inch in diameter. The bumper is used to prevent the fan motor fr...
In Stock
Order now and your part arrives by Aug 13
This replacement door shelf bar helps keep items secure on your GE refrigerator’s door shelves. It’s made from sturdy plastic and installs easily without tools. A simple solution to restore shelf supp...
In Stock
Order now and your part arrives by Aug 13
$81.53
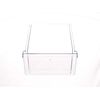
This is a replacement crisper drawer for your refrigerator. The drawer is approximately 17 inches long, 13 inches wide, and 9 inches tall. It is made of clear plastic and is sold individually. The cri...
In Stock
Order now and your part arrives by Aug 13
$15.26
This is the replacement hinge washer for your refrigerator. The hinge washer is mounted on the top of the door hinge pin, and supports the refrigerator door, allowing it to open and close easily. The ...
In Stock
Order now and your part arrives by Aug 13
In Stock
Order now and your part arrives by Aug 13
$185.75
This part is the replacement stationary wire shelf for your refrigerator. It is white in color and is approximately 24 1/2 inches by 14 3/8 inches. The stationary wire shelf rests on grooves in the re...
In Stock
Order now and your part arrives by Aug 13
Common Problems and Symptoms for RTT16EBMBRCC
Viewing 9 of 9Noisy
Fixed by these parts
How to fix it
Light not working
Fixed by these parts

How to fix it
Fridge too warm
Fixed by these parts
How to fix it
Door won’t open or close
Fixed by these parts
How to fix it
Freezer section too warm
Fixed by these parts
How to fix it
Freezer not defrosting
Fixed by these parts
How to fix it
Clicking sound
Fixed by these parts
How to fix it
Frost buildup
Fixed by these parts
How to fix it
Door Sweating
Fixed by these parts
How to fix it


Keep searches simple. Use keywords, e.g. "leaking", "pump", "broken" or "fit".
- Customer:
- Jonathan from Lilburn, GA
- Parts Used:
- WR23X37285
- Difficulty Level:
- Really Easy
- Total Repair Time:
- Less than 15 mins
- Tools:
- Pliers, Screw drivers
Sticking Light Switch
I applied some tips learned by reading other reviews. So before I started I grabbed my trusty vise grip pliers and a small screw driver. I locked onto the switch actuator, the part that the refrigerator door pushes in, with the vise grips and pulled on it just hard enough to get the screw driver inserted in the right side to push in the c
... Read more
atch clip so the switch could be pulled out further each time the catch clip was depressed to the next detent. Then I used the screw driver on the left site to encourage the switch past the detents on the left and very quickly the switch was out of the mount. The wires from the refrigerator pulled out with the old switch. I unplugged the old switch from the wires and plugged in the new switch and shoved the new switch back into the mount, wiggled it a couple of times to make sure it was secure and the job was done. Once I applied the vise gripes at first, the whole job took less than a minute.
Read less
Was this instruction helpful to you?
Thank you for voting!
- Customer:
- Kim from Bronx, NY
- Parts Used:
- WR32X10398
- Difficulty Level:
- Really Easy
- Total Repair Time:
- Less than 15 mins
Vegetable pan cover broke down the middle
When the cover came to my apartment, I crossed my fingers that the piece would fit . Well, within 5 minutes the old cover was out and the new cover in. And it looks better than new! Finally, I don't have to hold my vegetable drawers up with a D battery!
Was this instruction helpful to you?
Thank you for voting!
- Customer:
- Scott from Pratt, KS
- Parts Used:
- WR50X10071, WR51X10038
- Difficulty Level:
- A Bit Difficult
- Total Repair Time:
- 30 - 60 mins
- Tools:
- Nutdriver
Freezer cold, but Refrigerator not cooling. Iced up coils.
After determining that it was the defrost system, I ordered the thermostat. Make sure you look closely. Mine had two thermostats, and so I had to wait a couple of days for the extra part.
1. Remove ice maker if installed.
2. Remove center casing on ceiling and back wall. There may be two screws that need removed.
3. L ... Read more ocate and remove two screws on upper back wall.
4. Remove back wall carefully, revealing coil system.
5. If this was the problem, the coils will be iced over and need thawed. Either time or a hair dryer...
6. The thermostats clip onto the copper tubing, simply pull them off, keeping close attention to the color of the wires.
7. Be very careful touching the bottom of the coils as the defrost conductor coils are along the bottom and encased in easily breakable glass. If you need to replace this as well, remove the center brace (wire)by pulling towards you and then down. remove wire attachments at both ends and rotate coil out of end braces.
8. Replacing thermostats...you must CUT the wires, and attach new thermostats with wire couplers or wire nuts and then wrap with electrical tape that is rated for the cold.
9. Re-attach all parts and replace back wall and coverings.
10. Enjoy!
1. Remove ice maker if installed.
2. Remove center casing on ceiling and back wall. There may be two screws that need removed.
3. L ... Read more ocate and remove two screws on upper back wall.
4. Remove back wall carefully, revealing coil system.
5. If this was the problem, the coils will be iced over and need thawed. Either time or a hair dryer...
6. The thermostats clip onto the copper tubing, simply pull them off, keeping close attention to the color of the wires.
7. Be very careful touching the bottom of the coils as the defrost conductor coils are along the bottom and encased in easily breakable glass. If you need to replace this as well, remove the center brace (wire)by pulling towards you and then down. remove wire attachments at both ends and rotate coil out of end braces.
8. Replacing thermostats...you must CUT the wires, and attach new thermostats with wire couplers or wire nuts and then wrap with electrical tape that is rated for the cold.
9. Re-attach all parts and replace back wall and coverings.
10. Enjoy!
Read less
Was this instruction helpful to you?
Thank you for voting!