



Models
>
PAVANMRO
PAVANMRO General Electric Refrigerator
Jump to:
Find Part by Name
Keep searches simple, eg. "belt" or "pump".
Diagrams for PAVANMRO
Viewing 1 of 1
Keep searches simple, eg. "belt" or "pump".
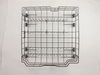
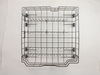
Designed for GE dishwashers, this lower rack holds dishes in place for thorough cleaning. It’s made from durable materials and may include upgraded wheels for smoother movement. Ideal for replacing ra...
In Stock
Order now and your part arrives by Aug 10
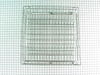
$346.73
This is the complete dishrack.
Note: This part has been updated by the manufacturer. It may appear different but will still function the same as the original.
In Stock
Order now and your part arrives by Aug 10
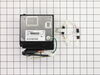
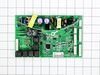
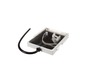
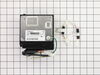
This inverter control board regulates compressor speed to maintain consistent cooling and improve energy efficiency. It supports quieter operation and includes jumper harnesses and installation instru...
In Stock
Order now and your part arrives by Aug 10
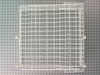
This part includes the wheels. This part may differ in appearance or color but will function the same as the original.
No Longer Available
$343.77
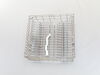
This genuine dishwasher upper rack assembly provides organized storage for cups, glasses, mugs, bowls, and other smaller items while ensuring proper water circulation for effective cleaning performanc...
In Stock
Order now and your part arrives by Aug 10
In Stock
Order now and your part arrives by Aug 10
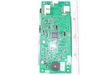
This dispenser display assembly is for refrigerators. Dispenser display assembly contains the display control board, switches and houses the touch pad for the display
In Stock
Order now and your part arrives by Aug 10
Special Order
$273.23
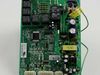
This main control board acts as the central hub for managing refrigerator functions, including cooling cycles and temperature settings. A failing board can cause inconsistent cooling or error codes. T...
In Stock
Order now and your part arrives by Aug 10
Special Order
In Stock
Order now and your part arrives by Aug 10

Special Order
Common Problems and Symptoms for PAVANMRO
Viewing 4 of 4Not cleaning dishes properly
Fixed by these parts
How to fix it
Fridge and Freezer are too warm
Fixed by these parts
How to fix it
Fridge too warm
Fixed by these parts
How to fix it
Will Not Start
Fixed by these parts
How to fix it
Keep searches simple. Use keywords, e.g. "leaking", "pump", "broken" or "fit".
- Customer:
- MONICA from ENCINITAS, CA
- Parts Used:
- WD28X25960
- Difficulty Level:
- Really Easy
- Total Repair Time:
- Less than 15 mins
The bottom rack had broken wheels and rusted prongs
Exactly as described by a previous reviewer. I pulled out the old rack, put in the new rack and just moved over the cutlery rack.
Was this instruction helpful to you?
Thank you for voting!
- Customer:
- Mike from Aguilar, CO
- Parts Used:
- WR49X10283
- Difficulty Level:
- Really Easy
- Total Repair Time:
- 15 - 30 mins
- Tools:
- Nutdriver, Pliers, Screw drivers
my refrgerator stopped cooling and freezing
Take the cardboard grill off the bottom of the back it is held on with 5-6 hex head screws. Located the voltage inverter on the tank. It's on the bottom left of the refrigerator. Removed the screw that holds it in place.Remove the jumper wires at the quick connect. Rotate the voltage inverter and removed it. Check the voltage at the plug
... Read more
in going to the voltage Inverter. It should be 115-125 volts. Plug in the voltage inverter to the Quick connect away from the tank check the voltage on the side that would be connected to the tank. If both sides don't read at least 115 volts the inverter is bad. Order a new on and reinstall in the reverse order.
Read less
Was this instruction helpful to you?
Thank you for voting!
- Customer:
- Bryan from BROWNSVILLE, TX
- Parts Used:
- WD28X10413
- Difficulty Level:
- A Bit Difficult
- Total Repair Time:
- 30 - 60 mins
- Tools:
- Screw drivers, Socket set
Upper washer rack rusted out.
The repair is simple and straightforward. I rated as a bit difficult since the rack mounts on the new were located in the wrong place.
Releasing the rack from the slide rails requires either a Phillips screwdriver or a ratchet and socket.
The issue to check for, which I missed, is if the rail mounts on the new r ... Read more ack are in the same position as on the old rack. Mine were not and I did not discover until the new rack was fully installed. Once the unit was back out, 7 SS screws need to be removed on each side to move the mounts to the correct position.
Releasing the rack from the slide rails requires either a Phillips screwdriver or a ratchet and socket.
The issue to check for, which I missed, is if the rail mounts on the new r ... Read more ack are in the same position as on the old rack. Mine were not and I did not discover until the new rack was fully installed. Once the unit was back out, 7 SS screws need to be removed on each side to move the mounts to the correct position.
Read less
Was this instruction helpful to you?
Thank you for voting!