


Models
>
GTD84ECPN0DG
GTD84ECPN0DG General Electric Dryer
Jump to:
Find Part by Name
Keep searches simple, eg. "belt" or "pump".
Diagrams for GTD84ECPN0DG
Viewing 5 of 5


Keep searches simple, eg. "belt" or "pump".

$43.55
This is a duct felt seal for a dryer. The duct felt seal allows the front-load dryer drum to glide smoothly on the front panel. Your dryer will not function properly if the drum felt seal is compromis...
In Stock
Order now and your part arrives by Apr 11

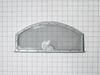
$52.50
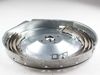
This Lint Filter is a genuine OEM part for your clothes dryer. The Lint Filter can be used with both electric and gas models. Proper air flow is essential to the operation of the dryer, and the lint f...
In Stock
Order now and your part arrives by Apr 11
 – Part Number: WE03X37319")
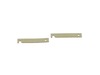
$17.44
f your dryer is excessively noisy when operating, is not tumbling, or is leaving marks on your laundry, it may be time to replace the drum glides. The drum glide bearing is a genuine OEM part for your...
In Stock
Order now and your part arrives by Apr 11
 – Part Number: WE03X37320")
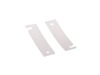
$26.19
If your dryer is making a squealing, metal-on-metal noise you may need to replace your slide bearings. These slide bearings are genuine OEM replacement parts that measure approximately 3 inches in len...
In Stock
Order now and your part arrives by Apr 11

In Stock
Order now and your part arrives by Apr 11

$17.58
This is a replacement O-ring for the drum bearing retainer on your dryer. The drum bearing is found at the back of the dryer drum. The O-ring is designed to create a seal on the drum bearing. The O-r...
In Stock
Order now and your part arrives by Apr 11

In Stock
Order now and your part arrives by Apr 11

In Stock
Order now and your part arrives by Apr 11

In Stock
Order now and your part arrives by Apr 11

$40.71
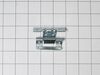
This gray door latch keeps the dryer door securely closed during operation and ensures the appliance won’t run unless latched properly. It’s part of the safety system and helps prevent accidents or in...
In Stock
Order now and your part arrives by Apr 11

$17.44
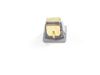
This durable fastening nut secures internal components such as panels, brackets, or control housings. When worn or missing, the appliance may rattle, vibrate, or shift out of alignment. Replacing the ...
In Stock
Order now and your part arrives by Apr 11

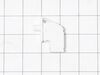
This part is connected to the rear bulkhead of the dryer with screws. It provides a way of connecting individual electrical wires and offers protection of the device from electrical surges (voltages and/or currents).
In Stock
Order now and your part arrives by Apr 11
Questions and Answers
We're sorry, but our Q&A experts are temporarily unavailable.
Please check back later if you still haven't found the answer you need.
- < Prev
- 1
- Next >
Sort by:
Search filter:
Clear Filter
Your search term must have 3 or more characters.
Keep searches simple. Use keywords, e.g. "leaking", "pump", "broken" or "fit".
Sorry, we couldn't find any existing answers that matched.
Try using some different or simpler keywords, or submit your new question by using the "Ask a Question" button above!
Try using some different or simpler keywords, or submit your new question by using the "Ask a Question" button above!
Scott
July 6, 2023
Thermistor not reading any ohms. Replaced and replacement has the same problem. With Thermistor in front of blow dryer ohms reading never changed. This occurs on the new o e and the old one.
For model number GTD84ECPN0DG
Hello Scott, thank you for your inquiry. If you have bought the aftermarket part, maybe the new thermostat is also defective. There will be no gradual shift in reading, or there will be no change at all if the thermistor is defective. The meter reading will always be 0 for a short thermistor. We hope that helps!
Was this helpful?
Thank you for voting!
Common Problems and Symptoms for GTD84ECPN0DG
Viewing 9 of 9Noisy
Fixed by these parts
How to fix it
Door won’t close
Fixed by these parts
How to fix it
Marks left on clothes
Fixed by these parts
How to fix it
Not Heating
Fixed by these parts


How to fix it
Won’t Start
Fixed by these parts
How to fix it
Drum Not Spinning
Fixed by these parts
How to fix it
Door Pops Open
Fixed by these parts
How to fix it
Door Sags
Fixed by these parts
How to fix it
Too hot
Fixed by these parts
How to fix it

")
")


Keep searches simple. Use keywords, e.g. "leaking", "pump", "broken" or "fit".
- Customer:
- Lisha|Lamb from SHELDON, MO
- Parts Used:
- WE03X23881
- Difficulty Level:
- Very Easy
- Total Repair Time:
- Less than 15 mins
Lint filter tore
Replaced riped filter with new mesh filter screen.
Was this instruction helpful to you?
Thank you for voting!
- Customer:
- Richard from San Antonio, FL
- Parts Used:
- WE11X29438
- Difficulty Level:
- Difficult
- Total Repair Time:
- 1- 2 hours
- Tools:
- Wrench set
Deflector was covered in burnt something.
Deflector has 3 bolts attaching it. They require a star wrench. Had to purchase same to do the repair. Removed the bolts(they are sheet metal type screws(bolts). Installed the deflector and started dryer. Loud rubbing sound noted. Shut off and checked the drum and noted it was not running concentrically. Removed deflector and the found th
... Read more
e 3 screws actually retained the drum to drive. Had to make alignment pins to allow proper alignment of the drive, drum, and deflector. Once the pins were used during installation of the deflector everything worked correctly. Turned on dryer and it operated normally.
Had I had the proper tools the repair would probably have taken 30 minutes or less.
Had I had the proper tools the repair would probably have taken 30 minutes or less.
Read less
Was this instruction helpful to you?
Thank you for voting!
- Customer:
- Charles from Alexandria, VA
- Parts Used:
- WE11X29438
- Difficulty Level:
- A Bit Difficult
- Total Repair Time:
- 30 - 60 mins
- Tools:
- Socket set
Heat deflector was covered in melted plastic
Someone I'm related to by marriage accidentally dried a plastic-coated tablecloth on high heat, and our heat deflector was hosed. I was very happy to find this part here for such a reasonable price; Sears wanted about $65 for it. Installation required a Torx bit, and removing the old one was easy, but the dryer's design made it difficult
... Read more
to reinstall the heat deflector while keeping the dryer running concentrically. I ended up cutting the heads off three screws, threading those into the plate behind the drum, sliding the new heat deflector on over those, and then one by one replacing them with the original Torx head screws. Once I figured it out it didn't take long but it took me a while to figure it out. That's probably more a reflection on me than the dryer!
Read less
Was this instruction helpful to you?
Thank you for voting!