


Models
>
KTM487187A
KTM487187A Frigidaire Range
Jump to:
Find Part by Name
Keep searches simple, eg. "belt" or "pump".
Keep searches simple, eg. "belt" or "pump".

$14.16
This OEM drip bowl fits under 8-inch burner elements and has a diameter of approximately 10-inches. Drip bowls catch any spills, and are a quick, easy, and cheap way to improve your cooktop aesthetic....
In Stock
Order now and your part arrives by Apr 11

$14.16
This kit comes with the necessary components to replace your burner terminal block. It includes interchangeable mounting brackets, a terminal box, ceramic wire nuts, heat shrink protective tubing, and...
In Stock
Order now and your part arrives by Apr 11

If the burner element on your range is damaged or no longer heating up, the element should be replaced. When you remove the element, check the terminals for any signs of corrosion or arcing. If you fi...
In Stock
Order now and your part arrives by Apr 11

$36.80
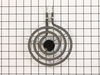
This is a genuine OEM 6-inch burner element for your electric range or cooktop. If the element is no longer heating up, it may be time for a replacement. When you remove the old element, inspect the t...
In Stock
Order now and your part arrives by Apr 11

$38.56
Terminal blocks (also called terminal boards or strips) provide a convenient means of connecting individual electrical wires.
In Stock
Order now and your part arrives by Apr 11

In Stock
Order now and your part arrives by Apr 11

In Stock
Order now and your part arrives by Apr 11

On Order

Special Order

Special Order


Special Order
Questions and Answers
We're sorry, but our Q&A experts are temporarily unavailable.
Please check back later if you still haven't found the answer you need.
Common Problems and Symptoms for KTM487187A
Viewing 5 of 5Element will not heat
Fixed by these parts


How to fix it
Little to no heat when baking
Fixed by these parts


How to fix it
Will Not Start
Fixed by these parts
How to fix it
Little to no heat when broiling
Fixed by these parts
How to fix it
Oven not heating evenly
Fixed by these parts
How to fix it


Keep searches simple. Use keywords, e.g. "leaking", "pump", "broken" or "fit".
- Customer:
- Timothy from Spring Valley, AL
- Parts Used:
- 5304409888
- Difficulty Level:
- Really Easy
- Total Repair Time:
- 15 - 30 mins
- Tools:
- Screw drivers, Socket set
Cord was not tightened enough by delivery crew.
PF alarm appeared on display. Noticed clicking when cord was moved. Had arced for some time and melted original block. New part slightly different. Only has 3 lugs, old one had six. Stack using washers provided. Take note of colors before disassembly. Use caution while working through access opening. The edges are sharp. Only tools neede
... Read more
d are phillips screwdriver, deep socket for lug nuts. Nut driver optional. Hope this is helpful.
Read less
Was this instruction helpful to you?
Thank you for voting!
- Customer:
- George from New Port Richey, FL
- Parts Used:
- 5303935086
- Difficulty Level:
- Easy
- Total Repair Time:
- 15 - 30 mins
- Tools:
- Nutdriver, Pliers, Screw drivers
High heat reluctant to turn down.
Most of the job is simple fastener mechanics.
Use a nut driver or Phillips screwdriver. Remove rear panel.
Pull out control knob. If it is stuck, wrap a small rag around the back of it and pull the rag steadily.
Carefully match marked terminals on the replacement switch with those on original. Switch terminals ... Read more may not be in the same location. Replace wires one for one, one at a time.
Carefully select the correct knob filler for the switch post. Several are supplied. Proceed with logic and measure the shaft length and the filler length and type to match.
Read less
Was this instruction helpful to you?
Thank you for voting!
- Customer:
- louis from cuba, NY
- Parts Used:
- 5303051140
- Difficulty Level:
- Easy
- Total Repair Time:
- 15 - 30 mins
- Tools:
- Socket set
Broiler element burned out
Remove old element by removing two screws on back wall of oven, pull attached wires out about 6" and disconnect. Reverse to install, very easy. Of course the oven door makes it harder to get at things, but it all worked out. Partselect was the only place I could find the element since the stove is 18 years old. I love keeping appliances g
... Read more
oing as long as possible.
Read less
Was this instruction helpful to you?
Thank you for voting!