



Models
>
WC22001Q00
WC22001Q00 Whirlpool Freezer
Jump to:
Find Part by Name
Keep searches simple, eg. "belt" or "pump".
Diagrams for WC22001Q00
Viewing 4 of 4


Keep searches simple, eg. "belt" or "pump".

$21.82
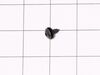
This is a screw and it is made for multiple appliances in your home. This model is called a sheet metal screw because it has sharp points, and the threads are closer together. This screw is designed t...
In Stock
Order now and your part arrives by Oct 4

$7.60
This light socket is a genuine OEM part for your refrigerator. The light socket powers the bulb that lights your fridge. To repair this part, you will need to remove the screws holding the control pan...
In Stock
Order now and your part arrives by Oct 4
In Stock
Order now and your part arrives by Oct 4
$468.17
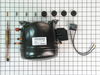
This is the mechanics (motor/engine) of the cooling system. It kicks in whenever the thermostat demands cooling.
This kit includes the compressor, relay, overload, drier filter, 4 pieces of tubin...
On Order
$77.48
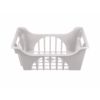
This basket provides organized storage and easy access during appliance operation. Sturdy construction supports regular use without sagging or shifting. Replacing a damaged basket restores capacity, s...
On Order
Special Order

$54.12
Need to replace a missing or worn-out brand label on your appliance? This nameplate is a simple peel-and-stick fix that restores the look of your fridge, stove, or dryer. It shows the brand and model ...
In Stock
Order now and your part arrives by Oct 4
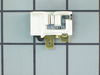
This part maintains the proper temperature. When the refrigerator reaches the desired temperature, this part interrupts the flow of electricity to the compressor which stops the cooling process.
In Stock
Order now and your part arrives by Oct 4
$169.58
The freezer lid gasket creates a seal around the lid to prevent warm air from entering the freezer.
In Stock
Order now and your part arrives by Oct 4
In Stock
Order now and your part arrives by Oct 4
$45.00
This filter dryer is for refrigerators and filters refrigerant that travels through the sealed system of the refrigerator.
In Stock
Order now and your part arrives by Oct 4
Common Problems and Symptoms for WC22001Q00
Viewing 1 of 1
Keep searches simple. Use keywords, e.g. "leaking", "pump", "broken" or "fit".
- Customer:
- Mike from Baytown, TX
- Parts Used:
- W10309994
- Difficulty Level:
- Easy
- Total Repair Time:
- 1- 2 hours
- Tools:
- Nutdriver, Pliers, Wrench (Adjustable)
Compressor "grounded" and quit running
Replaced the compressor with the new one I purchased from you. Installed new parts and recharged unit. The refrigerator / freezer is working better than new. Thanks for the great deal on the compressor. It was here in 3 days. All the parts fit exactly and had no difficulty in the installation or startup. The directions for the wirin
... Read more
g were a great help also. Thanks again.
Read less
Was this instruction helpful to you?
Thank you for voting!
- Customer:
- Henry from Monrovia, CA
- Parts Used:
- W10917237
- Difficulty Level:
- Easy
- Total Repair Time:
- Less than 15 mins
- Tools:
- Pliers
light switch metal was corroaded by the moisture. there was no contact so light wouldnot turn on.
pulled switch from door ,unpluged it and then plued in new switch.
Was this instruction helpful to you?
Thank you for voting!
- Customer:
- Victor from CEDAR CREEK, TX
- Parts Used:
- WPW10191429
- Difficulty Level:
- Very Easy
- Total Repair Time:
- Less than 15 mins
- Tools:
- Nutdriver
Both Upper Lights Burned Out Same Time
The holder is held in place with two screws. Once you have it unscrewed you can snap the old sockets out and replace them.
Ordered new sockets and presto, the lights work again.
They just snapped into the holder and the holder went up with two screws.
HINT: I did take a photo of the 4 electrical connectors AND labele ... Read more d each one with a Sharpie 1, 2, 3, and 4 from left to right.
Ordered new sockets and presto, the lights work again.
They just snapped into the holder and the holder went up with two screws.
HINT: I did take a photo of the 4 electrical connectors AND labele ... Read more d each one with a Sharpie 1, 2, 3, and 4 from left to right.
Read less
Was this instruction helpful to you?
Thank you for voting!