


Models
>
EEV201XY0
EEV201XY0 Whirlpool Freezer
Jump to:
Find Part by Name
Keep searches simple, eg. "belt" or "pump".
Diagrams for EEV201XY0
Viewing 4 of 4


Keep searches simple, eg. "belt" or "pump".

$19.75
This is a genuine OEM 40-Watt replacement light bulb that is compatible with various types of appliances. It has a frosted glass bulb with a standard metal socket base, making it easy to screw and uns...
In Stock
Order now and your part arrives by Jul 20

$24.15
This 18 ml bottle of white appliance touch-up paint is used to cover scratches or marks on your appliance. The white touch-up paint can be used on refrigerators, microwaves, ranges, clothes dryers, an...
In Stock
Order now and your part arrives by Jul 20

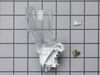
This is a multi-use cover screw. It fits appliances such as dryers, ranges, washers, dishwashers, refrigerators, air conditioners, washer dryer combos, freezers, wall ovens, microwaves, dehumidifiers,...
In Stock
Order now and your part arrives by Jul 20

In Stock
Order now and your part arrives by Jul 20

In Stock
Order now and your part arrives by Jul 20

Almond and white handle are no longer available. Black only. NOTE: As per the manufacture the handle may have to be cut to fit.
No Longer Available

In Stock
Order now and your part arrives by Jul 20

In Stock
Order now and your part arrives by Jul 20

On Order

On Order

In Stock
Order now and your part arrives by Jul 20

In Stock
Order now and your part arrives by Jul 20
Common Problems and Symptoms for EEV201XY0
Viewing 3 of 3Light not working
Fixed by these parts
How to fix it
Door won’t open or close
Fixed by these parts
How to fix it
Frost buildup
Fixed by these parts
How to fix it


Keep searches simple. Use keywords, e.g. "leaking", "pump", "broken" or "fit".
- Customer:
- DANIEL from MINNEAPOLIS, MN
- Parts Used:
- 4387478
- Difficulty Level:
- Easy
- Total Repair Time:
- Less than 15 mins
- Tools:
- Screw drivers
Light Would Not Go On In The Refrigerator
First I removed the old lightbulb from the socket and replaced it with a new one to confirm that the bulb was not the problem. I then pryed the socket out with a flat-head screwdriver. I could tell that the socket was anchored in its hole with clips so it was relatively easy to pry it out. Once the socket was out, I disconnected the le
... Read more
ad wires and ordered a replacement socket kit from Partselect. When the new one arrived, I reconnected the lead wires to it, snapped it back into its hole, screwed in a new lightbulb, and presto!! The light was back on with no further problem. Thank you, Partselect!! A $15.00 part saved me what probably would have been at least a $100. service call and heaven knows what the technician would have told me I needed!!!
Read less
Was this instruction helpful to you?
Thank you for voting!
- Customer:
- Vernon from Clayton, NC
- Parts Used:
- 2188438A
- Difficulty Level:
- A Bit Difficult
- Total Repair Time:
- 30 - 60 mins
- Tools:
- Nutdriver
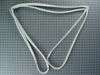
The old door gasket was hard and frequently didn't seal and caused evaperator to ice up and contents of freezer to thaw out.
Using a nut driver on a cordless drill I took out the screws that held the metal strips on, which held the seal in place. I installed the new seal with a hand driven nut driver so as not to strip the screw holes in the door. It came out well and the new seal works very well. Getting the seal positioned properly was the most tedious par
... Read more
t.
Read less
Was this instruction helpful to you?
Thank you for voting!
- Customer:
- Michelle from Richardson, TX
- Parts Used:
- 72017
- Difficulty Level:
- Really Easy
- Total Repair Time:
- Less than 15 mins
Scratches in Surface
This product comes in a bottle with a brush like Liquid Paper. It goes on incredibly easy. A second coat might be needed. I wanted to prevent rust from setting in so I covered the scratches and dings. The paint is a little brighter since my washer is 10 years old but it still looks great.
Was this instruction helpful to you?
Thank you for voting!