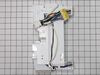
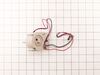
If the light inside your fridge is not coming on, or if it is staying on continuously, there may be an issue with your door switch. When the door to your fridge is closed, the button on the switch is...
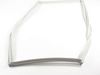
This front plate assembly, often called a mullion or flipper, fits select LG and Kenmore French-door refrigerators. It helps seal the gap between the doors to prevent air leaks and maintain proper tem...
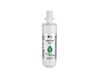
This refrigerator water filter replacement is for 2010 LG refrigerators that have either forward French doors or are the four-door dispensing models. This filter is designed to minimize impurities tha...
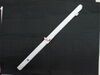
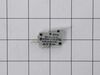
This part includes a single mounting bolt needed to secure the door handle to your refrigerator. This part is commonly replaced because the handle has started to loosen. Try tightening the screw first...
This is the replacement shelf glass for your refrigerator. It is made of glass and is approximately 31 inches wide and 16 inches long. The shelf glass for your refrigerator slides over the crisper cov...
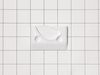
The door bin is attached to the inside of the refrigerator door, and typically holds condiments, jars, and bottles. This OEM basket assembly is made of white and clear plastic. Measures approximately...
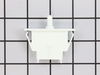
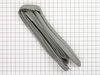
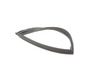
This is a manufacturer-approved refrigerator door closure for your refrigerator. It is made of white plastic and measures approximately 3 inches by 2 inches. If your old closure is damaged, your refri...
Special Order
Questions and Answers
Ask our experts a question about this part and we'll get back to you as soon as possible!
1 question answered by our experts.
< Prev
1
Next >
Sort by:
Search filter:
Clear Filter
Your search term must have 3 or more characters.
Keep searches simple. Use keywords, e.g. "leaking", "pump", "broken" or "fit".
Sorry, we couldn't find any existing answers that matched. Try using some different or simpler keywords, or submit your new question by using the "Ask a Question" button above!
John
July 7, 2023
If my refrigerator is stuck in the demo mode and everything works how do I get it to stay out of demo mode as well as turn everything back on in my refrigerator to where it cools again we have had someone come out and test the compressor everything it's all good it just will not go back into cooling we've tried everything the manual says on defrosting and how to get it out of demo we never hear the beeps what do I do next before I have to call a repair person. Everyone says that it's a demo mode that makes it stop cooling and go into warm something to do with the compressor or a relay a lot of people have tell me if you just continuously to get it in and out of the demo it'll kick itself right back into like it was brand new we've already hit the reset button on the control panel everything that we've read the book to tell us to do
For model number 79571056010
Hi John, thank you for contacting us. To deactivate the demo mode, open the refrigerator door, and press the refrigerator temperature and ultra ice buttons at the same time for 5 seconds. The control panel will beep to confirm that the demo mode is deactivated. If the demo mode does not deactivate, the issue might be with the display control board, part number FIX3534012. A faulty control board might be causing the refrigerator to get stuck in this mode. We hope this helps!
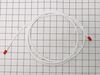
Remove water filter and water filter holder. Removed cover on back of frig. Removed clip where water line connects to back of water filter. Took half inch wrench pushed in on water line lock to release line. Repeat at other end. Reverse steps to put on new line. Easy repair.
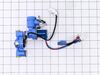
1. Shut off water to refrigerator. 2. Removed bottom sheet metal cover (6 screws). 3. Removed leaking water inlet valve assembly from refrigerator (1 screw). 4. Remove water inlet tube (loosen nut) and tube back to refrigerator (pull from water valve after remove cotter pin washer). 5. Detach two electrical wire harnesses. 6. Install new
... Read morewater inlet valve assembly to refrigerator (1 screw). 7. Replace both water tubes to water inlet assembly. 8. Re-attach both wiring harnesses. 9. Turn water to refrigerator on. 10. Check for leaks. 11. Re-attach bottom sheet cover (6 screws).
Video makes it look easy. Kenmore refrigerator does not have "groove" along the right hand side of switch that allows for pushing down on release. Used a thin screwdriver to get under to push while holding switch edge with pliers. Kept slipping. Tape sides to avoid scratching inside of refrigerator.