


Models
>
25311521100
25311521100 Kenmore Freezer
Jump to:
Find Part by Name
Keep searches simple, eg. "belt" or "pump".
Keep searches simple, eg. "belt" or "pump".

$63.75
Ensure proper lighting inside your refrigerator with this 3.8W LED bulb, designed for use in various models. It provides clear, energy-efficient illumination to help you easily see stored items. If yo...
In Stock
Order now and your part arrives by Jul 26

In Stock
Order now and your part arrives by Jul 26


$25.10
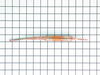
This 18 ml bottle of white appliance touch up paint is a little over two inches tall. It can be used for refrigerators, microwaves, ranges, clothes dryers, and freezers.
In Stock
Order now and your part arrives by Jul 26

$30.60
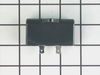
This is a switch for your refrigerator, but you may also know it as a door switch or a plunger light switch. This part turns your appliance light on and off as the door is opened and closed. If your c...
In Stock
Order now and your part arrives by Jul 26

$71.99
This 220V, 12µF run capacitor plays a vital role in the operation of your refrigerator or wine cooler by supplying continuous current to the compressor motor windings. It ensures stable motor performa...
In Stock
Order now and your part arrives by Jul 26

$79.87
This freezer door hinge assembly supports the door and allows it to open and close smoothly while helping maintain a proper seal. It provides the stability needed to keep cold air inside and food stor...
Special Order

$161.58
Keep your freezer running efficiently with this flexible white door gasket. It seals the door tightly to keep cold air in and warm air out, helping prevent frost and save energy. If your current gaske...
In Stock
Order now and your part arrives by Jul 26

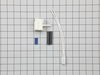
This part is both the start relay and the overload. The start relay boosts the compressor, and then shuts off as soon as the motor gets up to speed and the overload provides extra protection against e...
In Stock
Order now and your part arrives by Jul 26


In Stock
Order now and your part arrives by Jul 26

Common Problems and Symptoms for 25311521100
Viewing 7 of 7Frost buildup
Fixed by these parts

How to fix it
Won’t start
Fixed by these parts
How to fix it
Too warm
Fixed by these parts
How to fix it
Will Not Start
Fixed by these parts
How to fix it
Fridge too warm
Fixed by these parts
How to fix it
Freezer section too warm
Fixed by these parts
How to fix it
Fridge and Freezer are too warm
Fixed by these parts
How to fix it


Keep searches simple. Use keywords, e.g. "leaking", "pump", "broken" or "fit".
- Customer:
- eric from inglewood, TN
- Parts Used:
- 218909912, 5304491584
- Difficulty Level:
- A Bit Difficult
- Total Repair Time:
- Less than 15 mins
- Tools:
- Pliers, Screw drivers
Faulty Controller and Possibly Capacitor
After building a test box and determining the Controller was bad simply ordered parts and installed. Installation was a little difficult due to locking spades on electrical connections.
Unplug all power from freezer. Remove Bail wire from controller capacitor unit and remove from compressor by pulling STRAIGHT from compre ... Read more ssor body to avoid bending contacts.
Use a very small instrumentation screwdriver to release locking spade on yellow and white wires. To unlock slide screwdriver in slot along wire entry to controller body while gently pulling on wire. Note position of wires and replace on new unit in same position/order. Plug new run capacitor into new controller being careful to orient capacitor to proper position (hole matches guide on controller unit). Plug newly installed controller and capacitor into condensor and replace bail wire.
Make sure timer is not in defrost mode - manually advance timer if necessary to ensure timer is in run mode. Turn temperature control to coldest setting. Plug in and hopefully enjoy the humming noise of your newly repaired and operational compressor and freezer.
Read less
Was this instruction helpful to you?
Thank you for voting!
- Customer:
- Roberta from Winnfield, LA
- Parts Used:
- 216916200
- Difficulty Level:
- Really Easy
- Total Repair Time:
- Less than 15 mins
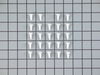
needed baskets for single items
I bought the freezer second hand, When I really started using it all the time it was inconvenient for the single items to reach down in three feet of larger frozen items.
I went to a store to see about getting a basket, They told me the next time I was there, get them the model number and they would see what they could do.
... Read more />
I just came home and got the model number and put name of the freezer in the search engine, Bingo it was done and I win.
Only took a couple days and my new basket was here. I am so pleased I ordered a second one.
Read less
Was this instruction helpful to you?
Thank you for voting!
- Customer:
- Arnold from Quincy, IL
- Parts Used:
- 216481211
- Difficulty Level:
- Easy
- Total Repair Time:
- 15 - 30 mins
- Tools:
- Pliers, Screw drivers
Door gasket needed to be replaced.
I removed all of the expandable pins that held the gasket and the inner door panel, and removed the old gasket from the inner door panel. The new gasket was then placed around the edges of the inner panel. While holding the gasket and panel in the proper location, the expandable pins were inserted into the mounting holes, finishing the
... Read more
installation.
Read less
Was this instruction helpful to you?
Thank you for voting!