


Models
>
FCM7DUGWW
FCM7DUGWW General Electric Freezer
Jump to:
Find Part by Name
Keep searches simple, eg. "belt" or "pump".
Diagrams for FCM7DUGWW
Viewing 1 of 1
Keep searches simple, eg. "belt" or "pump".

$29.98
The freezer basket helps organize food in the freezer easier. The basket measures approximately 7 1/2” high by 16.75” deep. The freezer basket is white in color and made of metal. This is a genuine OE...
On Order

In Stock
Order now and your part arrives by Jul 23


On Order

In Stock
Order now and your part arrives by Jul 23


Special Order

Special Order

Special Order


Common Problems and Symptoms for FCM7DUGWW
Viewing 2 of 2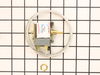
Keep searches simple. Use keywords, e.g. "leaking", "pump", "broken" or "fit".
- Customer:
- Thomas A from BLUEMONT, VA
- Parts Used:
- WR50X10085
- Difficulty Level:
- Easy
- Total Repair Time:
- More than 2 hours
- Tools:
- Pliers, Screw drivers
Freezer temp was either -20 or +30, operation was intermittant
I replaced the thermostat, all but the capillary pipe. It was stuck in the
tube in which it fits. I had to let it sit unplugged until the ice in the cap tube melted, and I was able to lightly jerk on the cap pipe until it came
loose and slipped out. Put in the new one and sealed the end of the
tube with putty.
tube in which it fits. I had to let it sit unplugged until the ice in the cap tube melted, and I was able to lightly jerk on the cap pipe until it came
loose and slipped out. Put in the new one and sealed the end of the
tube with putty.
Was this instruction helpful to you?
Thank you for voting!
- Customer:
- Alex from PLANO, TX
- Parts Used:
- WR02X12562
- Difficulty Level:
- Very Easy
- Total Repair Time:
- Less than 15 mins
- Tools:
- Pliers, Screw drivers
Green light indicator out
Removed cover with screwdriver used pliers unhook wires green light indicator and replaced with new one put cover back.
Was this instruction helpful to you?
Thank you for voting!
- Customer:
- Michael from CINCINNATI, OH
- Parts Used:
- WR05X10031
- Difficulty Level:
- Really Easy
- Total Repair Time:
- Less than 15 mins
Replacing lost Top Lock Cover.
Placed Top Lock cover over the latch mechanism. Then using my hand I put downward pressure on the Top Lock Cover and it snapped into place. The entire installation took less than five minutes.
Best regards,
Micha Sweeney
Best regards,
Micha Sweeney
Was this instruction helpful to you?
Thank you for voting!