



Models
>
WGD5010LW0
WGD5010LW0 Whirlpool Dryer
Jump to:
Find Part by Name
Keep searches simple, eg. "belt" or "pump".
Keep searches simple, eg. "belt" or "pump".
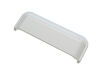
$46.07
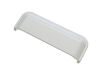
Sourced directly from the manufacturer, this OEM approved replacement handle is approximately 6 inches long, 2 inches wide, and is made of durable white plastic. This handle is used to open the dryer ...
In Stock
Order now and your part arrives by Sep 12
$6.51
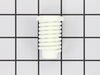
It is important for your dryer to be properly leveled, as an unleveled one can cause excessive vibration and noise when operating, may not drain properly, and can cause excessive wear on various parts...
In Stock
Order now and your part arrives by Sep 12
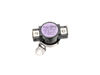
$16.35
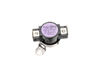
This OEM high-limit thermostat kit includes the thermal cut-off fuse and the high-limit thermostat. The purpose of this part is to cut-off power to the dryer when it overheats. Common indications that...
In Stock
Order now and your part arrives by Sep 12
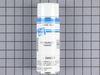
This 18 ml bottle of white appliance touch-up paint is used to cover scratches or marks on your appliance. The white touch-up paint can be used on refrigerators, microwaves, ranges, clothes dryers, an...
No Longer Available
In Stock
Order now and your part arrives by Sep 12
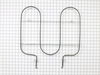
$145.14
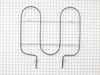
If your oven isn’t broiling like it used to or food is taking longer to cook, this broil element might be the fix. It’s the part at the top of the oven that gives off heat for broiling. Replacing it i...
In Stock
Order now and your part arrives by Sep 12
$47.14
This kit comes with 2 adhesive pads, 2 brackets and 4 screws. This is for stacking the appliances vertically - dryer over washer.
In Stock
Order now and your part arrives by Sep 12
$43.92
This kit allows you to stack your washer and dryer to maximize your laundry space.
On Order
In Stock
Order now and your part arrives by Sep 12
$57.30
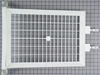
This stationary drying rack is designed for use in dryers with rear drum dimples spaced 4½ inches apart. Constructed in white, it provides a stable platform for drying items that should not tumble, su...
In Stock
Order now and your part arrives by Sep 12
$59.43
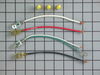
This terminal and wire kit helps repair electrical connections in your dryer by replacing worn or damaged wires. It includes wires, screws, and wire nuts, but the terminal block is sold separately. Us...
In Stock
Order now and your part arrives by Sep 12
$68.99
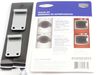
This stacking kit allows compatible front-load washer and dryer models to be stacked vertically. It is designed to maximize laundry space and can be used on various models. Please use your model numbe...
In Stock
Order now and your part arrives by Sep 12
Common Problems and Symptoms for WGD5010LW0
Viewing 8 of 8Door won’t close
Fixed by these parts
How to fix it
Little to no heat when broiling
Fixed by these parts
How to fix it
Element will not heat
Fixed by these parts
How to fix it
Not Heating
Fixed by these parts
How to fix it
Noisy
Fixed by these parts
How to fix it
Oven not heating evenly
Fixed by these parts
How to fix it
Little to no heat when baking
Fixed by these parts
How to fix it
Too hot
Fixed by these parts
How to fix it
Keep searches simple. Use keywords, e.g. "leaking", "pump", "broken" or "fit".
- Customer:
- Dawn from AUSTIN, TX
- Parts Used:
- W10861225
- Difficulty Level:
- Very Easy
- Total Repair Time:
- Less than 15 mins
The handle to the dryer broke.
Replacement handle snapped in place very easily.
Was this instruction helpful to you?
Thank you for voting!
- Customer:
- Kathy from DALLAS, TX
- Parts Used:
- W10861225
- Difficulty Level:
- Very Easy
- Total Repair Time:
- Less than 15 mins
Dryer handle to open door broke
took the old one off and pooped in the new one!
Was this instruction helpful to you?
Thank you for voting!
- Customer:
- Ramona from Mexico, MO
- Parts Used:
- W10856603
- Difficulty Level:
- Really Easy
- Total Repair Time:
- 15 - 30 mins
- Tools:
- Screw drivers
The broiler element started sparking and melting in one spot. I thought it would catch on fire and quickly turned off the oven.
First we unplugged the range. My husband removed the old element using a screw driver. He also removed the back panel on the oven after pulling it out from the wall. He unplugged the broiler prongs and plugged in the new element, put it all back together using the screw driver. We plugged it back in, turned on the oven and it is workin
... Read more
g great! Simple and easy to do in a short amount of time. Cool!!
Read less
Was this instruction helpful to you?
Thank you for voting!