


Models
>
ADE3SRGS173TW01
ADE3SRGS173TW01 Speed Queen Dryer
Jump to:
Find Part by Name
Keep searches simple, eg. "belt" or "pump".
Diagrams for ADE3SRGS173TW01
Viewing 12 of 12


Keep searches simple, eg. "belt" or "pump".

In Stock
Order now and your part arrives by Aug 3

$13.07
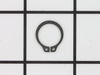
This metal retaining ring is well under an inch long. Use it for your Maytag brand clothes washer or your clothes dryer.
In Stock
Order now and your part arrives by Aug 3

$46.07
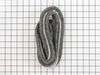
This rear drum felt seal is designed to create a flexible, airtight barrier between the dryer drum and the rear panel, helping to maintain optimal heat circulation and airflow during drying cycles. By...
In Stock
Order now and your part arrives by Aug 3

$7.60
This is a multi-use screw and can be used on a variety of appliances. The measurements of the screw are: 8/18 x 3/8. *Please note: the screw is sold individually. Refer to the manual provided by the m...
In Stock
Order now and your part arrives by Aug 3

$9.79
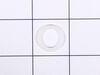
This front cover spring retaining clip is not quite an inch long. It is made entirely of metal and is used for some washing machines.
On Order

$100.07
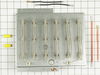
This 240 volt heating element is used for electric clothes dryers. Included with this element is a fuse kit consisting of a thermal fuse, a high limit thermostat, two wire leads, and four mounting screws.
In Stock
Order now and your part arrives by Aug 3

In Stock
Order now and your part arrives by Aug 3

In Stock
Order now and your part arrives by Aug 3

Special Order

In Stock
Order now and your part arrives by Aug 3

In Stock
Order now and your part arrives by Aug 3

$7.60
Sold individually. This nut is for dryers.
Follow appropriate safety practices when installing the nut.
Special Order
Common Problems and Symptoms for ADE3SRGS173TW01
Viewing 6 of 6Noisy
Fixed by these parts
How to fix it
Marks left on clothes
Fixed by these parts
How to fix it
Will not agitate
Fixed by these parts
How to fix it
Burning smell
Fixed by these parts
How to fix it
Not Heating
Fixed by these parts
How to fix it
Spins slowly
Fixed by these parts
How to fix it


Keep searches simple. Use keywords, e.g. "leaking", "pump", "broken" or "fit".
- Customer:
- Jeff from Conyers, GA
- Parts Used:
- 61927
- Difficulty Level:
- A Bit Difficult
- Total Repair Time:
- 30 - 60 mins
- Tools:
- Nutdriver, Screw drivers
Heating element went bad
I couldn't find any information on the internet on how to fix my dryer, so I took every screw out of it, which I later found was not needed - just 2 in the front. Then I had to figure out WHERE the element was. Turns out, against the back panel with 2 screws. I had to crawl on my belly to get in there with little room to work. Installing
... Read more
the new one didn't take long at all though. I also vacuumed out the inside and cleaned it well, then put all the screws back in it.
I'm glad I re-did all the screws because now it sounds brand new. It's 3 times quieter than it ever was (it was donated to me), and it feels great that I was able to fix it on my own for about $50.
I'm glad I re-did all the screws because now it sounds brand new. It's 3 times quieter than it ever was (it was donated to me), and it feels great that I was able to fix it on my own for about $50.
Read less
Was this instruction helpful to you?
Thank you for voting!
- Customer:
- James from Eagle, ID
- Parts Used:
- 61927
- Difficulty Level:
- Easy
- Total Repair Time:
- 15 - 30 mins
- Tools:
- Nutdriver
Taking too long for clothes to dry.
I first unplugged the dryer (don't want to get nailed with 240 volts). I then removed the two screws on the bottom section of the dryer just below the door. I then removed the two screws on the front door assembly and removed the door (make sure you don't break the wires and/or door switch. The wires need to be removed from the door sw
... Read more
itch prior to removing the door panel completely). I then took a flash light and look inside the dryer towards the back. I could see the heating element in the back. I then removed the two screws holding the heat element and removed the heating element (taking note on the orientation of the element). I then removed the black and orange wires making note which wire fit on which terminal. I then compared the old unit with the new unit to make sure I had the right one. I then assembled the new heating element (heat sensors etc.). I then hooked the black and orange wire to the new element. I then reassembled everything in the reverse order.
Note: I very CAREFULLY used the heating elements support connectors to hold the element in place while I started my screws. Once they were started then I could release the element and fit it properly into the housing as I tightened the screws.
The other thing that you need to check is to make sure that the air-duct is not blocked. If you have a lot of lent on the bottom of the dyer (inside) then you could have a blocked air-duct. This happened to me. I went outside and noticed that we have a door on our vent that flips up to keep mice etc. from coming in. Some of the lint that was blown out got wet from the sprinklers and calcified underneath the vent. This was preventing the vent from opening. This could of been our problem all along but I had already replaced the heating element so I keep it as is.
PartSelect was wonderful. I was able to find my parts quickly and the turn around time was tremendous. I would buy from PartSelect again.
Read less
Was this instruction helpful to you?
Thank you for voting!
- Customer:
- Doneen from Provo, UT
- Parts Used:
- 61927
- Difficulty Level:
- Easy
- Total Repair Time:
- 15 - 30 mins
- Tools:
- Nutdriver
Dryer stopped heating
I removed the screws that hold the element in place. I disconnected the wires. I took the new part, which was easy to identify and order, assembled per instructions, and attached it to the wires in the dryer, then screwed it in. I normally let my husband do these repairs, but he wasn't available. It was easy and the dryer works perfec
... Read more
tly again!
Read less
Was this instruction helpful to you?
Thank you for voting!