



Models
>
DV665JWXAA
DV665JWXAA Samsung Dryer
Jump to:
Find Part by Name
Keep searches simple, eg. "belt" or "pump".
Keep searches simple, eg. "belt" or "pump".
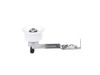
$62.63
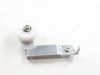
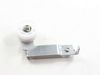
This idler pulley assembly includes the pulley wheel and bracket, and is located near the motor in compatible dryer models. It maintains tension on the dryer belt, allowing the drum to rotate smoothly...
In Stock
Order now and your part arrives by Oct 15
In Stock
Order now and your part arrives by Oct 15

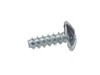
$6.51
This manufacturer-approved screw is for refrigerators, including Kenmore refrigerator model. Avoid cross-threading refrigerator screw during installation.
In Stock
Order now and your part arrives by Oct 15
In Stock
Order now and your part arrives by Oct 15
In Stock
Order now and your part arrives by Oct 15
Special Order
In Stock
Order now and your part arrives by Oct 15
On Order
In Stock
Order now and your part arrives by Oct 15
Common Problems and Symptoms for DV665JWXAA
Viewing 3 of 3Noisy
Fixed by these parts
How to fix it
Drum Not Spinning
Fixed by these parts
How to fix it
Won’t Start
Fixed by these parts
How to fix it

Keep searches simple. Use keywords, e.g. "leaking", "pump", "broken" or "fit".
- Customer:
- charlie from conroe, TX
- Parts Used:
- WP35001086, WP35001084
- Difficulty Level:
- Easy
- Total Repair Time:
- 30 - 60 mins
- Tools:
- Screw drivers
pulley wheel locked up and belt had burned it in half.
had to take top off to get to the front cover screws.Then took the screws out of front cover, pulled it off then pulled the drum out. Man at the amount of lent in the buttom and in the heating element area. Well, after removing drum I found the problem with the pulley. When I got parts to put back together it took a little time and thinki
... Read more
ng to find out how the pulley an belt went together(belt came off when pulley finally melted in half)with holding drum up to see what's going on. The pulley is laying down,with drum in and belt around it put belt on motor shaft then pull pulley up vertical wrap belt coming down on motor side around pulley. Then put it all together.
Read less
Was this instruction helpful to you?
Thank you for voting!
- Customer:
- Noah from OXFORD, KS
- Parts Used:
- DC93-00634A
- Difficulty Level:
- Really Easy
- Total Repair Time:
- Less than 15 mins
- Tools:
- Screw drivers
Tension/Dead Man Wheel Broke/Shattered
Dryer would not start but electronics were working.
Pulled top of dryer off; noticed the belt was loose but not broken.
Went in through the back (1 screw and removed the exhaust pipe/plate); noticed the wheel was broken and thus the belt had fallen off.
Ordered replacement wheel/arm.
One screw to remove ol ... Read more d one, one screw to install new one...tentioned the belt. Dryer was good as new.
Pulled top of dryer off; noticed the belt was loose but not broken.
Went in through the back (1 screw and removed the exhaust pipe/plate); noticed the wheel was broken and thus the belt had fallen off.
Ordered replacement wheel/arm.
One screw to remove ol ... Read more d one, one screw to install new one...tentioned the belt. Dryer was good as new.
Read less
Was this instruction helpful to you?
Thank you for voting!
- Customer:
- Pamela from TILLSON, NY
- Parts Used:
- DC93-00634A
- Difficulty Level:
- Easy
- Total Repair Time:
- More than 2 hours
- Tools:
- Screw drivers
The (front-load) dryer was noisy and eventually slowed down but was still heating.
I removed the dryer top and saw that the belt was intact. (I had suspected the belt or something stuck in the exhaust fan or somewhere.) I watched a few youtube videos and took off the rest of the top plates and front door and inner structure that held the barrel. After i inspected and cleaned out the fan blades and exhaust areas, I looke
... Read more
d at the pulley rollers (motor and idler rollers). The idler roller looked a little melted and chewed up. I replaced it with the new assembly. Also replaced the belt. Putting the barrel and new belt back on was harder for me than the videos indicated because the spring was very tight and the area to put my hands was small and didn't give me enough leverage. I eventually got someone to give me the third hand pulling the idling roller a little further over and the belt was back on. It didn't take me long to put the whole dryer back together. It is running fine now.
These are not instructions as much as warning that although it is a one-person job, the idler pulley assembly is not as easily manipulated with the barrel there. Doing the fix was straightforward: one screw holds it in place. The men in the videos seemed to have no problem with easily replacing the belt, but I needed help with the tight spring. Perhaps now that I've done it once, I could figure out how to reach around the barrel and yank the roller enough to replace the belt, but with the extra hand it took seconds and was super easy.
These are not instructions as much as warning that although it is a one-person job, the idler pulley assembly is not as easily manipulated with the barrel there. Doing the fix was straightforward: one screw holds it in place. The men in the videos seemed to have no problem with easily replacing the belt, but I needed help with the tight spring. Perhaps now that I've done it once, I could figure out how to reach around the barrel and yank the roller enough to replace the belt, but with the extra hand it took seconds and was super easy.
Read less
Was this instruction helpful to you?
Thank you for voting!