


Models
>
MED8630HC1
MED8630HC1 Maytag Dryer
Jump to:
Find Part by Name
Keep searches simple, eg. "belt" or "pump".
Diagrams for MED8630HC1
Viewing 5 of 5


 Diagram and Parts List for Maytag Dryer")

Keep searches simple, eg. "belt" or "pump".

$60.49
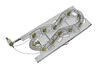
When connected to electricity the dryer heating element glows red hot and generates heat. When air is blown over it, it heats the air which is used to dry the clothes. The heating element fits inside ...
In Stock
Order now and your part arrives by Jul 26

$39.63
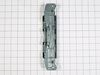
The Whirlpool Dryer Repair Kit is a genuine OEM maintenance kit designed to resolve common issues such as squeaking, thumping, or poor drum rotation in 27-inch dryers. This all-in-one kit is compatibl...
In Stock
Order now and your part arrives by Jul 26

In Stock
Order now and your part arrives by Jul 26

$27.28
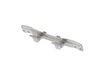
Often referred to as a dryer belt tension pulley wheel, this idler pulley is an OEM approved replacement part for a variety of dryer models. The idler pulley puts tension on the drive belt, and if the...
In Stock
Order now and your part arrives by Jul 26

$25.10
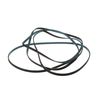
This is a single dryer drum belt that measures 93.5 inches. The belt rotates the dryer drum and is a common wear part that can become brittle over time. It can also stretch and change shape, so keep t...
In Stock
Order now and your part arrives by Jul 26

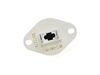
The internal-bias thermostat, also know as a thermistor, is used to prevent the dryer from overheating. It does this by monitoring and controlling the temperature of the inside of the dryer drum. If ...
In Stock
Order now and your part arrives by Jul 26

$11.98
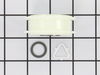
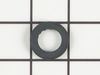
This small but mighty OEM piece is called a tri-ring and is used to support the drum roller shaft and the idler pulley shaft in your dryer. It helps to provide a tight seal between components by evenl...
In Stock
Order now and your part arrives by Jul 26

$6.51
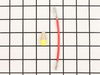
It is important for your dryer to be properly leveled, as an unleveled one can cause excessive vibration and noise when operating, may not drain properly, and can cause excessive wear on various parts...
In Stock
Order now and your part arrives by Jul 26

$27.83
If your dryer is not tumbling, will not start, or is excessively noisy while operating, there may be an issue with your idler pulley. The idler pulley works by maintaining a constant tension on the dr...
In Stock
Order now and your part arrives by Jul 26

$9.79
This is an authentic OEM replacement moisture sensor for your dryer. The sensor detects the moisture levels in your clothing while the appliance is operating, and once the appropriate level has been r...
In Stock
Order now and your part arrives by Jul 26

This heating element connection wire kit is a genuine OEM replacement for your electric dryer. The kit is used to connect the thermostat to the heater element. The kit comes with a yellow wire nut and...
In Stock
Order now and your part arrives by Jul 26

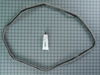
This part seals the drum to prevents air from escaping. This includes silicone rubber adhesive.
In Stock
Order now and your part arrives by Jul 26
Common Problems and Symptoms for MED8630HC1
Viewing 12 of 12Noisy
Fixed by these parts


How to fix it
Not Heating
Fixed by these parts
How to fix it
Drum Not Spinning
Fixed by these parts
How to fix it
Won’t Start
Fixed by these parts
How to fix it
Too hot
Fixed by these parts

How to fix it
Door won’t close
Fixed by these parts

How to fix it
Marks left on clothes
Fixed by these parts
How to fix it
Door Sags
Fixed by these parts
How to fix it
Lid or door won’t close
Fixed by these parts
How to fix it
Touchpad does not respond
Fixed by these parts
How to fix it
Leaking
Fixed by these parts
How to fix it
Locking Issues
Fixed by these parts
How to fix it


Keep searches simple. Use keywords, e.g. "leaking", "pump", "broken" or "fit".
- Customer:
- Alan from Brooksville, FL
- Parts Used:
- WP3387747
- Difficulty Level:
- Easy
- Total Repair Time:
- 30 - 60 mins
- Tools:
- Socket set
Burned out heater element
Remove the kick plate from the bottom of the dryer by sliding a putty knife along the top edge to release the plastic clamps, one on each side about 4" in from the edges. The kick plate folds out and down. You will see the heat shield on the right, held in by one hex head screw. Remove screw and heat shield. The element is positioned in a
... Read more
n open-front housing and is fastened to the left side of the housing by two hex head screws, located on the "rail" of the element and right near the two wires. Remove the hex-head screws that hold the element in place and disconnected the two wires by pulling them out by hand or with needle nose pliers. The only difficulty here is the cramped working area...I recommend a stubby socket driver for these two screws. Most of this I had to do by feel because I could not see the screw heads. Once the screws are out and the wires have been disconnected, slide the old element straight out toward you. You may need to disconnect a small plastic hose located to the left front of the element, but this hose just pulls right off. Vacume the dust & lint build-up out of the whole area, wipe out the element housing and clean up the whole underside of the dryer prior to installing the new element. Installation is reverse of removal. It also might be a good opportunity to clean out your exhaust duct and the vent to the outside. (Never use the aluminum foil-accordian-type duct.) If the exterior dryer vent has any kind of screen over it, remove it and get rid of it. Screens collect lint, lint builds up and burns out elements.
Read less
Was this instruction helpful to you?
Thank you for voting!
- Customer:
- jason from HOLDEN, MA
- Parts Used:
- 4392067
- Difficulty Level:
- Really Easy
- Total Repair Time:
- 30 - 60 mins
- Tools:
- Socket set
very loud squeeling sound
The issue was the idler pulley. First I began opening up the front panel based on a youtube video but soon realized the model was slightly different and required a lot more items to remove. I saw the pulley in the back with nothing in the way so I put the front panel crap back on and removed the rear panel. There it was, very simple to re
... Read more
move and replace. I'm not looking forward to drum rollers though. Hopefully they're aren't as difficult as they appear.
Read less
Was this instruction helpful to you?
Thank you for voting!
- Customer:
- Eddie from PELZER, SC
- Parts Used:
- 4392067
- Difficulty Level:
- A Bit Difficult
- Total Repair Time:
- More than 2 hours
- Tools:
- Nutdriver, Screw drivers
Squeaky Dryer Noise
I purchased the dryer repair kit with the drum belt, wheels and idler pulley. I watched the instructional videos online and it seemed fairly straight forward. Breaking down the dryer and replacing the pulleys was easy enough. My problem began when I tried to feed the drum belt around the idler pulley. After finishing the job, the dryer wo
... Read more
uld not turn and the sensor light stayed on. I thought something else was broken with the dryer and spent hours trouble shooting other problems that I was having. Finally I figured out that the drum belt was not installed correctly around the idler pulley. However, I could not get it properly installed from the front of the machine so I tried from the rear still with no avail. I finally had to fish the old belt out of the garbage can that I had thrown away earlier. I lined up the old belt with the new one in the kit and discovered that the new belt was much smaller, so I put the old one back on the drum. Here's the lesson I learned...make sure the belts are the same size before attempting to install. The old idler was responsible for the squeaking and that stopped but I am still using the same old drum belt. Hope it lasts.
Read less
Was this instruction helpful to you?
Thank you for voting!