



Models
>
WT7060CW
WT7060CW (ABWEUUS) LG Dryer
Jump to:
Find Part by Name
Keep searches simple, eg. "belt" or "pump".
Keep searches simple, eg. "belt" or "pump".
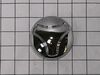
$48.21
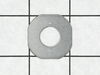
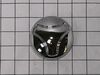
This part is known as a pulsator cap or washplate cap, and is designed for your LG washer. It fits over the washplate mounting bolt and prevents clothes from getting caught on the washplate during a w...
In Stock
Order now and your part arrives by Oct 3

In Stock
Order now and your part arrives by Oct 3
In Stock
Order now and your part arrives by Oct 3
In Stock
Order now and your part arrives by Oct 3
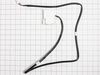
$148.42
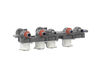
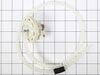
This part is the replacement switch assembly for your top-load washer. It contains the switch mechanism and the connecting wire that hooks the door latch to the electrical system of the washer. The li...
In Stock
Order now and your part arrives by Oct 3
In Stock
Order now and your part arrives by Oct 3
$137.30
This washer inlet valve assembly is responsible for regulating the flow of both hot and cold water into your washing machine. It opens and closes at specific points during the wash cycle to ensure the...
In Stock
Order now and your part arrives by Oct 3
In Stock
Order now and your part arrives by Oct 3
Special Order
In Stock
Order now and your part arrives by Oct 3
$130.07
This drain pump assembly is responsible for removing water from your washer during the drain cycle. It is typically at the bottom of the washing machine and connected to the drain hose. If it is damag...
On Order

In Stock
Order now and your part arrives by Oct 3
Common Problems and Symptoms for WT7060CW
Viewing 10 of 10Leaking
Fixed by these parts
How to fix it
Water Filling Issues
Fixed by these parts
How to fix it
Will not agitate
Fixed by these parts
How to fix it
Will not drain
Fixed by these parts
How to fix it
Draining Issues
Fixed by these parts
How to fix it
Will Not Start
Fixed by these parts
How to fix it
Lid or door won’t close
Fixed by these parts
How to fix it
Does not dispense fabric softener or detergent
Fixed by these parts
How to fix it
Marks left on clothes
Fixed by these parts
How to fix it
Locking Issues
Fixed by these parts
How to fix it
Keep searches simple. Use keywords, e.g. "leaking", "pump", "broken" or "fit".
- Customer:
- thomas m from CARMICHAEL, CA
- Parts Used:
- 4263FA3933C
- Difficulty Level:
- A Bit Difficult
- Total Repair Time:
- Less than 15 mins
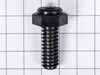
leg broke off inside housing
raised the front of washer by hand (literally) and placed two 2x4 blocks under front lip for support. reached up inside washer cabinet and unscrewed the broken leg piece upwards into the cabinet. this was the only way I could get the broken piece out without some specialized tool to reach it from the underside. replacement with the new
... Read more
leg was a breeze.
Read less
Was this instruction helpful to you?
Thank you for voting!
- Customer:
- Terry from SIMI VALLEY, CA
- Parts Used:
- AEM73732901
- Difficulty Level:
- Really Easy
- Total Repair Time:
- 30 - 60 mins
- Tools:
- Screw drivers
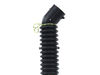
Drain hose had a pin hole leak external to washer
Very close to the installation video online at Parts Select. Removed the back panel, unclipped the hose from the inner fitting and replaced with the rear hose. Why it didn;t leak on the inside is interesting as there was no clip on the at the inner fitting.
The one difference from the existing install video online was that I didn't ... Read more have to tip the washer over ~75 degs before replacing. I instead found that I could put to cinder blocks under the back edge to replace the drain hose. This made the job quicker without having to worry about having a box for it to rest on (with any risk of falling to the floor).
The one difference from the existing install video online was that I didn't ... Read more have to tip the washer over ~75 degs before replacing. I instead found that I could put to cinder blocks under the back edge to replace the drain hose. This made the job quicker without having to worry about having a box for it to rest on (with any risk of falling to the floor).
Read less
Was this instruction helpful to you?
Thank you for voting!
- Customer:
- Roger from Bradenton, FL
- Parts Used:
- AAZ72925601
- Difficulty Level:
- Very Easy
- Total Repair Time:
- Less than 15 mins
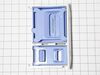
Detergent and Softner dispenser was not working peoperly
The old dispenser is removed by slightly raising the front as you pull it out of the housing slot. To install the new dispenser, keep the front slightly tilted up and insert the new dispenser into the housing alot
Was this instruction helpful to you?
Thank you for voting!