


Models
>
110C62102310
110C62102310 Kenmore Dryer
Jump to:
Find Part by Name
Keep searches simple, eg. "belt" or "pump".
Diagrams for 110C62102310
Viewing 5 of 5


 Diagram and Parts List for Kenmore Dryer")

Keep searches simple, eg. "belt" or "pump".

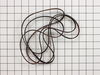
$15.26
This multi rib belt is an OEM replacement part for a dryer. It attaches to the drum, idler pulley, and motor pulley, and is responsible for spinning the drum. Over time, the belt can become frayed, br...
In Stock
Order now and your part arrives by Aug 3

$27.83
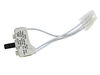
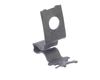
This OEM dryer door switch is an on/off mechanism that detects when the door is open to prevent the dryer from operating. If your dryer will turn on but will not start or continues working while the d...
In Stock
Order now and your part arrives by Aug 3

$6.51
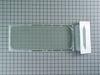
It is important for your dryer to be properly leveled, as an unleveled one can cause excessive vibration and noise when operating, may not drain properly, and can cause excessive wear on various parts...
In Stock
Order now and your part arrives by Aug 3

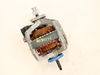
$101.78
This drive motor operates the dryer by turning the drive belt which spins the drum and will fit most Whirlpool incorporated dryer brands before 1996. If the motor has shorted out, it will no longer tu...
In Stock
Order now and your part arrives by Aug 3

$110.88
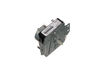
This dryer timer is used to control the unit's cycles by regulating the length of time that power is directed to each setting.
In Stock
Order now and your part arrives by Aug 3

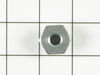
$7.60
This is a multi-use screw and can be used on a variety of appliances. The measurements of the screw are: 8/18 x 3/8. *Please note: the screw is sold individually. Refer to the manual provided by the m...
In Stock
Order now and your part arrives by Aug 3

$22.91
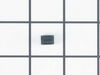
If your dryer door keeps popping open or won’t latch, this door catch might be the fix you need. It’s a small part, but it plays a big role in keeping your dryer running smoothly. Just swap out the ol...
In Stock
Order now and your part arrives by Aug 3

$60.49
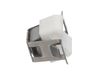
This push to start switch is an authentic OEM replacement part for your dryer. Once a setting has been selected on the timer, the switch is then used to complete the circuit and start the cycle. If yo...
In Stock
Order now and your part arrives by Aug 3

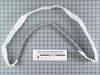
$55.18
This is a genuine OEM replacement door gasket for your dryer. The gasket, also known as a door seal, is used to provide an airtight seal when the dryer door is closed. If the gasket has failed it can ...
In Stock
Order now and your part arrives by Aug 3

$41.78
Hearing squealing or grinding from your dryer? The motor pulley might be the culprit. This part helps the drum spin by supporting the belt where it connects to the motor. It’s a genuine replacement an...
In Stock
Order now and your part arrives by Aug 3

This is a multi-use cover screw. It fits appliances such as dryers, ranges, washers, dishwashers, refrigerators, air conditioners, washer dryer combos, freezers, wall ovens, microwaves, dehumidifiers,...
In Stock
Order now and your part arrives by Aug 3

$16.35
This part is the replacement single front panel clip for your dryer. It is made of metal and is approximately 2 inches long and ¾ inch wide. The front panel retainer clip is what holds the front panel...
In Stock
Order now and your part arrives by Aug 3
Common Problems and Symptoms for 110C62102310
Viewing 14 of 14Noisy
Fixed by these parts
How to fix it
Drum Not Spinning
Fixed by these parts
How to fix it
Won’t Start
Fixed by these parts

How to fix it
Door won’t close
Fixed by these parts

How to fix it
Running With Door Open
Fixed by these parts
How to fix it
Timer Not Working
Fixed by these parts
How to fix it
Door Pops Open
Fixed by these parts
How to fix it
Heat stays on after drum has stopped
Fixed by these parts
How to fix it
Not Heating
Fixed by these parts

How to fix it
Marks left on clothes
Fixed by these parts
How to fix it
Light not working
Fixed by these parts
How to fix it
Will Not Start
Fixed by these parts
How to fix it
Touchpad does not respond
Fixed by these parts
How to fix it
Too hot
Fixed by these parts
How to fix it


Keep searches simple. Use keywords, e.g. "leaking", "pump", "broken" or "fit".
- Customer:
- pat from lisbon,, OH
- Parts Used:
- WP3406107
- Difficulty Level:
- Really Easy
- Total Repair Time:
- 15 - 30 mins
- Tools:
- Screw drivers, Wrench set
door switch was bad
i was able to go on line with your company , find my dryer, order the part and had it the next day. fast , great , service
Was this instruction helpful to you?
Thank you for voting!
- Customer:
- RICHARD from NORCROSS, GA
- Parts Used:
- WP3406107
- Difficulty Level:
- Really Easy
- Total Repair Time:
- 15 - 30 mins
- Tools:
- Nutdriver, Screw drivers
Dryer Would Not Turn Off With Door Open
Pryed dryer top open and opened front door. . Unscrewed the 2 retaining screws. Pulled old switch from the wiring harness. Put new switch in place and replaced the retaining screws. Put new switch wire plug into the wiring harness. Before closing top, checked door switch function with dryer on. Dryer cut off when door open an
... Read more
d when closed dryer started normally. . . Maint. Note instruction book should warn that letting door slam, which I did on occaision, broke the switch arm. Might save future problems.
Read less
Was this instruction helpful to you?
Thank you for voting!
- Customer:
- April from Xenia, OH
- Parts Used:
- WP3406107
- Difficulty Level:
- Easy
- Total Repair Time:
- 30 - 60 mins
- Tools:
- Pliers, Screw drivers
Dryer wouldn't turn on b/c door switch broken
It was simple once I figured out what to do:). I removed the 2 screws on the top of the dryer... they were a bit hard to find. Even with the other descriptions on this site. I was removing things I didn't need to. The 2 screws you need to remove are under the LINT COLLECTOR LID. Remove those 2 screws & lift the lid... it will be tigh
... Read more
t at first. the front of the lid has 2 "catches" in the corners.
The hardest part was getting the door switch assembly to "unplug". We pried it off -- eventually -- & then simply plugged in the new one.
Saved me LOTS of money & was worth the 30 minutes - 1 hour of work.
As I said previously, once you realize how to get the lid up & manage to pry off the plug, that's all there is to it -- easy!
Save yourself time & money & do it yourself!
Read less
Was this instruction helpful to you?
Thank you for voting!