


Models
>
41791052001
41791052001 Kenmore Dryer
Jump to:
Find Part by Name
Keep searches simple, eg. "belt" or "pump".
Manuals & Guides for 41791052001
Click to downloadInstall
Installation Instructions
(0.61MB)
Care
Use and Care Manual
(0.25MB)
Wiring
Wiring Diagram
(0.15MB)
Keep searches simple, eg. "belt" or "pump".

$43.95
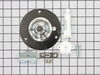
This ball-and-socket style bearing kit is used in your dryer to support the rear of the drum as it tumbles through the dry cycle. The bearing attaches on the inside of the rear panel of the dryer cabi...
In Stock
Order now and your part arrives by Aug 1

$10.95
The drum support bearing is an authentic OEM replacement part for your dryer. The bearing is used to support the drum and allow it to rotate smoothly and quietly. If your dryer is excessively noisy wh...
In Stock
Order now and your part arrives by Aug 1

In Stock
Order now and your part arrives by Aug 1

$63.45
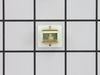
This door catch is an authentic OEM replacement part for your dryer. This part holds the door strike and ensures that the door stays closed while your dryer is running. This prevents hot air or laundr...
In Stock
Order now and your part arrives by Aug 1

Special Order

$74.46
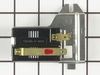
This part is used to start the dryer once you have selected a setting on the timer.
In Stock
Order now and your part arrives by Aug 1

$28.22
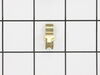
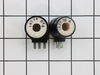
This coil ignition kit is used in dryers to open the gas valve when the dryer is on. This kit includes two coils. One is a two-wire secondary coil and the other is a three-wire booster coil. If your d...
In Stock
Order now and your part arrives by Aug 1

$23.05
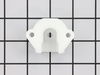
This drum bearing bracket is for dryers. Drum bearing bracket holds and supports the drum bearing
In Stock
Order now and your part arrives by Aug 1

$37.35
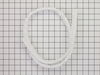
This white dryer lint filter screen collects lint as it passes through the dryer vent.
In Stock
Order now and your part arrives by Aug 1

In Stock
Order now and your part arrives by Aug 1

The upper felt seal for your dryer is attached to the top edge of the drum support area, and is held there by a high temperature adhesive. It creates a seal where the dryer door opens and closes, so t...
In Stock
Order now and your part arrives by Aug 1

$60.45
Part may differ in color from image. Please note that this is only a cosmetic difference.
In Stock
Order now and your part arrives by Aug 1
Common Problems and Symptoms for 41791052001
Viewing 7 of 7Noisy
Fixed by these parts

How to fix it
Door won’t close
Fixed by these parts
How to fix it
Marks left on clothes
Fixed by these parts
How to fix it
Not Heating
Fixed by these parts
How to fix it
Drum Not Spinning
Fixed by these parts
How to fix it
Door Pops Open
Fixed by these parts
How to fix it
Won’t Start
Fixed by these parts
How to fix it


Keep searches simple. Use keywords, e.g. "leaking", "pump", "broken" or "fit".
- Customer:
- Frank from Boyertown, PA
- Parts Used:
- 5303281153
- Difficulty Level:
- Easy
- Total Repair Time:
- 15 - 30 mins
- Tools:
- Nutdriver, Screw drivers
Loud Squeaking
1. Unplug dryer from outlet
2. Using Lg. flat screwdriver, pry under the front edge of the top and release two spring tabs
3. Lift up top and tilt back out of your way
4. Unscrew two phillips scews on inside of front panel
5. Lift up and out the front panel. Two spring clips at bottom.
6. Rlease tension on drum be ... Read more lt at the motor. Access panel at rear of dryer.
7.Unscrew 3 screws from inside, center rear of drum.
8. Remove drum through the front of the dryer. You may have to spread the sides apart a little bit for it to fit
9. Lift up on the rear drum bearing to remove it from the bearing retainer. ( U shaped plastic socket)
10. unsrew 2 screws and remove the bearing retainer, ground ball. Ball retainer is on outside of dryer.
11. Vacuum everything--duct, blower, lint trap, ect.
12. Intall new bearing retainer and grounding ball, an assistant is helpful at this time, one to hold ball retainer on rear of dryer, one to screw it in from the inside
13. reassemble remainder of parts in reverse order.
Read less
Was this instruction helpful to you?
Thank you for voting!
- Customer:
- Brett from Monticello, MN
- Parts Used:
- 5303931775
- Difficulty Level:
- Easy
- Total Repair Time:
- 15 - 30 mins
- Tools:
- Screw drivers
Dryer would heat initially then cool down
The top of the dryer was easily removed by prying the front up with a screwdriver then tipping it back and off of the mounting brackets. Then the front of the dryer was removed by unscrewing a single screw on each side that held the front to the side panels then pulling the front away from the dryer. Once the front was off, the coils we
... Read more
re easily accessible on the bottom left side. A metal bracket held the coils on and was somewhat tough to get the two screws removed on it as they were stuck, but once they were removed the coils easily came out and I was able to replace them in minutes. The whole job took 15-20 minutes and I now have a dryer that heats through the entire drying cycle.
Read less
Was this instruction helpful to you?
Thank you for voting!
- Customer:
- Dirk from Sonoma, CA
- Parts Used:
- 5303937186, 5303281135, 134048900
- Difficulty Level:
- A Bit Difficult
- Total Repair Time:
- 30 - 60 mins
- Tools:
- Pliers, Screw drivers
dryer won't stay hot, gas smell
Pulled unit out from wall to access back panel. Top needs to be removed to get to the screws that hold on the front panel and door. These need to be removed to get to the valve and burner.
Once your in, the sensor, thermostat, and igniter are right up front. Sensor and thermostat were easy, the igniter breaks very easily... ... Read more how do I know? Cause I broke the one I bought and had to get a new one.
I also replaced the coil set for the gas valve, because I had read that they can go bad and cause a gas fume smell. The coils are cheap, so you may as well as do them at the same time.
Anyway, once the repair was complete, I reassembled the unit and hooked up the vent.
Runs like new, and the clothes dry quickly.
Read less
Was this instruction helpful to you?
Thank you for voting!