


Models
>
11082826100
11082826100 Kenmore Dryer
Jump to:
Find Part by Name
Keep searches simple, eg. "belt" or "pump".
Manuals & Guides for 11082826100
Click to downloadKeep searches simple, eg. "belt" or "pump".

$8.70
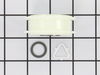
This kit includes two door strikes, and three door catches, to service doors that have one or two catches. The strike is mounted on the body of the dryer, while the catch is mounted on the dryer door....
In Stock
Order now and your part arrives by Aug 1

$60.49
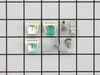
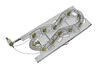
When connected to electricity the dryer heating element glows red hot and generates heat. When air is blown over it, it heats the air which is used to dry the clothes. The heating element fits inside ...
In Stock
Order now and your part arrives by Aug 1

In Stock
Order now and your part arrives by Aug 1

$27.28
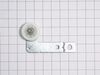
Often referred to as a dryer belt tension pulley wheel, this idler pulley is an OEM approved replacement part for a variety of dryer models. The idler pulley puts tension on the drive belt, and if the...
In Stock
Order now and your part arrives by Aug 1

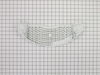
$45.00
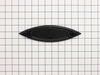
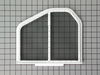
If the lint filter in your dryer has become damaged and unusable, it is important to replace it as soon as possible. The filter traps lint and other debris from your laundry, keeping it out of your ai...
In Stock
Order now and your part arrives by Aug 1

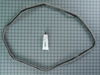
$25.10
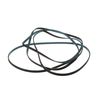
This is a single dryer drum belt that measures 93.5 inches. The belt rotates the dryer drum and is a common wear part that can become brittle over time. It can also stretch and change shape, so keep t...
In Stock
Order now and your part arrives by Aug 1

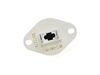
The internal-bias thermostat, also know as a thermistor, is used to prevent the dryer from overheating. It does this by monitoring and controlling the temperature of the inside of the dryer drum. If ...
In Stock
Order now and your part arrives by Aug 1

$11.98
This small but mighty OEM piece is called a tri-ring and is used to support the drum roller shaft and the idler pulley shaft in your dryer. It helps to provide a tight seal between components by evenl...
In Stock
Order now and your part arrives by Aug 1

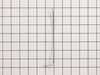
$6.51
It is important for your dryer to be properly leveled, as an unleveled one can cause excessive vibration and noise when operating, may not drain properly, and can cause excessive wear on various parts...
In Stock
Order now and your part arrives by Aug 1

$27.83
If your dryer is not tumbling, will not start, or is excessively noisy while operating, there may be an issue with your idler pulley. The idler pulley works by maintaining a constant tension on the dr...
In Stock
Order now and your part arrives by Aug 1

This thermal cut-off kit includes a genuine OEM replacement high limit thermostat and a fuse. The thermostat is a safety device used to prevent the dryer from overheating, and the fuse serves as a bac...
In Stock
Order now and your part arrives by Aug 1

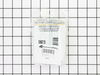
$9.79
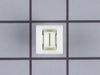
This is an authentic OEM replacement moisture sensor for your dryer. The sensor detects the moisture levels in your clothing while the appliance is operating, and once the appropriate level has been r...
In Stock
Order now and your part arrives by Aug 1
Common Problems and Symptoms for 11082826100
Viewing 14 of 14Noisy
Fixed by these parts

How to fix it
Door won’t close
Fixed by these parts
How to fix it
Not Heating
Fixed by these parts

How to fix it
Drum Not Spinning
Fixed by these parts
How to fix it
Too hot
Fixed by these parts
How to fix it
Won’t Start
Fixed by these parts
How to fix it
Door Pops Open
Fixed by these parts
How to fix it
Marks left on clothes
Fixed by these parts
How to fix it
Touchpad does not respond
Fixed by these parts
How to fix it
Lid or door won’t close
Fixed by these parts
How to fix it
Will not agitate
Fixed by these parts
How to fix it
Burning smell
Fixed by these parts
How to fix it
Running With Door Open
Fixed by these parts
How to fix it
Spins slowly
Fixed by these parts
How to fix it


Keep searches simple. Use keywords, e.g. "leaking", "pump", "broken" or "fit".
- Customer:
- Terri from Saint Augustine, FL
- Parts Used:
- 279570
- Difficulty Level:
- Really Easy
- Total Repair Time:
- Less than 15 mins
Door Catch part had fallen out,/ was missing
Received your parts, Popped them both right into place, Even though only one side needed to be replaced, I wanted them to match up. It was amazing how easy this was. My husband was quite impressed I had ordered these rather then look for either a new or used dryer from some other source.
Was this instruction helpful to you?
Thank you for voting!
- Customer:
- Alan from Brooksville, FL
- Parts Used:
- WP3387747
- Difficulty Level:
- Easy
- Total Repair Time:
- 30 - 60 mins
- Tools:
- Socket set
Burned out heater element
Remove the kick plate from the bottom of the dryer by sliding a putty knife along the top edge to release the plastic clamps, one on each side about 4" in from the edges. The kick plate folds out and down. You will see the heat shield on the right, held in by one hex head screw. Remove screw and heat shield. The element is positioned in a
... Read more
n open-front housing and is fastened to the left side of the housing by two hex head screws, located on the "rail" of the element and right near the two wires. Remove the hex-head screws that hold the element in place and disconnected the two wires by pulling them out by hand or with needle nose pliers. The only difficulty here is the cramped working area...I recommend a stubby socket driver for these two screws. Most of this I had to do by feel because I could not see the screw heads. Once the screws are out and the wires have been disconnected, slide the old element straight out toward you. You may need to disconnect a small plastic hose located to the left front of the element, but this hose just pulls right off. Vacume the dust & lint build-up out of the whole area, wipe out the element housing and clean up the whole underside of the dryer prior to installing the new element. Installation is reverse of removal. It also might be a good opportunity to clean out your exhaust duct and the vent to the outside. (Never use the aluminum foil-accordian-type duct.) If the exterior dryer vent has any kind of screen over it, remove it and get rid of it. Screens collect lint, lint builds up and burns out elements.
Read less
Was this instruction helpful to you?
Thank you for voting!
- Customer:
- Colleen from Lenox, MI
- Parts Used:
- WP8559751
- Difficulty Level:
- Easy
- Total Repair Time:
- Less than 15 mins
- Tools:
- Screw drivers
Handle on Kenmore he3 dryer door broke off
1) Removed six smaller Phillips head screws from around the inside of the dryer door. This allowed the black plastic front piece of the dryer door to come off.
2) Unscrewed the two screws holding the damaged door handle and removed the old door handle.
3) Screwed new door handle on to the black plastic front piece o ... Read more f the dryer door
4) Replaced black plastic front piece on the dryer door and screwed the original six screws back in.
2) Unscrewed the two screws holding the damaged door handle and removed the old door handle.
3) Screwed new door handle on to the black plastic front piece o ... Read more f the dryer door
4) Replaced black plastic front piece on the dryer door and screwed the original six screws back in.
Read less
Was this instruction helpful to you?
Thank you for voting!