


Models
>
1106008711
1106008711 Kenmore Dryer
Jump to:
Find Part by Name
Keep searches simple, eg. "belt" or "pump".
Keep searches simple, eg. "belt" or "pump".

$19.75
This is a genuine OEM 40-Watt replacement light bulb that is compatible with various types of appliances. It has a frosted glass bulb with a standard metal socket base, making it easy to screw and uns...
In Stock
Order now and your part arrives by Jul 31

$19.63
This 10-watt clear bulb provides dependable lighting inside dryers and refrigerators, helping you see the interior clearly when the door is open. Compatible with a variety of appliance models, it inst...
In Stock
Order now and your part arrives by Jul 31

In Stock
Order now and your part arrives by Jul 31

$7.60
This is a multi-use screw and can be used on a variety of appliances. The measurements of the screw are: 8/18 x 3/8. *Please note: the screw is sold individually. Refer to the manual provided by the m...
In Stock
Order now and your part arrives by Jul 31

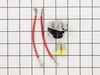
This thermostat kit helps regulate your dryer’s temperature by cycling the heating element on and off. It’s adjustable between 135°F and 155°F and reactivates the heat when the temperature drops by 20...
In Stock
Order now and your part arrives by Jul 31

$16.35
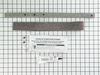
This part is the replacement single front panel clip for your dryer. It is made of metal and is approximately 2 inches long and ¾ inch wide. The front panel retainer clip is what holds the front panel...
In Stock
Order now and your part arrives by Jul 31

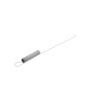
This dryer door cable is intended for use with spring part number PS343422. This cable is compatible with many of Whirlpool/Kenmore's brands of gas and electric clothes dryers.
No Longer Available

In Stock
Order now and your part arrives by Jul 31

$7.60
***The manufacturer suggests to replace both springs at the same time.***
In Stock
Order now and your part arrives by Jul 31

$7.60
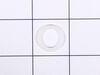
This screw is a little under an inch long and is made of metal. It is used with a refrigerator's ice maker assembly. Sold individually.
In Stock
Order now and your part arrives by Jul 31

In Stock
Order now and your part arrives by Jul 31

In Stock
Order now and your part arrives by Jul 31
Common Problems and Symptoms for 1106008711
Viewing 7 of 7Noisy
Fixed by these parts
How to fix it
Too hot
Fixed by these parts
How to fix it
Door won’t close
Fixed by these parts
How to fix it
Will not agitate
Fixed by these parts
How to fix it
Not Heating
Fixed by these parts
How to fix it
Burning smell
Fixed by these parts
How to fix it
Spins slowly
Fixed by these parts
How to fix it


Keep searches simple. Use keywords, e.g. "leaking", "pump", "broken" or "fit".
- Customer:
- George from Rochester Hills, MI
- Parts Used:
- WP230131
- Difficulty Level:
- Easy
- Total Repair Time:
- 30 - 60 mins
- Tools:
- Nutdriver, Screw drivers
Dryer door cable broken
1. Remove the lint filter. Then remove 2 screws at the lint filter housing.
2. At the back of the dryer, remove 2 screws that restrain the hinges for the dryer top. Do NOT remove the hinges.
3. Remove the front lower access panel. It snaps at the top and hinges at the bottom. It can be slipped off the hinges.
... Read more />
4. Remove 2 screws at the bottom of the main front panel
5. The front of the dryer top is held in place by two plastic clips. Use a flat blade screwdriver (with a rag wrapped around the tip to minimize paint damage) to pry the top up at each front corner. Then tilt the top up to just past vertical. You now can see the top of the spring that is connected to the door cable.
6. Open the dryer door. Use a putty knife to pry up the plastic plug that holds the cable in place at the door. Remove the old cable from the door and insert the new one. Be sure the cable end without a hole goes into the dryer door. Replace the plastic plug.
7. Feed the new cable through the main front panel and close the door.
8. Loosen but do NOT remove two screws that hold the main front panel to each side panel. Tilt the bottom of the front panel out about 2 inches.
9. Working through the gap between the main front panel and the side, hook the spring into the hole in the cable end.
10. Working through the open top and the gap on the side, move the spring+cable up to the top. Pass the upper end of the spring through the rectangular hole in the top of the main front panel and hook the end into the small hole there.
11. Repeat for other cable as needed.
12. Reassemble all parts. You may need to hold the top of the drum up as you move the main front panel back into place. Install the main front panel lower screws before tightening the upper screws.
Read less
Was this instruction helpful to you?
Thank you for voting!
- Customer:
- Robert from Buffalo, NY
- Parts Used:
- WP694674
- Difficulty Level:
- Easy
- Total Repair Time:
- 30 - 60 mins
- Tools:
- Nutdriver, Screw drivers
Temperature setting not working
Took off back cover, thermostat was easily identified because of photos I've seen on website. Took 2 connectors off, removed 2 screws and removed old thermostat. That was pretty much it!
NOTE: Replacement thermostat 694674 has an adjustable temperature range setting that MUST be manually set prior to installing! You need to use ... Read more the enclosed chart to find your original part# and make sure the setting is matched. My original part# 341146 had a "D" setting so I had to change but very easy to do.
NOTE: Replacement thermostat 694674 has an adjustable temperature range setting that MUST be manually set prior to installing! You need to use ... Read more the enclosed chart to find your original part# and make sure the setting is matched. My original part# 341146 had a "D" setting so I had to change but very easy to do.
Read less
Was this instruction helpful to you?
Thank you for voting!
- Customer:
- Leslie from Townsend, GA
- Parts Used:
- 279264
- Difficulty Level:
- Easy
- Total Repair Time:
- 1- 2 hours
- Tools:
- Nutdriver, Pliers, Screw drivers
Drum was binding because of worn bearing supporting front of dryer drum
First I unplugged the dryer for safety, then I removed the top of the dryer, then removed the 2 hex head screws holding the font door panel onto the dryer. Then I disconnected the door safety switch. the rest was cake. I removed the old bearing and cut the new bearing and seal to the exact size of the old one. I used contact cement to gl
... Read more
ue the new bearing and seal into place. Reassembly was a breeze. End of job. Success!!!
Read less
Was this instruction helpful to you?
Thank you for voting!