



Models
>
41784132002
41784132002 Kenmore Dryer
Jump to:
Find Part by Name
Keep searches simple, eg. "belt" or "pump".
Manuals & Guides for 41784132002
Click to downloadInstall
Installation Instructions
(5.62MB)
Specs
Product Specifications Sheet
(0.32MB)
Care
Use and Care Manual
(3.9MB)
Wiring
Wiring Diagram
(0.32MB)
Keep searches simple, eg. "belt" or "pump".
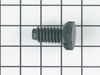
This is an adjustable foot for your freezer, refrigerator, and dryer. This part supports your unit by screwing into one of the bottom four corners, and adjusting the height of your machine. If your ap...
In Stock
Order now and your part arrives by Oct 19
In Stock
Order now and your part arrives by Oct 19
In Stock
Order now and your part arrives by Oct 19
In Stock
Order now and your part arrives by Oct 19

In Stock
Order now and your part arrives by Oct 19
Special Order
In Stock
Order now and your part arrives by Oct 19
Special Order
Special Order
In Stock
Order now and your part arrives by Oct 19
Special Order
Common Problems and Symptoms for 41784132002
Viewing 3 of 3Noisy
Fixed by these parts
How to fix it
Marks left on clothes
Fixed by these parts
How to fix it
Ice maker not making ice
Fixed by these parts
How to fix it
Keep searches simple. Use keywords, e.g. "leaking", "pump", "broken" or "fit".
- Customer:
- Kristi from Winfield, WV
- Parts Used:
- 218470300
- Difficulty Level:
- Really Easy
- Total Repair Time:
- Less than 15 mins
- Tools:
- Nutdriver, Pliers
Ice Maker Repair
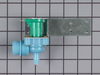
The ice maker wouldn't fill with water. The maker itself appeared to operate but the tray would not fill. I ordered the part from PartSelect.com. The website allowed me to conveniently match a picture of the part with my part on the refrig. I ordered the part and it arrived in two days. I was impressed!
I turned the water ... Read more to the ice maker off, unplugged the refrig. and pulled it out from the wall. I loosened and removed two screws with a nut-driver and unplug the wiring connection from the old part by simply pulling on it with my fingers. I then unscrewed the water connection from the old part using a set of pliers. The old part was then discarded. I connected the water and electrical and remounted the new part using the two screws. It was too easy!
I turned the water ... Read more to the ice maker off, unplugged the refrig. and pulled it out from the wall. I loosened and removed two screws with a nut-driver and unplug the wiring connection from the old part by simply pulling on it with my fingers. I then unscrewed the water connection from the old part using a set of pliers. The old part was then discarded. I connected the water and electrical and remounted the new part using the two screws. It was too easy!
Read less
Was this instruction helpful to you?
Thank you for voting!
- Customer:
- Dave from SAN FRANCISCO, CA
- Parts Used:
- 5308027429
- Difficulty Level:
- Easy
- Total Repair Time:
- 1- 2 hours
- Tools:
- Screw drivers
Noisy squeaky dryer
Main problem was the bearing, replaced the belt and felt seal as well
The video instruction was very helpful
Was easy with basic mechanical aptitude
Dryer running great now
All parts from Partselect.com
Have ordered from them before and would order from them again
The video instruction was very helpful
Was easy with basic mechanical aptitude
Dryer running great now
All parts from Partselect.com
Have ordered from them before and would order from them again
Was this instruction helpful to you?
Thank you for voting!
- Customer:
- Terry from Lakewood, OH
- Parts Used:
- 218470300
- Difficulty Level:
- Really Easy
- Total Repair Time:
- Less than 15 mins
- Tools:
- Screw drivers
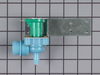
Plastic water valve sprung a leak through the plastic.
Fast and easy. Started by pulling out refrigerator and unplugging it. Water valve for ice maker was already turned off due to leaking. Disconnected old valve, detached old valve, reattached new valve and reconnected water lines. Bled the lines and turned back on. Make sure temp in freezer stays at recommended temps for ice making.
Was this instruction helpful to you?
Thank you for voting!