


Models
>
NJLR473GV0WW
NJLR473GV0WW Hotpoint Dryer
Jump to:
Find Part by Name
Keep searches simple, eg. "belt" or "pump".
Diagrams for NJLR473GV0WW
Viewing 4 of 4


Keep searches simple, eg. "belt" or "pump".

$9.01
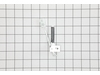
This clip fits inside the control knobs for your laundry machines, and helps to securely fasten the knob to the shaft, which allows you to easily turn the knob to select the correct settings. This is ...
In Stock

$9.25
If the lightbulb inside your dryer drum has burned out, this is an authentic OEM replacement. It is a 10W, 120V bulb that is sold individually. The bulb turns on when the dryer door is open and should...
In Stock

$88.17
This rear drum bearing kit is a genuine OEM replacement for your dryer. The kit includes a shaft, ground strap, bracket, bearing and seven screws for installation. The bearing supports that back of th...
In Stock

In Stock

In Stock

$21.04
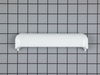
This slide is sold individually. Some dryers require up to three of these slides . Be sure to check to make sure you order the necessary amount for your dryer.
In Stock

$54.65
This part is used to start the dryer once you have selected a setting on the timer.
In Stock

In Stock

In Stock

In Stock

$8.54
TThe door strike for your dryer is mounted on the dryer frame that the door shuts onto. It fits into the door catch on the door and keeps the door closed. If the door strike is damaged or missing, the...
In Stock

$18.69
This part is the rear dryer drum bearing only. This part helps keep your dryer running smoothly as possible with as little noise as possible.
In Stock
Questions and Answers
We're sorry, but our Q&A experts are temporarily unavailable.
Please check back later if you still haven't found the answer you need.
Common Problems and Symptoms for NJLR473GV0WW
Viewing 5 of 5Noisy
Fixed by these parts


How to fix it
Door won’t close
Fixed by these parts


How to fix it
Marks left on clothes
Fixed by these parts


How to fix it
Will Not Start
Fixed by these parts

How to fix it
Not Heating
Fixed by these parts
How to fix it


Keep searches simple. Use keywords, e.g. "leaking", "pump", "broken" or "fit".
- Customer:
- Matt from La Belle, MO
- Parts Used:
- WE12X10014
- Difficulty Level:
- A Bit Difficult
- Total Repair Time:
- 15 - 30 mins
- Tools:
- Nutdriver, Screw drivers, Socket set
dryer belt broke
first I took the dryer apart 1st thing i did was unplug the power supply (safety first) then I removed the top of the unit then removed the front cleaned all the lint from the inside of the cabinet I found the proper belt size on part select.com the next day I had my dryer belt delivered (which cost 1/3 the price of the local repair shop
... Read more
price)
then I placed the belt over the dryer drum and made sure it was in the general location it should be I then replaced the front cover and the top. then I removed the rear cover which was held on by six 5/16 sheet metal screws which gave me access to the drive pulley and belt tensioner the belt goes on by going under the tensioner then around the drive pulley
Then i rotated the drum by hand to make sure everything had clearance I then buttend everything up plugged it and started it up it workd fine and I figure Ill get another 8 years out of it
Thank you partselect.com
Read less
Was this instruction helpful to you?
Thank you for voting!
- Customer:
- Jaren from Lemoore, CA
- Parts Used:
- WE4X881
- Difficulty Level:
- A Bit Difficult
- Total Repair Time:
- 15 - 30 mins
- Tools:
- Pliers, Screw drivers
Broken Knob Post
First I unplugged the dryer, then I removed the access panel on the back of the control panel. I removed the wires from the back of the switch...Here is where I messed up. I removed the switch prior to ordering the part, the bad part is the way I removed the part. When you get the new part in you will be able to see how it will be mounted
... Read more
to the control panel. I had no idea, so I did what was necessary to remove it. Needless to say, I bent the hell out of the hole that the switch mounts in. In turn, the installation of the new switch did not go as easily as I would have liked. After straightening out some metal and drowning the thing in epoxy, the new switch is installed. I hooked the wires back up on the back of the switch, plug in the dryer, and dry some clothes. Standing victorious over the dryer with beer in hand, not only did I accomplish the mission but I learned my lesson... destructive removal = BAD!
Read less
Was this instruction helpful to you?
Thank you for voting!
- Customer:
- Gary L. from Freeport, IL
- Parts Used:
- WE04X25996, WE4X448
- Difficulty Level:
- A Bit Difficult
- Total Repair Time:
- 1- 2 hours
- Tools:
- Screw drivers
The dryer drum turned ok, but the gas heat did not start.
First I found and watched three videos on how to open the dryer and replace the igniter.
Then I opened the dryer, but I did not remove the belt as suggested in the video, and then I removed the ignitor and flame detecter as the videos had shown.
I got on-line and ordered the new parts from PartsSelect in the afternoon and had t ... Read more hem in my hands the next morning by 9:30 am.
I installed the new parts and everything worked fine again. You must be very careful with the igniter to not touch it with hands or anything else. I practiced puting in the old parts first.
Read less
Was this instruction helpful to you?
Thank you for voting!