


Models
>
BWXR473ET0WW
BWXR473ET0WW General Electric Dryer
Jump to:
Find Part by Name
Keep searches simple, eg. "belt" or "pump".
Diagrams for BWXR473ET0WW
Viewing 4 of 4


Manuals & Guides for BWXR473ET0WW
Click to downloadKeep searches simple, eg. "belt" or "pump".

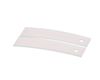
This single drum bearing slide attaches to the outer-most side of the bearing. This part is also sometimes referred to as a drum slide, drum glide, or drum pad. It provides support to the front of the...
In Stock
Order now and your part arrives by Apr 2

$17.44
This durable fastening nut secures internal components such as panels, brackets, or control housings. When worn or missing, the appliance may rattle, vibrate, or shift out of alignment. Replacing the ...
On Order

In Stock
Order now and your part arrives by Apr 2


Questions and Answers
We're sorry, but our Q&A experts are temporarily unavailable.
Please check back later if you still haven't found the answer you need.
Common Problems and Symptoms for BWXR473ET0WW
Viewing 3 of 3Noisy
Fixed by these parts
How to fix it
Marks left on clothes
Fixed by these parts
How to fix it
Drum Not Spinning
Fixed by these parts
How to fix it

Keep searches simple. Use keywords, e.g. "leaking", "pump", "broken" or "fit".
- Customer:
- Al from Elmhurst, IL
- Parts Used:
- WE03X37318
- Difficulty Level:
- Really Easy
- Total Repair Time:
- 15 - 30 mins
- Tools:
- Screw drivers
The Front Drum Glides wore out
I first unplugged the unit, opened the top, disconnected and took off the control panel, took off the front panel to determine the source of the squeaking noise coming from the Dryer. I saw that 3 of the 4 Front Drum Glides were gone and the drum had worn away significant amounts of plastic from the Top Bearing Assembly. I purchased the
... Read more
Top Bearing Assembly and a set of 4 Front Drum Glides. Disassembled the damaged parts and reassembled with the new replacement parts. The reassembly took less than 20 minutes. I plugged in the Dryer and viola! It works as good as new.
Read less
Was this instruction helpful to you?
Thank you for voting!
- Customer:
- philip from pickens, SC
- Parts Used:
- WE03X37318
- Difficulty Level:
- Easy
- Total Repair Time:
- 1- 2 hours
- Tools:
- Nutdriver, Screw drivers, Socket set
Replaced Drum Bearing Front And Rear
Pulled the unit all apart to replace the rear drum bearing. Also replaced the front bearing. Works like brand new. Easier then I thought
Was this instruction helpful to you?
Thank you for voting!
- Customer:
- Cheryl from Inwood, WV
- Parts Used:
- WE03X37318
- Difficulty Level:
- Easy
- Total Repair Time:
- 30 - 60 mins
- Tools:
- Screw drivers
Making noise while drum was turning.
Removed 2 screws to remove top. Removed 2 other screws to remove front. Removed old parts. Installed new parts. Reassemble all afetr cleaning duct work out.
Was this instruction helpful to you?
Thank you for voting!