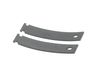
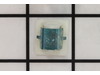
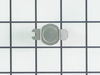
This single drum bearing slide is an OEM approved replacement part for dryers. It can also be known as a bearing drum slide, pad, or glide. The slides attach to the inner most slots on the front beari...
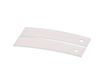
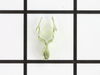
This single drum bearing slide attaches to the outer-most side of the bearing. This part is also sometimes referred to as a drum slide, drum glide, or drum pad. It provides support to the front of the...
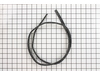
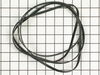
This 89.5-inch drive belt is for dryers. It has a 4-rib design on the inside for a better grip. If comparing the size of your current belt to the new one, keep in mind that a small amount of stretchin...
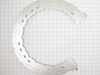
This is a duct felt seal for a dryer. The duct felt seal allows the front-load dryer drum to glide smoothly on the front panel. Your dryer will not function properly if the drum felt seal is compromis...
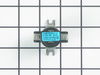
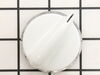
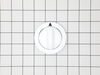
This knob and clip set is an OEM replacement part for your washer or dryer timer. It is common for this plastic knob to break around the shaft, or for the retainer clip inside the knob to go missing, ...
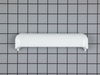
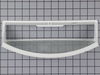
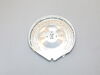
The lint filter is an important component of your dryer, as it traps lint and other debris from entering the dryer vents, where they can become a fire hazard. If your lint filter has become damaged or...
If the lightbulb inside your dryer drum has burned out, this is an authentic OEM replacement. It is a 10W, 120V bulb that is sold individually. The bulb turns on when the dryer door is open and should...
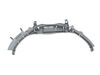
This rear drum bearing kit is a genuine OEM replacement for your dryer. The kit includes a shaft, ground strap, bracket, bearing and seven screws for installation. The bearing supports that back of th...
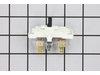
This push-to-start switch is a genuine OEM part and is used to activate your dryer. If your dryer will not start, or will only start if the switch is pushed down, or the timer knob is not engaging wit...
This knob accepts a D-shaped shaft. Sold individually.
In Stock
Order now and your part arrives by Jul 23
Questions and Answers
Ask our experts a question about this part and we'll get back to you as soon as possible!
1 question answered by our experts.
< Prev
1
Next >
Sort by:
Search filter:
Clear Filter
Your search term must have 3 or more characters.
Keep searches simple. Use keywords, e.g. "leaking", "pump", "broken" or "fit".
Sorry, we couldn't find any existing answers that matched. Try using some different or simpler keywords, or submit your new question by using the "Ask a Question" button above!
Jackie
January 16, 2024
How do I install a new timer
For model number GTDP280ED0WW
Hi Jackie, Thank you for asking. Unplug the appliance before starting the repair. Remove the knob from the Timer Switch Shaft. You will need to remove the back of the panel to expose the Timer Switch. Once the panel is removed, rotate the old Timer counter clock wise to unlock from the panel tabs. Remove each wire from the old timer and attach tot he new timer one by one so you know the new timer is wired correctly. Once the wires are transferred, line the new timer up to the panel tabs and rotate clock wise to lock into place and replace the back of the panel. Reinstall the knob to the shaft and plug the appliance back in to test. We hope this helps!
Was this helpful?
Thank you for voting!
Ask a Question
Ask our experts a question on this part and we'll respond as soon as we can.
It was pretty easy. After already taking apart the dryer to install a new belt I knew exactly my plan of action. I removed the two screws that hold the top panel of the dryer to the front panel. I then removed the top panel and removed the screws that hold the front to each side panel. I than pulled the front away from the cabinet and
... Read more drum. I put the new slides in place and installed a new felt strip. I put it back together and that was that. Very easy.
I removed the two screws at the front above the drum opening (with the dryer door open). The top panel then lifts off. I removed the screw at each side that holds the front panel to the side panels, tilted the front panel forward, which disengages the front of the drum from the front drum glide bearing. I then lifted the front panel sl
... Read moreightly, unhooking the bottom of the panel from the dryer base, and swung the front panel aside. I removed the existing top drum bearing guide, which was disintegrated, and snapped in the new bearing guide, with the nylon slide strips installed in the bearing guide. Next pulled out the old felt strip, and pressed the new one in place. I then put the bottom of the front panel back into the bottom of the dryer front, and while lifting the drum to asure it fit over the bearing guide, pushed the front panel back to a vertical position to mate with the side panels. I then replaced the side panel screws, replaced the top, and replaced the front top panel screws.
Basically, I followed the same steps a prior person posted. 1.Removed the two screws inside the door, on the top part of the opening. 2.Lifted up and removed the top. 3.Removed two screws holding the front panel in place. 4.Held up the drum while removing the front panel. I carefully turned the panel so I could get at
... Read morethe drum bearing without pulling the wires connecting it to the front panel. The wires are not very long, so I had to be careful not to pull on them. 5.Carefully pried off the old drum bearing, using just my hands. It was fairly tight, and popped out just as I started to worry if I was putting too much pressure on it. 6.Checked to see how the old felt was installed, then I pulled out the old felt. 7.Inserted the new felt, being careful to insert one end into a slot the same way the original was installed. 8.Inserted the new slides into the new drum bearing. The gray slides went in at the eleven and one o'clock positions, the white slides went in at ten and two o'clock. 9.Removed a surplus plastic piece from the new drum bearing (where the light comes through). 10.Inserted the new drum bearing, putting the bottom tabs in first, then pivoting it into place. I squeezed it into place to make sure it was tight. 11.Lifted up the drum and put the front panel back on. 12.Screwed the front panel back on, using the two screws. 13.Carefully put the top back on. 14.Screwed in the two screws inside the front door to fasten down the top. That was it! I started up the dryer and it worked fine. No more squeaking. About the only thing odd about the repair is why PartSelect sells each slide separately (i.e., I had to order 2 white slides and 2 gray slides). I can't imagine replacing just one, so why not package them in pairs, or maybe even all four in one package. At any rate, the repair was easy, and a lot cheaper than having someone come out to fix it.