



Models
>
DSXH43GV0WW
DSXH43GV0WW General Electric Dryer
Jump to:
Find Part by Name
Keep searches simple, eg. "belt" or "pump".
Diagrams for DSXH43GV0WW
Viewing 5 of 5


Keep searches simple, eg. "belt" or "pump".
In Stock
Order now and your part arrives by Oct 22
$130.97
This kit comes with the rear bearing, shaft support, lubricant and other items required for the installation.
Special Order


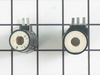
This dryer solenoid kit comes with both the 2 and 3 wire coil valves.
No Longer Available
Common Problems and Symptoms for DSXH43GV0WW
Viewing 1 of 1

Keep searches simple. Use keywords, e.g. "leaking", "pump", "broken" or "fit".
- Customer:
- Kenneth from Boise, ID
- Parts Used:
- WE25X10001
- Difficulty Level:
- A Bit Difficult
- Total Repair Time:
- 30 - 60 mins
- Tools:
- Nutdriver, Screw drivers
Loud screeching noises from the rear of the dryer whenever in was running.
We unlatched the top of the dryer by pushing a screwdriver under the two areas where there were metal clips holding it down. We then removed the yellow clip screwed onto the top frame. We removed the front frame of the dryer by unscrewing the two screws holding the front frame on--one on either side. We didn't undo the wiring to the con
... Read more
trols, we just kind of pivoted the front aside. We pulled the drum out from the plastic holder attached to the back of the dryer frame also unwinding the belt encircling the drum. Then we unscrewed the 3 screws holding the bearing to the back of the drum. We removed the plastic that had held the bearing by undoing the screws to the back of the frame. We installed the new bearing by screwing it to the back of the drum with 3 screws. We installed the plastic holder to the back of the frame by 2 screws and put the little ball bearing in. We used the grease that came with the kit to grease up the plastic where it held the big bearing attached to the back of the drum and inserted the drum back into the body of the dryer frame, pushing the bearing into the plastic holder. The hard part was getting the belt back around the drum and through the pulley on the motor that holds the belt. When that was accomplished, we put the yellow plastic holder back on the front frame with the screws and put the front back on after thoroughly cleaning the inside bottom area where there was a lot of lint. Then we snapped the top back into place.
Read less
Was this instruction helpful to you?
Thank you for voting!
- Customer:
- Russell from Fort DIx, NJ
- Parts Used:
- WE25X10001
- Difficulty Level:
- Really Easy
- Total Repair Time:
- 30 - 60 mins
- Tools:
- Screw drivers
Very loud squeek in rear of dryer
The part arrived in only 3 days and I didn't even pay for express shipping!
Once I popped the top lid off, and removed the two screws holding the front on it was a breeze from there. Simply take the drive belt off by loosening the spring loaded tensioner on the bottom, lift entire drum slightly up and then out. Remove the scr ... Read more ews to replace bearing on rear of drum (4) and the screws that hold the bushing assembly in place (2). Reverse the process and you will be up and running in no time at all.
I was about to buy an ew washer and dryer set, but thanks to PartSelect.com, i saved over $1000!
Once I popped the top lid off, and removed the two screws holding the front on it was a breeze from there. Simply take the drive belt off by loosening the spring loaded tensioner on the bottom, lift entire drum slightly up and then out. Remove the scr ... Read more ews to replace bearing on rear of drum (4) and the screws that hold the bushing assembly in place (2). Reverse the process and you will be up and running in no time at all.
I was about to buy an ew washer and dryer set, but thanks to PartSelect.com, i saved over $1000!
Read less
Was this instruction helpful to you?
Thank you for voting!
- Customer:
- Frank from Rochester, NY
- Parts Used:
- WE12X10009
- Difficulty Level:
- Really Easy
- Total Repair Time:
- 15 - 30 mins
- Tools:
- Screw drivers
Dryer was not working.
Removed front and top panals to dryer. Installed belt over the drum. opened back air vent panal and installed belt to pully. Reinstalled back top and front panals. Done.
Was this instruction helpful to you?
Thank you for voting!