


Models
>
GFD43GSSM0WW
GFD43GSSM0WW General Electric Dryer
Jump to:
Find Part by Name
Keep searches simple, eg. "belt" or "pump".
Diagrams for GFD43GSSM0WW
Viewing 7 of 7


Keep searches simple, eg. "belt" or "pump".

$54.95
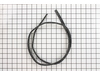
This 89.5-inch drive belt is for dryers. It has a 4-rib design on the inside for a better grip. If comparing the size of your current belt to the new one, keep in mind that a small amount of stretchin...
In Stock
Order now and your part arrives by Jul 30

$41.75
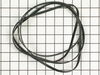
This is a duct felt seal for a dryer. The duct felt seal allows the front-load dryer drum to glide smoothly on the front panel. Your dryer will not function properly if the drum felt seal is compromis...
In Stock
Order now and your part arrives by Jul 30

$20.85
If the lightbulb inside your dryer drum has burned out, this is an authentic OEM replacement. It is a 10W, 120V bulb that is sold individually. The bulb turns on when the dryer door is open and should...
In Stock
Order now and your part arrives by Jul 30
 – Part Number: WE03X37319")
$18.95
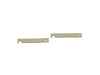
f your dryer is excessively noisy when operating, is not tumbling, or is leaving marks on your laundry, it may be time to replace the drum glides. The drum glide bearing is a genuine OEM part for your...
In Stock
Order now and your part arrives by Jul 30
 – Part Number: WE03X37320")
$28.95
If your dryer is making a squealing, metal-on-metal noise you may need to replace your slide bearings. These slide bearings are genuine OEM replacement parts that measure approximately 3 inches in len...
In Stock
Order now and your part arrives by Jul 30

$21.82
This Genuine OEM door latch is designed for use with a wide range of GE clothes dryers. Constructed from a combination of durable metal and plastic, the latch is mounted onto the dryer frame to secure...
In Stock
Order now and your part arrives by Jul 30

$17.55
This is a replacement O-ring for the drum bearing retainer on your dryer. The drum bearing is found at the back of the dryer drum. The O-ring is designed to create a seal on the drum bearing. The O-r...
In Stock
Order now and your part arrives by Jul 30

$37.49
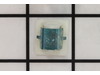
A door switch is a simple on/off mechanism that prohibits the dryer from operating when the door is open.
In Stock
Order now and your part arrives by Jul 30

$69.95
This igniter helps start the burner in your gas dryer, allowing it to produce heat for drying clothes. It’s a reliable replacement for fixing heating issues and restoring proper dryer performance. Eas...
In Stock
Order now and your part arrives by Jul 30

$20.72
The adjustable leveling screws on the bottom of your dryer can be screwed in or out to lower or raise the leg level. If one of the leveling screws is stripped, damaged, or missing, you may not be able...
In Stock
Order now and your part arrives by Jul 30

In Stock
Order now and your part arrives by Jul 30

In Stock
Order now and your part arrives by Jul 30
Common Problems and Symptoms for GFD43GSSM0WW
Viewing 9 of 9Noisy
Fixed by these parts

How to fix it
Drum Not Spinning
Fixed by these parts
How to fix it
Door won’t close
Fixed by these parts

How to fix it
Marks left on clothes
Fixed by these parts
How to fix it
Won’t Start
Fixed by these parts

How to fix it
Not Heating
Fixed by these parts
How to fix it
Door Pops Open
Fixed by these parts
How to fix it
Too hot
Fixed by these parts
How to fix it
Heat stays on after drum has stopped
Fixed by these parts
How to fix it

")
")


Keep searches simple. Use keywords, e.g. "leaking", "pump", "broken" or "fit".
- Customer:
- Adrian from Middletown, MD
- Parts Used:
- WE03X29897
- Difficulty Level:
- A Bit Difficult
- Total Repair Time:
- 30 - 60 mins
- Tools:
- Screw drivers
Drum belt broke
Removed the front Dryer panel. Left drum in place and lifted it up slightly to get access to motor drive. Slipped belt in place and put panel back on.
This was a first attempt ever at fixing an appliance and it was no big deal.
This was a first attempt ever at fixing an appliance and it was no big deal.
Was this instruction helpful to you?
Thank you for voting!
- Customer:
- Joshua from Dallas, TX
- Parts Used:
- WE4M415
- Difficulty Level:
- A Bit Difficult
- Total Repair Time:
- 1- 2 hours
- Tools:
- Pliers, Screw drivers, Socket set
Dryer would not start
The end repair was very simple and took minimal effort. The time and difficulty was all in the testing. I disassembled the dryer and removed the drum and then hard wired each thermo-fuse to determine where the fault was. After test all of those I was stumped. When I opened the door the light would not come on so I assumed it was a pow
... Read more
er fault closer to the source. However after all of my testing I couldn't find anything wrong. I then removed the light bulb and realized it was burned out which led me to the door switch being the fault. I removed the switch and soldered the three wire together and the dryer started right up! All I had to do was order a new $15 part, unsolder the wires and plug them in. Would have been so much simpler if that light bulb hadn't of been burned out causing me to over think my diagnosis. This was my first major appliance repair and I did it with only the help of the parts diagram provided on the website.
Read less
Was this instruction helpful to you?
Thank you for voting!
- Customer:
- Richard from Ashton, MD
- Parts Used:
- WE03X29897
- Difficulty Level:
- Easy
- Total Repair Time:
- 1- 2 hours
- Tools:
- Nutdriver, Screw drivers
Broken Dryer Belt
I had to take most of the dryer apart because there is no rear access to the motor. It turned out to be easy to dissasembel the dryer. The only problem that I had was that I could not figure out how to route the belt around the motor and the idol pullies. I could not find anywhere that gave instructions on how to properly tension the belt
... Read more
. I finally figured out that the idoler pulley needs to be locked in place on the right side of the engie mount. Then the belt needs to be routed over idoler pulley and under the motor pulley. Finally release the idoler pully from the locked postion to put tension on the belt. It really turned out to be pretty easy.
Read less
Was this instruction helpful to you?
Thank you for voting!