



Models
>
DDE9200NBC
DDE9200NBC General Electric Dryer
Jump to:
Find Part by Name
Keep searches simple, eg. "belt" or "pump".
Keep searches simple, eg. "belt" or "pump".
$27.28
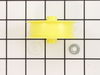
This white idler pulley is used for many clothes dryers. A dryer's idler pulley wheel serves to help the belt to rotate the drum.
In Stock
Order now and your part arrives by Sep 6
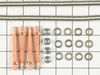
This restring coil kit is used to replace the existing coil in a dryer's heating element.
No Longer Available
$28.06
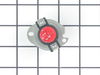
With this high limit/safety thermostat, a dryer's heating element will cut out if the internal temperature reaches 260 degrees Fahrenheit. This element is meant as a safety device, will kick back in w...
Special Order

This part has three terminals. Note: Use the two smaller terminals for models that only have two wires to the switch.
No Longer Available

This dryer drum belt goes around the dryer drum and the pulleys to rotate the drum once motor is activate.
No Longer Available
In Stock
Order now and your part arrives by Sep 6

Special Order
Special Order
Common Problems and Symptoms for DDE9200NBC
Viewing 2 of 2
Keep searches simple. Use keywords, e.g. "leaking", "pump", "broken" or "fit".
- Customer:
- Todd from Clarksburg, OH
- Parts Used:
- WE11X260
- Difficulty Level:
- A Bit Difficult
- Total Repair Time:
- More than 2 hours
- Tools:
- Nutdriver, Pliers, Screw drivers, Socket set, Wrench (Adjustable), Wrench set
dryer would run but no heat
first had to troubleshoot... used multimeter to check all switches, they were good.
then checked thermostats, good again.
then checked motor centrifugal switch.. good.
with multimeter i found continuity between heating coil leads and heater housing. coil had broken and welded itself to housing.
... Read more changed coil in short time with restring kit (which got here amazingly fast) and everything is great.
ps: PartsSelect got me the part super fast and it was what i needed. also at a great price. would order from them again.
added note: if i were to do this again i would order the porcelain insulators that insulate the leads to the coils, they were old and very fragile and i experienced some fragmentation.
thanks to PartsSelect
then checked thermostats, good again.
then checked motor centrifugal switch.. good.
with multimeter i found continuity between heating coil leads and heater housing. coil had broken and welded itself to housing.
... Read more changed coil in short time with restring kit (which got here amazingly fast) and everything is great.
ps: PartsSelect got me the part super fast and it was what i needed. also at a great price. would order from them again.
added note: if i were to do this again i would order the porcelain insulators that insulate the leads to the coils, they were old and very fragile and i experienced some fragmentation.
thanks to PartsSelect
Read less
Was this instruction helpful to you?
Thank you for voting!
- Customer:
- Robert from Virginia Beach, VA
- Parts Used:
- WE4X197
- Difficulty Level:
- Really Easy
- Total Repair Time:
- Less than 15 mins
- Tools:
- Screw drivers
replqce bad switch
pried old switch assembly from front of machine with screw driver. removed 2 electrical connections. shorted terminals to verify problem. inserted wiring terminals to new switch. verified operation and then pushed switch assembly into machine opening.
Was this instruction helpful to you?
Thank you for voting!
- Customer:
- Anne from Newton, MA
- Parts Used:
- WE11X260
- Difficulty Level:
- A Bit Difficult
- Total Repair Time:
- More than 2 hours
- Tools:
- Nutdriver, Screw drivers, Socket set, Wrench (Adjustable)
Dryer had no heat
Open the door. Remove torx screws just above the door. This allows the top to fold up toward the back.
Remove 2 screws with nutdriver just inside the top on each side. Then loosen 2 screws with nutdriver at the front near the bottom. The front can be lifted up and swung around to the right to get it out of the way. Optional: Di ... Read more sconnect the wires to get it completely out of the way.
From the back of the dryer bend the spring-loaded bar that holds a pulley to the belt just enough to release the belt.
From the front pull out the drum forward and out of the dryer. The belt will come with it.
Now you can see the inner and outer heater coil elements. Both of mine were clearly broken. At this point follow the directions in the replacement kit.
Reinstall in reverse order.
Remove 2 screws with nutdriver just inside the top on each side. Then loosen 2 screws with nutdriver at the front near the bottom. The front can be lifted up and swung around to the right to get it out of the way. Optional: Di ... Read more sconnect the wires to get it completely out of the way.
From the back of the dryer bend the spring-loaded bar that holds a pulley to the belt just enough to release the belt.
From the front pull out the drum forward and out of the dryer. The belt will come with it.
Now you can see the inner and outer heater coil elements. Both of mine were clearly broken. At this point follow the directions in the replacement kit.
Reinstall in reverse order.
Read less
Was this instruction helpful to you?
Thank you for voting!