



Models
>
FARE1011MW1
FARE1011MW1 Frigidaire Dryer
Jump to:
Find Part by Name
Keep searches simple, eg. "belt" or "pump".
Diagrams for FARE1011MW1
Viewing 6 of 6


Manuals & Guides for FARE1011MW1
Click to downloadInstall
Installation Instructions
(1.49MB)
Specs
Product Specifications Sheet
(0.28MB)
Care
Use and Care Manual
(4.87MB)
Keep searches simple, eg. "belt" or "pump".

$63.45
This door catch is an authentic OEM replacement part for your dryer. This part holds the door strike and ensures that the door stays closed while your dryer is running. This prevents hot air or laundr...
In Stock
Order now and your part arrives by Nov 12

$56.28
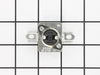
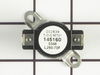
The two-terminal high limit thermostat has a limit of 260 degrees Fahrenheit and acts as a safety mechanism that keeps the dryer from overheating. The thermostat will cut out when the internal dryer t...
In Stock
Order now and your part arrives by Nov 12

$25.25
This screw is designed to fit washers and dryers. Refer to the diagram provided by the manufacturer for further installation instructions and accurate application of screw in your tool.
In Stock
Order now and your part arrives by Nov 12

$30.95
Keep your dryer operating properly with this dryer belt, designed to rotate the drum during each cycle for effective drying. Made from durable material, it provides the strength needed to handle regul...
In Stock
Order now and your part arrives by Nov 12

$26.35
This is a screw and it is used with a variety of home appliances. It is less than 1/2 an inch long, and is #8-18 x 3/8. This part is a pan head, sheet metal, screw. It is made of metal.
In Stock
Order now and your part arrives by Nov 12

$59.52
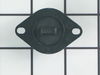
This part controls the temperature of the inside of the dryer drum and prevents the dryer from overheating. This part is located in the blower housing.
In Stock
Order now and your part arrives by Nov 12

In Stock
Order now and your part arrives by Nov 12

In Stock
Order now and your part arrives by Nov 12

$39.46
This dryer thermal fuse is a critical safety component designed to protect the appliance from overheating. It automatically shuts off power to the motor or heating system if excessive temperatures are...
In Stock
Order now and your part arrives by Nov 12

In Stock
Order now and your part arrives by Nov 12

$89.81
This element is strung with a coiled wire made of a nickel and a chrome alloy. This wire receives, but resists, a controlled electric current and as a result, the wire heats up. The heat produced is u...
In Stock
Order now and your part arrives by Nov 12

$85.44
This lint screen grille cover helps keep your dryer running smoothly by stopping small items like socks from falling into the lint duct. It also helps your lint filter do its job better by keeping lin...
In Stock
Order now and your part arrives by Nov 12
Common Problems and Symptoms for FARE1011MW1
Viewing 8 of 8Door won’t close
Fixed by these parts
How to fix it
Noisy
Fixed by these parts

How to fix it
Drum Not Spinning
Fixed by these parts

How to fix it
Not Heating
Fixed by these parts
How to fix it
Too hot
Fixed by these parts
How to fix it
Marks left on clothes
Fixed by these parts
How to fix it
Door Pops Open
Fixed by these parts
How to fix it
Won’t Start
Fixed by these parts
How to fix it
Keep searches simple. Use keywords, e.g. "leaking", "pump", "broken" or "fit".
- Customer:
- Michelle from Dallas, TX
- Parts Used:
- 131658800
- Difficulty Level:
- Really Easy
- Total Repair Time:
- Less than 15 mins
My husband ruined the old latch by trying to shut the door too hard, and the old latch fell down into the inside of the dryer.
I took the new latch out of the package and snapped it into place. It took about 15 seconds, and that included the walk to the laundry room!
Was this instruction helpful to you?
Thank you for voting!
- Customer:
- Don from RUIDOSO, NM
- Parts Used:
- 134587700
- Difficulty Level:
- Really Easy
- Total Repair Time:
- 30 - 60 mins
- Tools:
- Screw drivers
Dryer cut off before the clothes were dry.
All the symptoms indicated the thermister (located in the exhaust air stream of the dryer) was the problem. Pulled the lower panel off the dryer. Took out the two lower screws holding the door panel on so I could pull the front panel out just enough to get a screwdriver on the screws holding the thermister on. Unhooked the two wires co
... Read more
nnected to it and hooked them to the new thermister(no need to observe polarity). Put the new thermister in, screwed the door panel back down, put the lower panel on and started drying clothes.
Read less
Was this instruction helpful to you?
Thank you for voting!
- Customer:
- Rich from New Albany, OH
- Parts Used:
- 5304508449
- Difficulty Level:
- Easy
- Total Repair Time:
- 30 - 60 mins
- Tools:
- Screw drivers
Internal vent inside the drum was coated in black (plastics from use)
1. Loosened the 3 screws inside of the drum
2. Removed the entire back of the dryer (lots of screws)
3. Removed the old vent (there are 2 screws at the bottom that hold it in)
4. Install new vent (put the screws back in)
5. Close up back and proceed to put all of the screws back
2. Removed the entire back of the dryer (lots of screws)
3. Removed the old vent (there are 2 screws at the bottom that hold it in)
4. Install new vent (put the screws back in)
5. Close up back and proceed to put all of the screws back
Was this instruction helpful to you?
Thank you for voting!