


Models
>
FSE849GHQ0
FSE849GHQ0 Frigidaire Dryer
Jump to:
Find Part by Name
Keep searches simple, eg. "belt" or "pump".
Diagrams for FSE849GHQ0
Viewing 4 of 4


Keep searches simple, eg. "belt" or "pump".

$16.75
The drum belt, also known as a drive belt, is a rubber piece that wraps around the dryer drum, idler pulley, and motor pulley and is used to make the drum rotate. If you can hear the motor running, bu...
In Stock
Order now and your part arrives by Mar 26

$10.45
The drum support bearing is an authentic OEM replacement part for your dryer. The bearing is used to support the drum and allow it to rotate smoothly and quietly. If your dryer is excessively noisy wh...
In Stock
Order now and your part arrives by Mar 26

$65.23
If your dryer has little to no heat, there may be an issue with your heating element assembly. The heater element is a genuine OEM part that is found at the back of the dryer. The heating element come...
In Stock
Order now and your part arrives by Mar 26

$12.55
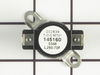
This thermal fuse limiter is used in dryers to monitor the temperature and make sure it does not overheat. The thermal fuse has a limit of 220 degrees Fahrenheit before the heating element and power a...
In Stock
Order now and your part arrives by Mar 26

$62.17
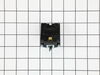
This part is used to start the dryer once you have selected a setting on the timer.
In Stock
Order now and your part arrives by Mar 26

$22.00
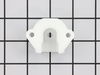
This drum bearing bracket is for dryers. Drum bearing bracket holds and supports the drum bearing
In Stock
Order now and your part arrives by Mar 26

$30.85
This white dryer lint filter screen collects lint as it passes through the dryer vent.
In Stock
Order now and your part arrives by Mar 26

$52.99
The two-terminal high limit thermostat has a limit of 260 degrees Fahrenheit and acts as a safety mechanism that keeps the dryer from overheating. The thermostat will cut out when the internal dryer t...
In Stock
Order now and your part arrives by Mar 26

$41.15
Part may differ in color from image. Please note that this is only a cosmetic difference.
In Stock
Order now and your part arrives by Mar 26

$23.05
This screw is designed to fit washers and dryers. Refer to the diagram provided by the manufacturer for further installation instructions and accurate application of screw in your tool.
In Stock
Order now and your part arrives by Mar 26

$24.10
This is a screw and it is used with a variety of home appliances. It is less than 1/2 an inch long, and is #8-18 x 3/8. This part is a pan head, sheet metal, screw. It is made of metal.
In Stock
Order now and your part arrives by Mar 26

In Stock
Order now and your part arrives by Mar 26
Questions and Answers
We're sorry, but our Q&A experts are temporarily unavailable.
Please check back later if you still haven't found the answer you need.
Common Problems and Symptoms for FSE849GHQ0
Viewing 6 of 6Noisy
Fixed by these parts


How to fix it
Too hot
Fixed by these parts


How to fix it
Not Heating
Fixed by these parts
How to fix it
Drum Not Spinning
Fixed by these parts
How to fix it
Marks left on clothes
Fixed by these parts

How to fix it
Won’t Start
Fixed by these parts
How to fix it


Keep searches simple. Use keywords, e.g. "leaking", "pump", "broken" or "fit".
- Customer:
- Juan Carlos from Weston, FL
- Parts Used:
- 131553900
- Difficulty Level:
- Easy
- Total Repair Time:
- 30 - 60 mins
- Tools:
- Screw drivers
short circuit with a brasier metal support
Disconect the dryer from the main power source.
1) Remove the two screws from the rear / upper panel (below the control panel).
2) Snap the front side using a flat head screw driver.
3) On the inside front, remove two screws (one on each side) from the upper side and snap the door assembly off.
... Read more 4) Remove the rear motor access panel (two screws) and appying tension to the spring remove the belt.
5) Pull the drum upwards (verticaly) unnapping it from the rear wall and remove it horizontally through the front panel.
6) Disconect the four leads to the heating element and remove the four screws from the rear of the dryer and replace the heating element.
Follow the same steps backwards to put the dryer together again.
Read less
Was this instruction helpful to you?
Thank you for voting!
- Customer:
- Stephen from Newnan, GA
- Parts Used:
- 134120900
- Difficulty Level:
- A Bit Difficult
- Total Repair Time:
- 15 - 30 mins
- Tools:
- Pliers, Screw drivers
Thermal Limiter opened
Unplugged Dryer.
Opened top of Dryer, over the drum.
Removed Thermal Limiter.
Tested the Thermal Limiter - found it was open.
Checked all vents and exhaust tube for lint build-up.
Replaced Thermal Limiter.
Closed top of dryer.
Plugged Dryer back.
Tested Dryer - it works.
Opened top of Dryer, over the drum.
Removed Thermal Limiter.
Tested the Thermal Limiter - found it was open.
Checked all vents and exhaust tube for lint build-up.
Replaced Thermal Limiter.
Closed top of dryer.
Plugged Dryer back.
Tested Dryer - it works.
Was this instruction helpful to you?
Thank you for voting!
- Customer:
- Stephen from Austin, TX
- Parts Used:
- 134120900
- Difficulty Level:
- Easy
- Total Repair Time:
- 15 - 30 mins
- Tools:
- Nutdriver, Pliers, Screw drivers
Dryer would not start
I found a electrical diagram and some common problems on some websites which led me to check the thermal limiters. There are two right up top near the back of the dryer - one mounted closer to the heating coils and one mounted directly to the sheet metal on the inside back of the dryer. Using an DMM on the "Ohms" setting, I checked each
... Read more
sensor to make sure that they were "closed" (near zero ohms). Sure enough, the sensor mounted on the back of the enclosure was open (high resistance) which prevented the dryer from starting. To confirm, I shorted the two leads going to the sensor together temporarily and wrapped them with electrical tape and then tested the dryer - it worked perfectly. The part from Part Select was ordered and shipped very quickly. Since the sheet metal screws holding the sensor on were difficult to access with the drum in place, I used small machine screws/nuts to fasten the sensor - this allowed me to tighten the nuts from the outside of the dryer, making it very easy to attach.
Read less
Was this instruction helpful to you?
Thank you for voting!