


Models
>
LG4209L-P1158902WL
LG4209L-P1158902WL Amana Dryer
Jump to:
Find Part by Name
Keep searches simple, eg. "belt" or "pump".
Diagrams for LG4209L-P1158902WL
Viewing 14 of 14


Keep searches simple, eg. "belt" or "pump".

$28.91
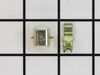
This OEM kit comes with two ignition coils (one three-terminal boost/hold coil, and one two-terminal secondary coil). Usually only one of them burns out, but you should replace them as a set as both h...
In Stock
Order now and your part arrives by Apr 2

$22.91
If your dryer is not tumbling, takes a long time to dry, or is noisy while tumbling, it may be time to replace the drum support rollers. These hold the drum in place while it rotates, so if they have ...
In Stock
Order now and your part arrives by Apr 2

$14.16
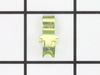
The multi rib belt, which may also be called a dryer drum belt or a multi-v belt, helps to rotate the drum of the dryer. The belt wraps completely around the drum, around a tension pulley, and then ar...
In Stock
Order now and your part arrives by Apr 2

This two inch wide idler pulley wheel is beige in color and is made of plastic. This pulley wheel comes with its own metallic bearing in its center.
In Stock
Order now and your part arrives by Apr 2

In Stock
Order now and your part arrives by Apr 2

$36.42
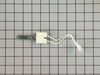
The spring for this part is sold separately.
This idler assembly is for dryers.
Idler assembly includes the idler arm and the idler pulley that maintains tension on the drive belt, allowing the ...
In Stock
Order now and your part arrives by Apr 2

On Order

In Stock
Order now and your part arrives by Apr 2

$13.07
This metal retaining ring is well under an inch long. Use it for your Maytag brand clothes washer or your clothes dryer.
In Stock
Order now and your part arrives by Apr 2

$46.07
This rear drum felt seal is designed to create a flexible, airtight barrier between the dryer drum and the rear panel, helping to maintain optimal heat circulation and airflow during drying cycles. By...
In Stock
Order now and your part arrives by Apr 2

This dryer drum glide pad is an inch long. It is made of a felt material and is used for gas and electric clothes dryers.
In Stock
Order now and your part arrives by Apr 2

$7.60
This is a multi-use screw and can be used on a variety of appliances. The measurements of the screw are: 8/18 x 3/8. *Please note: the screw is sold individually. Refer to the manual provided by the m...
In Stock
Order now and your part arrives by Apr 2
Questions and Answers
We're sorry, but our Q&A experts are temporarily unavailable.
Please check back later if you still haven't found the answer you need.
Common Problems and Symptoms for LG4209L-P1158902WL
Viewing 11 of 11Noisy
Fixed by these parts


How to fix it
Door won’t close
Fixed by these parts

How to fix it
Not Heating
Fixed by these parts

How to fix it
Drum Not Spinning
Fixed by these parts


How to fix it
Marks left on clothes
Fixed by these parts


How to fix it
Won’t Start
Fixed by these parts

How to fix it
Will not agitate
Fixed by these parts


How to fix it
Burning smell
Fixed by these parts
How to fix it
Door Pops Open
Fixed by these parts
How to fix it
Running With Door Open
Fixed by these parts
How to fix it
Spins slowly
Fixed by these parts
How to fix it


Keep searches simple. Use keywords, e.g. "leaking", "pump", "broken" or "fit".
- Customer:
- Chris from Hopedale, MA
- Parts Used:
- WP37001042, WPW10121334
- Difficulty Level:
- Easy
- Total Repair Time:
- 15 - 30 mins
- Tools:
- Pliers, Screw drivers
Drum not centered , clothes getting stuck in dryer
The first thing I did was to unplug the dryer from the wall. Then I removed the bottom two screws and slid the bottom cover off so i could see all the way to the back, I tipped the dryer back against the wall and searched for the problem with a flashlight. I noticed that one of the guide wheels that held the drum in place was sheared of
... Read more
f. I took the new drum support roller out and carefully slid it over the shaft, I had to jiggle it around for a bit, but then it finally was seated correctly. I replaced the washer and then the clip using a pair of needle nose pliers and a regular screw driver and then turned the dryer by hand to see if the wheel came off. After confirming that it worked, I put the cover back on, and plugged it in and tested it.
Read less
Was this instruction helpful to you?
Thank you for voting!
- Customer:
- Steven from Holderness, NH
- Parts Used:
- WP40113601, WP37001287, WP37001042, WP500121
- Difficulty Level:
- Easy
- Total Repair Time:
- 1- 2 hours
- Tools:
- Screw drivers, Socket set
Squeeling and grinding noise
Wasn't the belt!! Changed it anyway. Should have come here earlier. That mistake added several days to the repair waiting for a second batch of the right parts. Became a pro at taking the dryer apart and reassembling, though! Easy job, just take your time and mark your wires, if you need to.
Followed other people's excellent instru ... Read more ctions. Clean out all the dust bunnies. Schematics were a great resource. Those and the prices made me a repeat customer.
The shaft of the Idler Lever wheel was the cause, but decided, since I had it apart, to spend a little more money and replace both Drum Support Rollers and the Roller Bracket and Shaft Assembly. They showed some wear, and the parts were very inexpensive. Make sure you have snap ring pliers with prongs that are smaller than the standard 0.40 to save some aggravation with the Drum Rollers. $5 tool. Total parts were less than $60. Probably saved $150+ in labor. Quieter than ever now. Thanks!
Read less
Was this instruction helpful to you?
Thank you for voting!
- Customer:
- Gary from Haverhill, NH
- Parts Used:
- 279834
- Difficulty Level:
- Easy
- Total Repair Time:
- 30 - 60 mins
- Tools:
- Nutdriver, Screw drivers, Socket set
Dryer ran but would not heat
PartSelect showed seven different possibilities why the dryer wouldn't heat. I removed the two screws to remove the bottom panel and turned the dryer on and noticed that the heating element that ignites the gas was working fine. This meant that it was not getting gas so it could be the gas valve or one of the two gas valve coils which are
... Read more
located on top of the gas valve. I borrowed my neighbor"s ohm meter and touched the two probes on the coils terminals to check for continuity and found that one of the coils read zero. I then took both of the coils out by removing two screws and tested each coil again. One coil read 500-850 and the other read zero. This meant that it was no good so I called for the part and received it in three days. I reassembled the parts and turned the dryer on and it fired up after a few seconds. It works as good as new. The part plus shipping was less than $30. My repairman would have charged me $150-$200. While the dryer was apart I gave it a good cleaning with a vacuum and a toothbrush in delicate areas. I also removed and cleaned the lint trap housing by removing two nuts. I didn't know much about gas dryers, but thanks to PartSelect I easily fixed it myself.
Read less
Was this instruction helpful to you?
Thank you for voting!