


Models
>
WDF341PAPW1
WDF341PAPW1 Whirlpool Dishwasher
Jump to:
Find Part by Name
Keep searches simple, eg. "belt" or "pump".
Diagrams for WDF341PAPW1
Viewing 10 of 10


 Diagram and Parts List for Whirlpool Dishwasher")


Keep searches simple, eg. "belt" or "pump".

$29.98
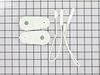
If your dishwasher door is not opening or closing properly, it may be time to install a new balance kit. This part helps to support the weight of the door as it opens and closes. You should also check...
In Stock
Order now and your part arrives by Mar 29

This is a single rack track stop clip used to prevent the upper dish rack from sliding all the way out of the dishwasher. It is made of gray plastic and can wear with time. This is an easy repair that...
In Stock
Order now and your part arrives by Mar 29

If the top rack of your dishwasher is no long sliding in and out smoothly, you may need to replace one of the wheels. This genuine OEM parts assembly includes the wheel, the mount, the axel, and the c...
In Stock
Order now and your part arrives by Mar 29

$47.14
This is a manufacturer-approved heating element and 2 washers. If the dishes in your dishwasher are not drying or the water in the dishwasher is not getting hot, it may be due to a failed heating elem...
In Stock
Order now and your part arrives by Mar 29

$15.26
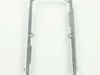
The mounting bracket is used to secure the top part of your dishwasher to the underside of your counter or cabinet. If you have solid surface counters (granite, quartz, etc.) you will likely need to s...
In Stock
Order now and your part arrives by Mar 29

The friction sleeve, sometimes called a friction pad, is made of a flexible black plastic and measures a bit over one inch in length. It is designed to reduce the friction between the hinge and the do...
In Stock
Order now and your part arrives by Mar 29

$45.00
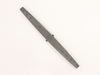
This is a lower spray arm for a dishwasher. The lower spray arm allows water to be spread evenly throughout the dishwasher tub with the proper force so dishes come out clean. This spray arm is gray in...
In Stock
Order now and your part arrives by Mar 29

$22.91
The retainer clip is used to hold the access panel on your dishwasher in place. It is a genuine OEM part that is black in color and sold individually. The only tool required to complete the repair is ...
In Stock
Order now and your part arrives by Mar 29

$49.29
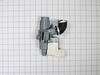
This genuine OEM filter is found under the lower spray arm in the bottom of your dishwasher. It is used to trap debris and prevent it from entering the pump. If your dishes are not properly cleaned or...
In Stock
Order now and your part arrives by Mar 29

$43.92
Enhance the efficiency of your Whirlpool dishwasher with this top-quality spray arm. This essential part rotates and sprays water effectively to clean the dishes inside the dishwasher tub, providing a...
In Stock
Order now and your part arrives by Mar 29

This part acts as as safety mechanism that keeps the dryer from overheating. Once the dryer temperature reaches a certain point, this part will shut down power to the heating element.
In Stock
Order now and your part arrives by Mar 29

$7.60
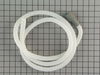
This hose clamp extends from half an inch to an inch in diameter. It is made entirely of metal and is intended for use with Maytag brand washing machines.
In Stock
Order now and your part arrives by Mar 29
Questions and Answers
We're sorry, but our Q&A experts are temporarily unavailable.
Please check back later if you still haven't found the answer you need.
Common Problems and Symptoms for WDF341PAPW1
Viewing 11 of 11Door latch failure
Fixed by these parts


How to fix it
Leaking
Fixed by these parts

How to fix it
Not cleaning dishes properly
Fixed by these parts

How to fix it
Not drying dishes properly
Fixed by these parts


How to fix it
Door won’t close
Fixed by these parts

How to fix it
Not draining
Fixed by these parts


How to fix it
Will Not Start
Fixed by these parts
How to fix it
Noisy
Fixed by these parts

How to fix it
Will not fill with water
Fixed by these parts


How to fix it
Will not dispense detergent
Fixed by these parts
How to fix it
Will not drain
Fixed by these parts
How to fix it


Keep searches simple. Use keywords, e.g. "leaking", "pump", "broken" or "fit".
- Customer:
- Scott from Fort Lauderdale, FL
- Parts Used:
- 8194001
- Difficulty Level:
- Easy
- Total Repair Time:
- Less than 15 mins
- Tools:
- Screw drivers
Replaced Hinge Link
Pulled dishwasher from under counter, attached link to spring, hooked spring back into frame/chassis, threaded link through pulleys, attached other end of link onto door, reinstalled dishwasher under counter. All's well. Note-I purchased an extra link anticipating that the other one will fail. They're cheap enough.
Was this instruction helpful to you?
Thank you for voting!
- Customer:
- Dennis from Sedro Woolley, WA
- Parts Used:
- W10518394
- Difficulty Level:
- Really Easy
- Total Repair Time:
- Less than 15 mins
- Tools:
- Screw drivers, Wrench set
Heater element broken.
Step 1: Remove the screws in the bottom of the countertop.
Step 2: Remove the screws holding the bottom kickplate.
Step 3: Loosen leveling legs.
Step 4: Pull dishwasher out of hole.
Step 5: Unlplug dishwasher.
Step 6: Disconnect wires from bottom of element in back.
Step 7: ... Read more Remove plastic nuts holding element in place.
Step 8: Remove element.
Step 9: Reverse Steps 1-7.
Step 10: Drink beer.
Read less
Was this instruction helpful to you?
Thank you for voting!
- Customer:
- Sean from Ramona, CA
- Parts Used:
- 8194001
- Difficulty Level:
- Easy
- Total Repair Time:
- 15 - 30 mins
- Tools:
- Screw drivers, Wrench (Adjustable)
Door spring link broken
1. Open the dishwasher and remove the two plastic grommets about halfway down on either side of the opening. Then remove the two screws under the grommets.
2. Remove the kick plate under the door. May have to lower unit by turning the feet using the adjustable wrench.
3. Make sure you have enough slack in the water i ... Read more nput line and electrical wiring that you can pull the dishwasher out about 12 inches or more.
4. There is a spring and nylon rope link on both sides of the unit. Probably just one link is broken, but the replacement comes with two, so you can replace both or save one as a spare. Look at the good side and it should be pretty self explanatory how it attaches. I found it easiest to first thread the link around the lower pulley, then attach the link to the spring, then spring to the rear support, then the link to the door.
5. Reverse (2 to 1) to reinstall the dishwasher.
Read less
Was this instruction helpful to you?
Thank you for voting!