


Models
>
DU4JV-CAN
DU4JV-CAN Magic Chef Dishwasher
Jump to:
Find Part by Name
Keep searches simple, eg. "belt" or "pump".
Diagrams for DU4JV-CAN
Viewing 6 of 6


Keep searches simple, eg. "belt" or "pump".

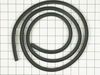
$57.30
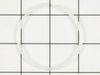
This door gasket can be installed by simply pressing it into the channel around the door. This dishwasher door gasket, or door seal, allows the dishwasher door to have an airtight seal when closing th...
In Stock
Order now and your part arrives by Aug 6

$15.26
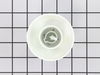
This upper dishwasher dishrack roller is just over an inch in diameter. It is all white in color and is made entirely of plastic.
In Stock
Order now and your part arrives by Aug 6

In Stock
Order now and your part arrives by Aug 6

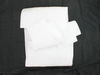
This rack comes complete with four attached wheels and the rack may differ in appearance, but will function same as original part.
No Longer Available

$7.60
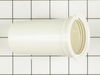
This hose clamp extends from half an inch to an inch in diameter. It is made entirely of metal and is intended for use with Maytag brand washing machines.
In Stock
Order now and your part arrives by Aug 6

This is an inner door foam insulation strip for your dishwasher. This part is also known as the foam seal. It creates a waterproof seal to prevent leaking from your appliance. Before installing the ne...
No Longer Available

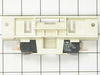
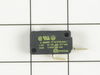
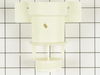
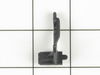
This part senses when the door is closed so the cycle can start.
In Stock
Order now and your part arrives by Aug 6

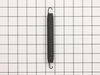
$11.98
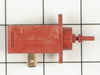
This door spring is sold individually and is located on either side of the door. NOTE: The part may not be the same size as the original, and may differ in appearance, but will function the same.
In Stock
Order now and your part arrives by Aug 6

$14.16
This wheel attaches to the inside of the tub to help guide the track and support the top rack.
In Stock
Order now and your part arrives by Aug 6

Special Order

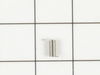
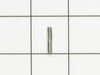
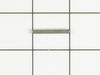
This dispenser door retaining pin is less than one inch long. Sold individually.
Special Order

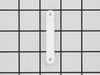
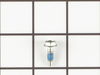
$7.60
Sold individually. Lock washers are used with screws when vibration from an appliance may cause the screw to loosen. Lock washers are also used in the electrical components of an appliance to ensure ...
In Stock
Order now and your part arrives by Aug 6
Common Problems and Symptoms for DU4JV-CAN
Viewing 12 of 12Leaking
Fixed by these parts


How to fix it
Door latch failure
Fixed by these parts
How to fix it
Will not dispense detergent
Fixed by these parts
How to fix it
Will Not Start
Fixed by these parts
How to fix it
Not cleaning dishes properly
Fixed by these parts
How to fix it
Will not fill with water
Fixed by these parts
How to fix it
Door won’t close
Fixed by these parts
How to fix it
Not draining
Fixed by these parts
How to fix it
Noisy
Fixed by these parts
How to fix it
Lid or door won’t close
Fixed by these parts
How to fix it
Door won’t close
Fixed by these parts
How to fix it
Will not drain
Fixed by these parts
How to fix it


Keep searches simple. Use keywords, e.g. "leaking", "pump", "broken" or "fit".
- Customer:
- Kathy from Lombard, IL
- Parts Used:
- WP903093
- Difficulty Level:
- Really Easy
- Total Repair Time:
- Less than 15 mins
- Tools:
- Pliers
Rack roller broke
I opened the end stop of the rack, replaced the roller, and put the end stop back on. I can't believe I paid the repairman the last time $125????? An he put in a regular screw that rusted and broke the roller. Took me 3 minutes! Thanks
Was this instruction helpful to you?
Thank you for voting!
- Customer:
- Bernard from Williamsport, PA
- Parts Used:
- WPW10117748, WP902894, W10131752
- Difficulty Level:
- Easy
- Total Repair Time:
- 1- 2 hours
- Tools:
- Screw drivers, Socket set
Water Leak at right side bottom of the dishwasher door
After dissassembling the unit to discover the leakage source I determined that it would do best to replace the top three contributors to the problem as listed by you. Disassembly, parts replacement and reassembly was straight forward and a few hints garnered from your good instructions and assembly blow-up drawings made the job simple wi
... Read more
th the most difficult task being the removal of the adhesive foam gasket at the bottom of the door's interior. After scraping as much of the deteriorated foam away as possible with a plastic scraper I used some of my wife's nail polisher remover and a clean-up rag (being careful not to get the remover on plastic parts)and soon I had the adhesion area surface clean and ready to receive the new seal. With close attention to clean up of residues left behind from detergent and water and care taken with part installation and reassembly it no longer leaks and I hope to get another 10-15 years of leak free operation out of the dishwasher
Read less
Was this instruction helpful to you?
Thank you for voting!
- Customer:
- Rosemary from Toms River, NJ
- Parts Used:
- WP903093
- Difficulty Level:
- Really Easy
- Total Repair Time:
- Less than 15 mins
- Tools:
- Screw drivers
The dishwasher roller axle needed to be repaired
I watched the installlation video found on the wedsite and followed his directions.
Was this instruction helpful to you?
Thank you for voting!