


Models
>
LDF6810ST
LDF6810ST ((02)(ASTEEUS)) LG Dishwasher
Jump to:
Find Part by Name
Keep searches simple, eg. "belt" or "pump".
Keep searches simple, eg. "belt" or "pump".

$18.54
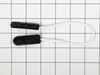
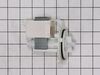
If the door to your dishwasher drops suddenly when opening, there may be an issue with your connector assembly. It works by connecting the door hinge to the door spring, which applies tension and prev...
In Stock
Order now and your part arrives by Jul 30

$15.26
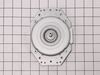
The dishwasher roller assembly connects to the dishrack, and is located in the lower level of the dishwasher. It allows the dishrack to easily slide in and out. If the lower rack keeps falling off the...
In Stock
Order now and your part arrives by Jul 30

$13.07
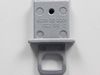
This is a roller and axle, which mounts to the dishwasher rack (sold independently). It is gray in color, made of plastic, and measures approximately an inch in diameter, with the axle making it rough...
On Order

In Stock
Order now and your part arrives by Jul 30

$108.67
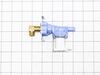
On a washer, this part is used for circulating the water. On a dishwasher, it is used for draining the water.
In Stock
Order now and your part arrives by Jul 30

In Stock
Order now and your part arrives by Jul 30

$53.58
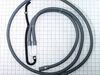
Replacement dishwasher drain hose. Per the manufacturer if the drain hose being replaced does not have the vent tube going to the water inlet assembly a new water inlet will be needed.
In Stock
Order now and your part arrives by Jul 30

In Stock
Order now and your part arrives by Jul 30


In Stock
Order now and your part arrives by Jul 30


In Stock
Order now and your part arrives by Jul 30
Common Problems and Symptoms for LDF6810ST
Viewing 10 of 10Door latch failure
Fixed by these parts

How to fix it
Leaking
Fixed by these parts

How to fix it
Not cleaning dishes properly
Fixed by these parts

How to fix it
Door won’t close
Fixed by these parts
How to fix it
Not draining
Fixed by these parts

How to fix it
Noisy
Fixed by these parts
How to fix it
Will not drain
Fixed by these parts
How to fix it
Not drying dishes properly
Fixed by these parts

How to fix it
Will not fill with water
Fixed by these parts
How to fix it
Will not dispense detergent
Fixed by these parts

How to fix it


Keep searches simple. Use keywords, e.g. "leaking", "pump", "broken" or "fit".
- Customer:
- Gregory L from INDEPENDENCE, OH
- Parts Used:
- 4970ED4004G
- Difficulty Level:
- Easy
- Total Repair Time:
- 15 - 30 mins
- Tools:
- Screw drivers
Broken door spring allows the door to overextend to the floor if not propped.
Simple, removed screws securing machine in the cabinet, then pull the unit out of the cabinet space about 10 inches. Springs are accessible within this extension. You need strong hands to extend the springs and attach them. Once attached, push machine back in place and re-install the anchor screws. In my situation, only one spring was bro
... Read more
ken, so the attached side revealed the correct slot to place the hook on the top position, the bottom position has a plastic lead for the spring, and that lead is attached to a rope to the door hinge. Note: Replace BOTH springs, even if only one is broken.
Read less
Was this instruction helpful to you?
Thank you for voting!
- Customer:
- Greg S from BELLE ISLE, FL
- Parts Used:
- 4970ED4004G, 4933DD3001B
- Difficulty Level:
- Easy
- Total Repair Time:
- 15 - 30 mins
- Tools:
- Pliers, Screw drivers
Door was very heavy due to spring problem
Turn off the power at breaker box. Disconnect the power at dishwasher since I needed to pull the unit all the way out of the cabinet to get to screws on the back side for this model. Find and remove the screws to the cover. Remove cover. In my case, the rope on the connector assembly had snapped. I replaced spring and connector identicall
... Read more
y to functioning side. Did need a pair of pliers to provide enough tension on spring to install. Reconnected cover and power and moved back into the cabinet. Easy repair and my wife wondered why I hadn't done it sooner.
Read less
Was this instruction helpful to you?
Thank you for voting!
- Customer:
- Doug from NEWPORT NEWS, VA
- Parts Used:
- 4681ED1004B
- Difficulty Level:
- Difficult
- Total Repair Time:
- More than 2 hours
- Tools:
- Nutdriver, Pliers, Screw drivers, Socket set, Wrench set
Dishwasher was noisy. PartsDirect suggested replacing circ pump.
Relocated dishwasher to garage and set it up on a table (easier on back having it elevated). Connected temporary water supply, drained to a bucket.
Removed pump, and found it severely corroded, indicating leakage from pump shaft seal in sump. Inspection of seal revealed excessive wear, requiring sump replacement (there is no wa ... Read more y to replace just the pump seal). I have photos of old pump & sump, but I don't see any way to upload them.
Removed sump from dishwasher with all components attached, swapped components over to new sump, reinstalled sump (with new sump gasket) and started dishwasher to check for leaks. The heater was the most difficult component to swap. Reinstalling the sump assembly was tricky.
Reinstalled dishwasher into kitchen cabinet.
Read less
Was this instruction helpful to you?
Thank you for voting!