


Models
>
39232533
39232533 (ASTEEUS) LG Dishwasher
Jump to:
Find Part by Name
Keep searches simple, eg. "belt" or "pump".
Diagrams for 39232533
Viewing 8 of 8


Keep searches simple, eg. "belt" or "pump".

$17.80
If the door to your dishwasher drops suddenly when opening, there may be an issue with your connector assembly. It works by connecting the door hinge to the door spring, which applies tension and prev...
In Stock
Order now and your part arrives by Mar 21

$14.65
The dishwasher roller assembly connects to the dishrack, and is located in the lower level of the dishwasher. It allows the dishrack to easily slide in and out. If the lower rack keeps falling off the...
In Stock
Order now and your part arrives by Mar 21

$12.55
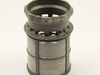
This is a roller and axle, which mounts to the dishwasher rack (sold independently). It is gray in color, made of plastic, and measures approximately an inch in diameter, with the axle making it rough...
In Stock
Order now and your part arrives by Mar 21

In Stock
Order now and your part arrives by Mar 21

$54.01
Ensure your dishwasher performs at its best with this replacement spray arm, designed for select LG models. Positioned at the bottom of the tub, it uses a series of nozzles to spray water evenly acros...
In Stock
Order now and your part arrives by Mar 21

In Stock
Order now and your part arrives by Mar 21

In Stock
Order now and your part arrives by Mar 21

$14.65
If your dishwasher rack isn?t sliding smoothly or feels unstable, this rack holder might be the fix. It keeps the roller wheels attached securely to the rack, helping it move in and out without tippin...
In Stock
Order now and your part arrives by Mar 21

$203.44
If your LG dishwasher’s bottom rack is peeling or not holding dishes properly, this replacement rack can help. It’s made from coated metal to resist rust and damage, but over time, heat can wear it do...
Special Order

In Stock
Order now and your part arrives by Mar 21

$199.95
The upper dishrack assembly securely holds dishes during the cleaning cycle and is compatible with select LG dishwasher models. Made with durable materials, this genuine OEM replacement part ensures a...
In Stock
Order now and your part arrives by Mar 21

In Stock
Order now and your part arrives by Mar 21
Questions and Answers
We're sorry, but our Q&A experts are temporarily unavailable.
Please check back later if you still haven't found the answer you need.
Common Problems and Symptoms for 39232533
Viewing 8 of 8Door latch failure
Fixed by these parts


How to fix it
Not cleaning dishes properly
Fixed by these parts


How to fix it
Door won’t close
Fixed by these parts
How to fix it
Leaking
Fixed by these parts


How to fix it
Noisy
Fixed by these parts
How to fix it
Will not dispense detergent
Fixed by these parts

How to fix it
Not drying dishes properly
Fixed by these parts

How to fix it
Not draining
Fixed by these parts
How to fix it


Keep searches simple. Use keywords, e.g. "leaking", "pump", "broken" or "fit".
- Customer:
- Gregory L from INDEPENDENCE, OH
- Parts Used:
- 4970ED4004G
- Difficulty Level:
- Easy
- Total Repair Time:
- 15 - 30 mins
- Tools:
- Screw drivers
Broken door spring allows the door to overextend to the floor if not propped.
Simple, removed screws securing machine in the cabinet, then pull the unit out of the cabinet space about 10 inches. Springs are accessible within this extension. You need strong hands to extend the springs and attach them. Once attached, push machine back in place and re-install the anchor screws. In my situation, only one spring was bro
... Read more
ken, so the attached side revealed the correct slot to place the hook on the top position, the bottom position has a plastic lead for the spring, and that lead is attached to a rope to the door hinge. Note: Replace BOTH springs, even if only one is broken.
Read less
Was this instruction helpful to you?
Thank you for voting!
- Customer:
- Gary from CHARLOTTE, MI
- Parts Used:
- 3751DD1001J, AHB32983761
- Difficulty Level:
- Really Easy
- Total Repair Time:
- Less than 15 mins
The racks were rusted
We replaced the rusty with the new ones.
Was this instruction helpful to you?
Thank you for voting!
- Customer:
- Bruce from PLEASANT HILL, CA
- Parts Used:
- ABT72909202
- Difficulty Level:
- Easy
- Total Repair Time:
- 30 - 60 mins
- Tools:
- Pliers, Screw drivers, Socket set
Leak coming from pump/motor assembly
Ordered complete M030 Casing Assembly (RepairClinic Item # 4116143) after cleaning and testing rubber seal and pump assembly. Worked for two washes, then leak came back. To replace complete assembly, remove dishwasher from under sink, tip on back, disconnect all electrical and connectors to Case Assembly. Next, remove heater assemble (sin
... Read more
gle nut) - this requires upward pulling to release the rubber washer and unit. Once removed unscrew the case assembly (four screws). That's it. Reverse the order to install.
Read less
Was this instruction helpful to you?
Thank you for voting!