


Models
>
66513203N411
66513203N411 Kenmore Dishwasher
Jump to:
Find Part by Name
Keep searches simple, eg. "belt" or "pump".
Diagrams for 66513203N411
Viewing 11 of 11


 Diagram and Parts List for Kenmore Dishwasher")


Keep searches simple, eg. "belt" or "pump".

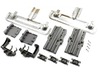
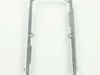
This OEM dishwasher upper rack adjuster kit includes the left and ride side adjusters and all the parts needed to repair the upper rack. These parts have changed from plastic to metal, so even though ...
In Stock
Order now and your part arrives by Mar 26

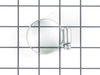
This is a single rack track stop clip used to prevent the upper dish rack from sliding all the way out of the dishwasher. It is made of gray plastic and can wear with time. This is an easy repair that...
In Stock
Order now and your part arrives by Mar 26

$45.27
This is a manufacturer-approved heating element and 2 washers. If the dishes in your dishwasher are not drying or the water in the dishwasher is not getting hot, it may be due to a failed heating elem...
In Stock
Order now and your part arrives by Mar 26

$14.65
The mounting bracket is used to secure the top part of your dishwasher to the underside of your counter or cabinet. If you have solid surface counters (granite, quartz, etc.) you will likely need to s...
In Stock
Order now and your part arrives by Mar 26

$61.15
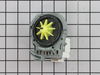
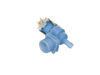
If there is still water left in your dishwasher after it has finished running, there may be an issue with your drain pump. The pump is designed to remove water from the tub, and if that is not happeni...
In Stock
Order now and your part arrives by Mar 26

The friction sleeve, sometimes called a friction pad, is made of a flexible black plastic and measures a bit over one inch in length. It is designed to reduce the friction between the hinge and the do...
In Stock
Order now and your part arrives by Mar 26

$43.21
This is a lower spray arm for a dishwasher. The lower spray arm allows water to be spread evenly throughout the dishwasher tub with the proper force so dishes come out clean. This spray arm is gray in...
In Stock
Order now and your part arrives by Mar 26

$47.33
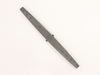
The tine row is located on the lower dishrack. The tine row can be raised or lowered to provide more room in the lower dishrack. Over time the tine row can become rusted, damaged, or lost, and will ne...
In Stock
Order now and your part arrives by Mar 26

$22.00
The retainer clip is used to hold the access panel on your dishwasher in place. It is a genuine OEM part that is black in color and sold individually. The only tool required to complete the repair is ...
In Stock
Order now and your part arrives by Mar 26

$170.17
This gray lower dishrack fits select Whirlpool, KitchenAid, Maytag, and other compatible dishwashers. It holds dishes securely during wash cycles and is ideal for replacing racks that are damaged or r...
In Stock
Order now and your part arrives by Mar 26

$47.33
This genuine OEM filter is found under the lower spray arm in the bottom of your dishwasher. It is used to trap debris and prevent it from entering the pump. If your dishes are not properly cleaned or...
In Stock
Order now and your part arrives by Mar 26

In Stock
Order now and your part arrives by Mar 26
Questions and Answers
We're sorry, but our Q&A experts are temporarily unavailable.
Please check back later if you still haven't found the answer you need.
Common Problems and Symptoms for 66513203N411
Viewing 11 of 11Leaking
Fixed by these parts


How to fix it
Not cleaning dishes properly
Fixed by these parts


How to fix it
Not drying dishes properly
Fixed by these parts


How to fix it
Not draining
Fixed by these parts

How to fix it
Door latch failure
Fixed by these parts


How to fix it
Will Not Start
Fixed by these parts
How to fix it
Door won’t close
Fixed by these parts

How to fix it
Will not fill with water
Fixed by these parts


How to fix it
Noisy
Fixed by these parts

How to fix it
Will not dispense detergent
Fixed by these parts
How to fix it
Will not drain
Fixed by these parts
How to fix it


Keep searches simple. Use keywords, e.g. "leaking", "pump", "broken" or "fit".
- Customer:
- Andrew from Alexandria, VA
- Parts Used:
- WPW10348269
- Difficulty Level:
- Easy
- Total Repair Time:
- Less than 15 mins
- Tools:
- Screw drivers
dishwasher not draining after wash cycle
Caviat: The actual repair is less than 15 minutes, but I spent a lot of time playing with it before I figured out it was that easy and fast. You don't need to remove the dishwasher from the counter to do this. And it will probably help to look at the new part closely so you can understand where the retainer clip is to press it and release
... Read more
the old pump.
First remove the water from the dishwasher pan that would not drain with a wet/dry vac. Otherwise the water will all drain on the floor when you remove the pump. Then remove the two screws on the kickplate on the front of the unit below the door. Remove the kickplate/maintainence access cover. The drain pump is on the right about 8 inches in. Using two hands you grasp the drain pump with your right hand and use the left hand to push the retaining clip down. Then the drain pump will rotate 1/4 turn counterclockwise and can be removed without pulling the dishwasher out. There is likely to be some water leak out that was traped in the pump housing that you can not reach with the vac. Disconnect the wire. Connect the wire to the new pump, put it in place and 1/4 turn clockwise to install it. Replace the kickplate and you're done.
First remove the water from the dishwasher pan that would not drain with a wet/dry vac. Otherwise the water will all drain on the floor when you remove the pump. Then remove the two screws on the kickplate on the front of the unit below the door. Remove the kickplate/maintainence access cover. The drain pump is on the right about 8 inches in. Using two hands you grasp the drain pump with your right hand and use the left hand to push the retaining clip down. Then the drain pump will rotate 1/4 turn counterclockwise and can be removed without pulling the dishwasher out. There is likely to be some water leak out that was traped in the pump housing that you can not reach with the vac. Disconnect the wire. Connect the wire to the new pump, put it in place and 1/4 turn clockwise to install it. Replace the kickplate and you're done.
Read less
Was this instruction helpful to you?
Thank you for voting!
- Customer:
- Dennis from Sedro Woolley, WA
- Parts Used:
- W10518394
- Difficulty Level:
- Really Easy
- Total Repair Time:
- Less than 15 mins
- Tools:
- Screw drivers, Wrench set
Heater element broken.
Step 1: Remove the screws in the bottom of the countertop.
Step 2: Remove the screws holding the bottom kickplate.
Step 3: Loosen leveling legs.
Step 4: Pull dishwasher out of hole.
Step 5: Unlplug dishwasher.
Step 6: Disconnect wires from bottom of element in back.
Step 7: ... Read more Remove plastic nuts holding element in place.
Step 8: Remove element.
Step 9: Reverse Steps 1-7.
Step 10: Drink beer.
Read less
Was this instruction helpful to you?
Thank you for voting!
- Customer:
- Richard from OAKLAND, CA
- Parts Used:
- W10712395
- Difficulty Level:
- Difficult
- Total Repair Time:
- 1- 2 hours
- Tools:
- Screw drivers
Instruction from Whirlpool Not Good (No problem with Part Select)
Trial and error. The instructions from Whirlpool included with the part had minuscule pictures so it was hard to follow. The written instructions were good. But "a picture is worth a thousand words." Eventually it worked. The metal replacement part is much better the the plastic original. Not a good reflection on Whirlpool.
Was this instruction helpful to you?
Thank you for voting!