


Models
>
DU599B
DU599B Jenn-Air Dishwasher
Jump to:
Find Part by Name
Keep searches simple, eg. "belt" or "pump".
Diagrams for DU599B
Viewing 10 of 10
.gif "CARTONS Diagram and Parts List for Jenn-Air Dishwasher")


Keep searches simple, eg. "belt" or "pump".

$21.82
This is a screw and it is made for multiple appliances in your home. This model is called a sheet metal screw because it has sharp points, and the threads are closer together. This screw is designed t...
In Stock
Order now and your part arrives by Aug 6

$7.60
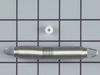
This is a multi-use screw and can be used on a variety of appliances. The measurements of the screw are: 8/18 x 3/8. *Please note: the screw is sold individually. Refer to the manual provided by the m...
In Stock
Order now and your part arrives by Aug 6

$7.60
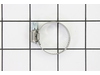
This hose clamp extends from half an inch to an inch in diameter. It is made entirely of metal and is intended for use with Maytag brand washing machines.
In Stock
Order now and your part arrives by Aug 6

$50.36
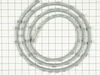
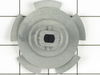
This pump housing filter is twenty-three inches long and a little over two inches wide. This filter wraps around a dishwasher's pump housing and clips in place. It is all white in color and is made of...
Special Order

In Stock
Order now and your part arrives by Aug 6

$18.54
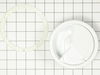
This is an OEM part sourced directly from the manufacturer. This white silicone adhesive caulk is commonly used on ranges, microwaves, and cooktops. This adhesive sealant works to form a bond between ...
In Stock
Order now and your part arrives by Aug 6


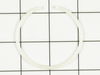
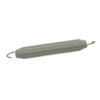
Water that fills your dishwasher lifts this float. When it reaches a certain level, the float triggers the float switch to shut off, thereby shutting off the flow of water into the dishwasher.
No Longer Available


In Stock
Order now and your part arrives by Aug 6

$12.44
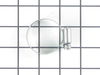
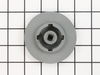
This accessory rack pivot clip is all blue in color and it is made entirely of plastic.
In Stock
Order now and your part arrives by Aug 6

In Stock
Order now and your part arrives by Aug 6
Common Problems and Symptoms for DU599B
Viewing 10 of 10Leaking
Fixed by these parts
How to fix it
Not cleaning dishes properly
Fixed by these parts
How to fix it
Will not fill with water
Fixed by these parts
How to fix it
Noisy
Fixed by these parts

How to fix it
Not draining
Fixed by these parts
How to fix it
Door latch failure
Fixed by these parts
How to fix it
Will not dispense detergent
Fixed by these parts

How to fix it
Will Not Start
Fixed by these parts
How to fix it
Door won’t close
Fixed by these parts
How to fix it
Will not drain
Fixed by these parts
How to fix it


Keep searches simple. Use keywords, e.g. "leaking", "pump", "broken" or "fit".
- Customer:
- Jeffrey from Wilmington, DE
- Parts Used:
- WP901403
- Difficulty Level:
- A Bit Difficult
- Total Repair Time:
- 1- 2 hours
- Tools:
- Pliers, Screw drivers
replace door seal
Remove old seal by pulling out tabs one at a time.
To install new seal, I had to remove the front control panel and door panel to access the back side of all of the slots that the new seal tabs go into. Using needlenose pliers i pulled each tab individually until they were locked into place.
Replace door and control pan ... Read more el.
To install new seal, I had to remove the front control panel and door panel to access the back side of all of the slots that the new seal tabs go into. Using needlenose pliers i pulled each tab individually until they were locked into place.
Replace door and control pan ... Read more el.
Read less
Was this instruction helpful to you?
Thank you for voting!
Right Side Door Springs Broken
With the dishwasher door open remove the 3 srews connecting the top of the dishwasher to the bottom of the kitchen counter top. Remove the lower access panel from the dishwasher and lower the dishwasher about 1/4 inch in the front and back of the dishwasher). Once you have lowered the dishwasher enough slide the dishwasher out about 6 inc
... Read more
hes (enough to gain access to the door springs on the left and right side). Remove all broken spring parts and replace using new springs. The left side of the door contained a single heavy duty spring and the right side of the door contained a heavy duty and light duty 'helper' spring. I replaced only the right side springs since the left side spring was in excellent condition. When the springs are installed slide the dishwasher back into its original position and raise the dishwasher back up to its original height using the front and back adjustment screws. Replace the 3 screws holding the top of the dishwasher secure to the bottom of the countertop. Ensure that the door opens, closes and latches smoothly and then replace the lower access panel. Job done.
Read less
Was this instruction helpful to you?
Thank you for voting!
- Customer:
- Robert from Taylor, MI
- Parts Used:
- 901839
- Difficulty Level:
- Really Easy
- Total Repair Time:
- 15 - 30 mins
- Tools:
- Nutdriver, Screw drivers
Detergent Cup would not open during wash cycle
This repair is very simple. Partselect.com sells a repair kit for this problem that you can use but for simplicity the entire unit is not that much more. First remove the four outside lower philips head screws on the inside of your dishwasher door. Support outer door panel while removing screws. This will remove the outer door panel to ga
... Read more
in access to the detergent cup. Remove panel by pulling out bottom first then slightly pulling downward. You will then see the detergent cup. Unplug the two leads that are connected to the unit keeping in mind their orientation. Remove the five screws that hold the detergent cup in place. Remove the cup assembly and gasket. Clean gasket area and install new cup and gasket. Reinstall five screws (do not overtighten) and plug leads back in. To reinstall door panel position door panel at a slight angle and install top first sliding upward into place under control panel then push inward at bottom. Reinstall the four philips head screws on the inside and you are finished. The complete repair will take you less than 30 minutes.
Read less
Was this instruction helpful to you?
Thank you for voting!