


Models
>
CDWT980V50SS
CDWT980V50SS General Electric Dishwasher
Jump to:
Find Part by Name
Keep searches simple, eg. "belt" or "pump".
Diagrams for CDWT980V50SS
Viewing 5 of 5


Manuals & Guides for CDWT980V50SS
Click to downloadInstall
Installation Instructions
(0.23MB)
Install
Installation Instructions
(3.07MB)
Manual
Owner's Manuals
(4.01MB)
Keep searches simple, eg. "belt" or "pump".

This basket is part of a silverware basket that has 3 sections. This is the middle section of the basket.
In Stock
Order now and your part arrives by Jul 23

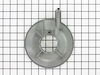
Designed for GE dishwashers, this lower rack holds dishes in place for thorough cleaning. It’s made from durable materials and may include upgraded wheels for smoother movement. Ideal for replacing ra...
In Stock
Order now and your part arrives by Jul 23

$52.95
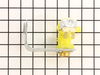
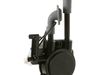
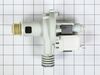
This water inlet valve is an authentic OEM part for your dishwasher. If can be found behind the lower kickplate panel in either the left or right corner. The valve has a solenoid that opens or closes ...
In Stock
Order now and your part arrives by Jul 23

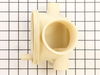
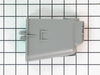
This part releases the detergent and rinse aid into the dishwasher.
In Stock
Order now and your part arrives by Jul 23

$15.26
The hinge link on your dishwasher connects the spring to the dishwasher door hinge. If the hinge link becomes cracked or damaged, you may not be able to shut or lock your dishwasher door properly. In ...
In Stock
Order now and your part arrives by Jul 23

In Stock
Order now and your part arrives by Jul 23

$17.95
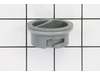
This genuine rinse-aid dispenser cap is an original replacement part from GE, designed for use with GE dishwashers. It covers the rinse agent port and securely seals the dispenser to keep the rinse ai...
In Stock
Order now and your part arrives by Jul 23


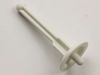
This OEM-compatible screw is designed for use with many GE dishwashers. Measuring 8-16 HXW and 1/2" in length, this stainless steel screw secures the middle spray arm hub to the upper rack assembly, e...
In Stock
Order now and your part arrives by Jul 23

$47.14
This works in conjunction with the pump and filtration system. It is used to receive drainage for disposal.
In Stock
Order now and your part arrives by Jul 23

$42.85
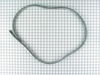
This part is the replacement door hinge cable for your dishwasher. The door hinge cable connects the door spring to the door hinge, and allows the door to open in a controlled fashion. If you open you...
In Stock
Order now and your part arrives by Jul 23

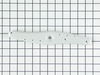
The upper spray arm helps distribute water from the top of the dishwasher tub.
No Longer Available
Common Problems and Symptoms for CDWT980V50SS
Viewing 9 of 9Leaking
Fixed by these parts

How to fix it
Not cleaning dishes properly
Fixed by these parts
How to fix it
Will not dispense detergent
Fixed by these parts

How to fix it
Door latch failure
Fixed by these parts
How to fix it
Will not fill with water
Fixed by these parts

How to fix it
Not draining
Fixed by these parts
How to fix it
Noisy
Fixed by these parts
How to fix it
Door won’t close
Fixed by these parts
How to fix it
Not drying dishes properly
Fixed by these parts
How to fix it


Keep searches simple. Use keywords, e.g. "leaking", "pump", "broken" or "fit".
- Customer:
- James from Naperville, IL
- Parts Used:
- WD12X10163
- Difficulty Level:
- Really Easy
- Total Repair Time:
- 15 - 30 mins
- Tools:
- Screw drivers
soap door latch broken, wouldn't hold soap for later release in middle of cycle like it was supposed to.
Turned off power to unit, 'cuz it has a solenoid lead to open the soap door.
Removed the phillips head screws that held the door together. The screw are located on the inside edge of the door, there are 10-12 of them.
Spearated the door shells carefully, trying not to disturb the location of the wiring in the middle of the doo ... Read more r.
Found the 4 screws that hold the module assembly to the door from the inside, and removed them.
Popped the assembly out, cleaned the gasket-seat area and placed the new one in place.
Carefully tightened the 4 screws. It is easy to over-tighten them, so only turn them until you feel they are snug. Let the gasket do the work.
Attached the two solenoid control wires in the same positions they were in before they were removed from the old assembly.
Re-assembled the door halves, again taking care to not over-tighten the phillips-head screws. One got "spun" and I removed it and re-set it into some epoxy.
Returned power to the dishwasher, and stopped washing dishes by hand.
Note: the latch is now made with a plastic that is more dense, and likely will not fail as soon as the original one did. I think GE learned something about the durability of their component plastics since this was originally built.
Read less
Was this instruction helpful to you?
Thank you for voting!
- Customer:
- Jason from Jersey City, NJ
- Parts Used:
- WD05X10010
- Difficulty Level:
- Easy
- Total Repair Time:
- 15 - 30 mins
Heating element rusted and cracked
The hardest part for me was pulling the dishwasher out from under the countertop. Once it is out all you have to do is disconnect the power (or power off the fuse going to the dishwasher) then look underneath the dishwasher and you will see where the two ends of the heating element come through. Disconnect the wires connected to the ends
... Read more
by simply sliding off the connector. Then remove the plastic "nuts" that screw onto the ends of the heating element by turning them counterclockwise counterclockwise. Once the nuts are removed you can reach inside the dishwasher and remove the old heating element and replace it with the new one. Then simply replace the plastic nuts and reconnect the wires and you are good to go.
Read less
Was this instruction helpful to you?
Thank you for voting!
- Customer:
- Greg from Burlington, VT
- Parts Used:
- WD15X10014
- Difficulty Level:
- Easy
- Total Repair Time:
- 15 - 30 mins
- Tools:
- Nutdriver, Socket set
Water leak, small puddle to front left of dishwasher
You'll need to remove the front toe kick and (if installed, the GE Profile baffling for additional silencing action).
You will need to disconnect the right wire connection to access the right screw (and may need to use a flat head screwdriver). You can then remove the 2 screws that hold the Valve Water Inlet on.
... Read more >You will then need to loosen and the hose clamp that attaches the water line to the Valve Water Inlet. You may need to force it undone since the rubber connection is pretty secure around the water tube inlet.
Disconnect the plastic wire housing from the Valve Water Inlet and you should now have the Valve Water Inlet disconnected.
Reverse the order and reconnect everything and you should be good to go!
Double-check for any leaks prior to pushing everything back in :)
Read less
Was this instruction helpful to you?
Thank you for voting!