


Models
>
GSC3500R20WW
GSC3500R20WW General Electric Dishwasher
Jump to:
Find Part by Name
Keep searches simple, eg. "belt" or "pump".
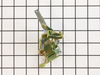
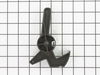
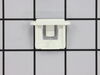
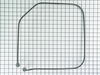
Diagrams for GSC3500R20WW
Viewing 4 of 4


Manuals & Guides for GSC3500R20WW
Click to downloadKeep searches simple, eg. "belt" or "pump".

The wheels on the lower rack of your dishwasher allow for the rack to slide in and out smoothly. If this is not happening, it may be necessary to replace one or more of the wheels. This kit includes 8...
In Stock
Order now and your part arrives by Mar 21

The rack slide end cap attaches to the rails of the upper dishrack, to prevent it from sliding all the way out. It is a one-inch white plastic part that can break over time. This might be the part you...
In Stock
Order now and your part arrives by Mar 21

$77.87
This one piece dishwasher door gasket provides a water tight seal to keep water from leaking out of your dishwasher.
In Stock
Order now and your part arrives by Mar 21

$43.21
This water inlet valve is an authentic OEM part for your dishwasher. If can be found behind the lower kickplate panel in either the left or right corner. The valve has a solenoid that opens or closes ...
In Stock
Order now and your part arrives by Mar 21

$33.94
This interlock switch is a genuine OEM part that can be used in a variety of appliances like dishwashers and dryers. The switch is also known as a belt switch and works as a simple on and off mechanis...
In Stock
Order now and your part arrives by Mar 21

In Stock
Order now and your part arrives by Mar 21

$14.65
The hinge link on your dishwasher connects the spring to the dishwasher door hinge. If the hinge link becomes cracked or damaged, you may not be able to shut or lock your dishwasher door properly. In ...
In Stock
Order now and your part arrives by Mar 21

This OEM-compatible screw is designed for use with many GE dishwashers. Measuring 8-16 HXW and 1/2" in length, this stainless steel screw secures the middle spray arm hub to the upper rack assembly, e...
In Stock
Order now and your part arrives by Mar 21

This valve opens in order for the water to drain out of the dishwasher.
In Stock
Order now and your part arrives by Mar 21

In Stock
Order now and your part arrives by Mar 21

$165.95
This is a replacement lower wash arm assembly for your dishwasher. The lower spray arm is mounted to the bottom of your dishwasher tub and will rotate and spray water during the wash cycle. The spray ...
In Stock
Order now and your part arrives by Mar 21

$75.95
This part fits just under the fine filter assembly and supports the lower spray arm.
In Stock
Order now and your part arrives by Mar 21
Questions and Answers
We're sorry, but our Q&A experts are temporarily unavailable.
Please check back later if you still haven't found the answer you need.
Common Problems and Symptoms for GSC3500R20WW
Viewing 11 of 11Leaking
Fixed by these parts


How to fix it
Not cleaning dishes properly
Fixed by these parts


How to fix it
Not draining
Fixed by these parts
How to fix it
Will Not Start
Fixed by these parts


How to fix it
Door latch failure
Fixed by these parts

How to fix it
Will not dispense detergent
Fixed by these parts


How to fix it
Will not fill with water
Fixed by these parts
How to fix it
Door won’t close
Fixed by these parts
How to fix it
Noisy
Fixed by these parts

How to fix it
Not drying dishes properly
Fixed by these parts
How to fix it
Won’t Start
Fixed by these parts
How to fix it


Keep searches simple. Use keywords, e.g. "leaking", "pump", "broken" or "fit".
- Customer:
- Mark from Huntingdon Valley, PA
- Parts Used:
- WD35X21038
- Difficulty Level:
- Really Easy
- Total Repair Time:
- Less than 15 mins
Lower rack wheel was melted
Unsnapped clip,and moved it 90 degrees. Slip wheel and clip off. Installed clip on new wheel. replaced new wheel. The wheel did not come with a new clip and was not suggested on the parts list. The existing clip was still OK but if it was not, I would have had to order a clip and wait. All in all, a good experience.
Was this instruction helpful to you?
Thank you for voting!
- Customer:
- Teresa from Phenix City, AL
- Parts Used:
- WD35X21038
- Difficulty Level:
- Really Easy
- Total Repair Time:
- Less than 15 mins
The rear wheels were missing on the lower rack.
The wheels came with a clip on part that clipped to the rack and the wheel snapped into that clip. I am a woman and it was easy for me to do. Thanks to Parts Select for being an easy to use and navigate site, for quick shipment and for good directions with the parts. Sincerely, Teresa from Alabama.
Was this instruction helpful to you?
Thank you for voting!
- Customer:
- Larry from Fort Worth, TX
- Parts Used:
- WD22X10055, WD12X10244
- Difficulty Level:
- A Bit Difficult
- Total Repair Time:
- 30 - 60 mins
- Tools:
- Socket set, Wrench set
Telescopic sprayer assembly in the Spray Arm Weld broke top element popped out
First off on this model, if one of the telescopic spray arm weld assembly comes out it is NOT repairable you have to replace the whole part.
The assembly on my model number was simple you do NOT have to PRY anything out...(I broke the base spray arm trying to shove a screw driver into the Spray arm weld.(You could try this but chanc ... Read more es are the plastic will break and I recommend replacing both parts why not???.)
There are two bolts on the sump protector basket that has to be removed first. They are 1/4 inch.
Once that cover is free there is a bolt (also 1/4 inch) on the base spray arm it is easy to see but hard to get to I used a very thin open ended wrench
1/3 turn at a time till I could get the socket on it.
Next there is a rubber gromet like thingy that just pulls loose remove it also.
Next take the spanner wrench (I used one with a rubber belt) wrap around base spray arm and turn counter clockwise it just unscrews.
reassembly is simple but this is GE so I inspected the sump and found one medal impeller and one black screw at the bottom!!!!!
The impeller is threaded and just screws onto the shaft (look at the diagrams on this web site to see placement.)
Throw the screw away it does nothing except if left there jacks up the impeller I am guessing it fell out of some factory workers pocket.
If after you put all the parts back in and the washer does not drain check your reassembly if you don't line the parts up just right the unit will not drain.
Don't forget the rubber grommet (not sure what it does but it's easy to replace after all is assembled) also there is a metal washer that is inbetween the base spray arm and the spray arm weld put it back before you click those two parts together it protect the plastic from wearing it is a bearing!!
If you found this site you are doing really good This site had all the diagrams I was looking for I love you guys you so rock!!! I wish the diagrams were bigger but they were adequate. GE 's site was no help and I doubt I will ever buy another one from them.
Good luck just remember look at the parts diagrams before attempting the repair.
Read less
Was this instruction helpful to you?
Thank you for voting!