


Models
>
GSC3430F00WW
GSC3430F00WW General Electric Dishwasher
Jump to:
Find Part by Name
Keep searches simple, eg. "belt" or "pump".
Diagrams for GSC3430F00WW
Viewing 5 of 5


Keep searches simple, eg. "belt" or "pump".

In Stock
Order now and your part arrives by Mar 21

$29.82
The gasket insert is connected to the gasket in the bottom of your dishwasher door. It is a small piece of white plastic that measures approximately 4 inches by 1 inch, and is sold individually. The g...
In Stock
Order now and your part arrives by Mar 21

$14.65
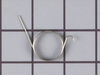
The hinge link on your dishwasher connects the spring to the dishwasher door hinge. If the hinge link becomes cracked or damaged, you may not be able to shut or lock your dishwasher door properly. In ...
In Stock
Order now and your part arrives by Mar 21

$194.11
This dishwasher pump and motor kit is a comprehensive replacement solution for various models manufactured since 1970. The redesigned assembly includes a built-in drain solenoid, streamlining installa...
In Stock
Order now and your part arrives by Mar 21

In Stock
Order now and your part arrives by Mar 21

$33.94
This genuine OEM dishwasher door seal gasket prevents water from leaking out of the dishwasher. If your washer is leaking from the door, check for wear on the gasket, and to ensure it is properly fitt...
In Stock
Order now and your part arrives by Mar 21

In Stock
Order now and your part arrives by Mar 21

$54.01
Water is forced through this spray arm by the unit's pump and motor assembly. The force of the water propels the spray arms, spraying water and detergent onto the dishes on the dishrack. This spray ar...
In Stock
Order now and your part arrives by Mar 21


In Stock
Order now and your part arrives by Mar 21

In Stock
Order now and your part arrives by Mar 21

$24.10
This hose clamp kit contains two clamps. The smaller of the two is an inch in diameter while the larger of the two is two inches in diameter.
In Stock
Order now and your part arrives by Mar 21
Questions and Answers
We're sorry, but our Q&A experts are temporarily unavailable.
Please check back later if you still haven't found the answer you need.
Common Problems and Symptoms for GSC3430F00WW
Viewing 9 of 9Leaking
Fixed by these parts


How to fix it
Not draining
Fixed by these parts


How to fix it
Not cleaning dishes properly
Fixed by these parts

How to fix it
Door latch failure
Fixed by these parts


How to fix it
Will not dispense detergent
Fixed by these parts

How to fix it
Door won’t close
Fixed by these parts
How to fix it
Noisy
Fixed by these parts
How to fix it
Will Not Start
Fixed by these parts
How to fix it
Will not fill with water
Fixed by these parts
How to fix it


Keep searches simple. Use keywords, e.g. "leaking", "pump", "broken" or "fit".
- Customer:
- Dan from Minnetonka, MN
- Parts Used:
- WD24X10018
- Difficulty Level:
- Really Easy
- Total Repair Time:
- Less than 15 mins
- Tools:
- Nutdriver
Dishwasher wouldn't fully drain
I removed the four screws holding the screen and molded plastic cage inside the rear of the dishwasher to expose the check valve assembly. I then unscrewed the piston and nut assembly with my hand and replaced it with the new one. I found that the rubber cone shaped valve on the old piston and nut assembly was entirely disintegrated. T
... Read more
his easy repair solved the problem.
Read less
Was this instruction helpful to you?
Thank you for voting!
- Customer:
- Joseph from Spartanburg, SC
- Parts Used:
- WD08X10016, WD08X10015
- Difficulty Level:
- Easy
- Total Repair Time:
- 30 - 60 mins
- Tools:
- Nutdriver, Screw drivers
Noticed a small seepage of water at the lower corners of the dishwasher door. Gasket had become hard and unpliable. Bottom part of gasket had come out of channel and would not stay in place.
I had replaced the door gasket a few years earlier and had difficulty fitting the gasket around the bottom corners. This time I removed the plastic inner door panel for complete access to the gasket channel. I opened the new gasket package and let it stand unrolled overnight to remove the kinks. Once the old gasket was removed I took
... Read more
a thin piece of wood wrapped with a cloth to clean out the gasket track. The gasket snaps in easily. Be careful not to over stretch the gasket around the bottom corners. The curve of the gasket will resemble the curve of the door panel when set correctly. This is where I had trouble earlier when I tried to set the gasket in the channel with the door panel still attached. It is much easier to do this with the door panel removed.
Read less
Was this instruction helpful to you?
Thank you for voting!
- Customer:
- Glenn from Clemmons, NC
- Parts Used:
- WD26X10013
- Difficulty Level:
- Easy
- Total Repair Time:
- 30 - 60 mins
- Tools:
- Nutdriver, Pliers, Screw drivers
Motor was getting noisier every time we used the dishwasher. We knew it was just a matter of time before it totally quit.
The most difficult part was removing the dishwasher from below the counter. Once that was complete, I simply turned the washer onto it's front surface to access the pump easier. Simply disconnected the electrical connectors, loosened the three hose clamps holding the hoses to the pump. Lastly removed a stiff arm bracket holding the pum
... Read more
p. Reversed the order to install the new one using a longer bracket provided with the new unit. Hooked up the electrical connections last and slid the washer back in place. The washer runs like new now and is not making noise. The replacement part was a perfect match.
Read less
Was this instruction helpful to you?
Thank you for voting!