


Models
>
GDT225SSL2SS
GDT225SSL2SS General Electric Dishwasher
Jump to:
Find Part by Name
Keep searches simple, eg. "belt" or "pump".
Diagrams for GDT225SSL2SS
Viewing 4 of 4


Keep searches simple, eg. "belt" or "pump".

In Stock
Order now and your part arrives by Mar 26

In Stock
Order now and your part arrives by Mar 26

In Stock
Order now and your part arrives by Mar 26

Special Order

On Order

In Stock
Order now and your part arrives by Mar 26

In Stock
Order now and your part arrives by Mar 26

In Stock
Order now and your part arrives by Mar 26

In Stock
Order now and your part arrives by Mar 26

$60.13
This drain pump assembly helps remove water from the dishwasher tub at the end of each cycle. It’s a replacement part designed to fix issues like standing water, poor drainage, or strange pump noises....
In Stock
Order now and your part arrives by Mar 26

In Stock
Order now and your part arrives by Mar 26

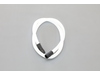
This mid-level spray arm conduit assembly directs water to the upper spray arm to improve cleaning coverage, especially in hard-to-reach areas. It’s typically replaced when the dishwasher leaves dishe...
In Stock
Order now and your part arrives by Mar 26
Questions and Answers
We're sorry, but our Q&A experts are temporarily unavailable.
Please check back later if you still haven't found the answer you need.
Common Problems and Symptoms for GDT225SSL2SS
Viewing 5 of 5Leaking
Fixed by these parts


How to fix it
Will Not Start
Fixed by these parts
How to fix it
Not draining
Fixed by these parts

How to fix it
Not cleaning dishes properly
Fixed by these parts

How to fix it
Door latch failure
Fixed by these parts

How to fix it

Keep searches simple. Use keywords, e.g. "leaking", "pump", "broken" or "fit".
- Customer:
- Vanessa from San Antonio, TX
- Parts Used:
- WD22X24672, WD08X24750
- Difficulty Level:
- Very Easy
- Total Repair Time:
- Less than 15 mins
Water leak at bottom of door during cycles
Tub gasket was not the issue, the lower spray arm corrected the fix! Took under two mins to pop off and replace and all was fixed. Very thankful for this site!
Was this instruction helpful to you?
Thank you for voting!
- Customer:
- Kenneth from PROSPER, TX
- Parts Used:
- WD22X24672
- Difficulty Level:
- Very Easy
- Total Repair Time:
- Less than 15 mins
Leaking from door
Gasket was verified to be good but found the lower spray arm cracked causing water to spray directly at door and leak out front of unit. Replaced arm and problem solved
Was this instruction helpful to you?
Thank you for voting!
- Customer:
- Al from REDDING, CA
- Parts Used:
- WD01X24739, WD01X24738
- Difficulty Level:
- Really Easy
- Total Repair Time:
- 15 - 30 mins
- Tools:
- Screw drivers
While the dishwasher door was fully open, someone accidentally turned and tripped over it with much of their weight. Now the door won't fully close.
*UNPLUG THE DISHWASHER
*remove 2 mounting screws attatching dishwasher to underside of countertop.
*with the dishwasher door closed, remove left and right side hinge cables off pulley and hinge.
*fully open door and remove all perimeter screws except for 2 screws holding the latch assembly.
*carefully separate outer ... Read more door shell from door body.
*disconnect electrical clip from inside top of outer shell. Carefully set outer shell aside.
*each hinge has 2 Torx head screws and 2 Phillips head screws, remove these. You can now slide the door body out and away from the hinges and dishwasher.
*these hinges were slightly bent so I had to use a ball peen hammer to tap them off the post.
To reassemble, reverse these instructions.
Read less
Was this instruction helpful to you?
Thank you for voting!