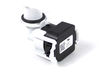
Please be informed that this OEM-verified part that DOES NOT come with the heatshield, as per GE directly and are no longer required. This lower spray arm assembly in your dishwasher distributes water...
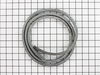
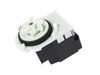
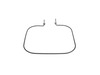
If your dishwasher is leaking water while it is running, there may be an issue with the gasket. Also known as a door gasket, the tub gasket creates a watertight seal between the tub of the dishwasher ...
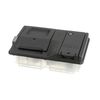
This is an authentic lower dishrack with wheels. Please note that the manufacturer has made a design change, which requires the silverware basket to be relocated from the door to the inside of the rac...
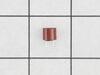
This genuine OEM part is an end cap for the racks in your dishwasher. The end cap ensures that the rack does not fall off the rails when you pull the rack in and out. If the end caps are damaged or mi...
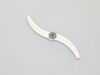
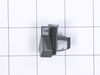
This dishwasher latch strike is a manufacturer-approved replacement part for your appliance. The latch strike is an important component in your dishwasher door assembly, and adds an extra layer of sec...
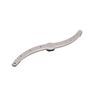
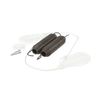
This heating element helps your dishwasher clean and dry dishes by heating water and aiding in moisture evaporation. It’s made of black metal and located at the bottom of the tub. The dimensions are r...
Ask our experts a question about this part and we'll get back to you as soon as possible!
2 questions answered by our experts.
< Prev
1
Next >
Sort by:
Search filter:
Clear Filter
Your search term must have 3 or more characters.
Keep searches simple. Use keywords, e.g. "leaking", "pump", "broken" or "fit".
Sorry, we couldn't find any existing answers that matched. Try using some different or simpler keywords, or submit your new question by using the "Ask a Question" button above!
Dan
February 28, 2024
Will not start, function plate Will not light up.
For model number GDF510PSR0SS
Hello Dan, thank you for your inquiry. We would recommend replacing the user interface control board, part number FIX16542457, to fix the issue. Good luck with your repair!
Replaced the UI board and latch still not working.
For model number GDF510PSR0SS
Hello Dan, thank you for writing back. Looking at our blog, https://www.partselect.com/blog/ge-dishwasher-no-power-no-lights/#:~:text=If%20your%20GE%20dishwasher%20has,and%20tools%20to%20do%20so., We would next suggest the User Interface Harness PS17137066. We hope this helps.
I found it online! There were step by step instructions that were easy to understand. I have never had to do anything like this in my life, only recently had to start doing everything around the house myself due to husband's illness. The repairman came out, charged me $100 to determine what the dishwasher needed & left me with the p
... Read moreart number. He was going to charge me $389 to install the part and they were over charging for the part. The repairman suggested I just get a new dishwasher. I ordered the part from the website at 1/2 the price that the other place charges and found it on line. With the step by step instructions and the online page, I successfully installed it MYSELF. Saved me a ton of $$. I LOVE the website Thank You!!!!
It was a simple as: attach and done! There is a ring on the part that tightens clockwise to the nipple that sprays out the water that it rests on. Twist clockwise and you are done! It is a mystery how it was unattached to begin with but not a problem in the end, it was easy to fix!
Thanks for sending genuine GE part
... Read mores!
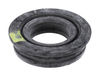
Replaced floating seal. Un plugged and Pulled washer out from the counter and laid on its left side. Pull pump out of seal by hand. Straight screwdriver to lever seal out of fitting. Clean hole and wipe seal then push into hole. Reinsert pump reverse install. To make it easier I previously extended the water supply hose to nearly 8
... Read morefeet so did not have to disconnect it.