


Models
>
GMR05BLHWWC
GMR05BLHWWC General Electric Dishwasher
Jump to:
Find Part by Name
Keep searches simple, eg. "belt" or "pump".
Diagrams for GMR05BLHWWC
Viewing 4 of 4


Keep searches simple, eg. "belt" or "pump".

This clip fits inside the control knobs for your laundry machines, and helps to securely fasten the knob to the shaft, which allows you to easily turn the knob to select the correct settings. This is ...
No Longer Available

$31.88
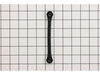
This is a genuine OEM drain hose for your top-load washing machine. It is made with a flexible and corrugated black material, and measures 57-inches in length. The purpose of the drain hose is to move...
In Stock
Order now and your part arrives by Mar 20

$14.65
This plastic clip is a genuine OEM part, used to help connect the timer knob to the shaft on your washer. If the clip has become damaged it will need to be replaced. The clip is found on the backside ...
In Stock
Order now and your part arrives by Mar 20

$58.89
This is an authentic agitator for your washer, responsible for moving clothes inside the tub. Please note, it does not come with the fabric dispenser, so you will need to either transfer the old one t...
In Stock
Order now and your part arrives by Mar 20

$19.90
If your washer is leaking when it is filling or agitating, you may need to replace the tub seal. The tub seal is found between the transmission and the outer tub in your washing machine. This genuine ...
In Stock
Order now and your part arrives by Mar 20

$33.94
This is a 6-rib washer drive belt. It is sourced directly from the original manufacturer and constructed with a durable Poly V material. This part connects the drive motor to the drive system that tur...
In Stock
Order now and your part arrives by Mar 20

In Stock
Order now and your part arrives by Mar 20

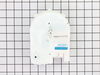
This part releases the detergent and rinse aid into the dishwasher.
In Stock
Order now and your part arrives by Mar 20


In Stock
Order now and your part arrives by Mar 20

$40.12
The tub bearing secures the spin basket in the tub assembly of a washer. It is located on the bottom of the outer tub. A common symptom of a worn tub bearing is a very loud noise (including a grinding...
In Stock
Order now and your part arrives by Mar 20

$24.10
This part is the hub nut, or lock down nut for your washing machine. It is designed to hold the inner tub on to the transmission. If your hub nut is stripped or damaged, it may need to be replaced. T...
In Stock
Order now and your part arrives by Mar 20
Questions and Answers
We're sorry, but our Q&A experts are temporarily unavailable.
Please check back later if you still haven't found the answer you need.
Common Problems and Symptoms for GMR05BLHWWC
Viewing 22 of 22Leaking
Fixed by these parts


How to fix it
Will not agitate
Fixed by these parts


How to fix it
Will Not Start
Fixed by these parts


How to fix it
Door latch failure
Fixed by these parts


How to fix it
Will not dispense detergent
Fixed by these parts

How to fix it
Will not drain
Fixed by these parts
How to fix it
No hot or cold water
Fixed by these parts

How to fix it
Not cleaning dishes properly
Fixed by these parts
How to fix it
Marks left on clothes
Fixed by these parts
How to fix it
Shaking and Moving
Fixed by these parts
How to fix it
Spinning Issues
Fixed by these parts


How to fix it
Door won’t close
Fixed by these parts
How to fix it
Spins slowly
Fixed by these parts
How to fix it
Does not dispense fabric softener or detergent
Fixed by these parts

How to fix it
Burning smell
Fixed by these parts
How to fix it
Noisy and Marks Left on Clothes
Fixed by these parts

How to fix it
Draining Issues
Fixed by these parts
How to fix it
Noisy
Fixed by these parts
How to fix it
Water Filling Issues
Fixed by these parts
How to fix it
Cycle Not Advancing
Fixed by these parts
How to fix it
Touchpad does not respond
Fixed by these parts

How to fix it
Not drying dishes properly
Fixed by these parts

How to fix it


Keep searches simple. Use keywords, e.g. "leaking", "pump", "broken" or "fit".
- Customer:
- Brian from Millerplace, NY
- Parts Used:
- WH12X10334
- Difficulty Level:
- Easy
- Total Repair Time:
- 15 - 30 mins
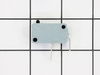
washing machine would not go through all cycles or agitate
After removing frt panel which prys off I checked for anything obvious like a loose belt. Then I jiggled the magnet switch located on the inside of the loading cover. I saw the machine start agitating the it stopped again when I stopped touching it. I ordered the new part and spliced it in with the wire crip tool. Now the machine is A ok.
Was this instruction helpful to you?
Thank you for voting!
- Customer:
- Anthonie from Beale AFB, CA
- Parts Used:
- WH41X10096, WH16X513
- Difficulty Level:
- Really Easy
- Total Repair Time:
- Less than 15 mins
- Tools:
- Wrench set
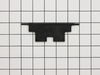
Old Hose Had A Leak
First I removed the screws that held the hose drain hose clip in place. Removed the damaged hose. Placed the new drain hose clip at the end of the new drain hose. Re-inserted back in hole, pushed in hose to necessary depth then tighted screws, Very easy and painless.
Was this instruction helpful to you?
Thank you for voting!
- Customer:
- James from Naperville, IL
- Parts Used:
- WD12X10163
- Difficulty Level:
- Really Easy
- Total Repair Time:
- 15 - 30 mins
- Tools:
- Screw drivers
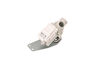
soap door latch broken, wouldn't hold soap for later release in middle of cycle like it was supposed to.
Turned off power to unit, 'cuz it has a solenoid lead to open the soap door.
Removed the phillips head screws that held the door together. The screw are located on the inside edge of the door, there are 10-12 of them.
Spearated the door shells carefully, trying not to disturb the location of the wiring in the middle of the doo ... Read more r.
Found the 4 screws that hold the module assembly to the door from the inside, and removed them.
Popped the assembly out, cleaned the gasket-seat area and placed the new one in place.
Carefully tightened the 4 screws. It is easy to over-tighten them, so only turn them until you feel they are snug. Let the gasket do the work.
Attached the two solenoid control wires in the same positions they were in before they were removed from the old assembly.
Re-assembled the door halves, again taking care to not over-tighten the phillips-head screws. One got "spun" and I removed it and re-set it into some epoxy.
Returned power to the dishwasher, and stopped washing dishes by hand.
Note: the latch is now made with a plastic that is more dense, and likely will not fail as soon as the original one did. I think GE learned something about the durability of their component plastics since this was originally built.
Read less
Was this instruction helpful to you?
Thank you for voting!