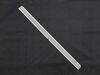
This dishwasher door gasket is attached to the bottom of the door, creating a strong seal between the tub and the outer edge of the door. This seal is prone to wear and tear due to its constant exposu...
The door gasket provides a watertight seal between the tub and the door, to keep water from leaking out of your dishwasher. If your dishwasher is leaking you may need to replace the door gasket. This ...
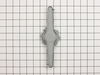
The upper spray arm is found above the top rack in your dishwasher. If your dishes are not properly cleaned after the cycle has finished, the spray arm may need to be replaced. As the part is made of ...
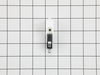
This is a genuine OEM replacement water inlet valve for your dishwasher. The water inlet valve supplies water to the dishwasher by opening and closing the solenoids attached to the valve, depending on...
This heating element mounting nut is used in dishwashers and is used to hold the nut to prevent leaking. If your nut is damaged or you notice leaking from the dishwasher, then replacing this nut will ...
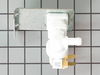
This is an authentic OEM door latch assembly for your dishwasher. The latch has a switch that uses an on-off mechanism which prevents the dishwasher from running when the door is opened. If your dishw...
If your dishwasher is leaking from the corners of the gasket, you may need to replace the splash shields. The splash shields attach to the lower front corners of dishwasher and are used to prevent wat...
This is a bracket, but it may also be known as a dishrack row clip, or simply a tine clip, and it is used in conjunction with your dishwasher. The purpose of this part is to fasten to the rack and the...
Ask our experts a question about this part and we'll get back to you as soon as possible!
1 question answered by our experts.
< Prev
1
Next >
Sort by:
Search filter:
Clear Filter
Your search term must have 3 or more characters.
Keep searches simple. Use keywords, e.g. "leaking", "pump", "broken" or "fit".
Sorry, we couldn't find any existing answers that matched. Try using some different or simpler keywords, or submit your new question by using the "Ask a Question" button above!
Carolyn
November 15, 2022
I have a flashing error code:Washing. er. clean
drying. s
any suggestions?
For model number PLD4555RFC3
Hi Carolyn, thank you for reaching out. According to our research, the error code ER Clean S means shorted keypad. The issue is with the touchpad or the control board. However, before replacing the touchpad you can unplug it, take it apart completely, and blow the moisture off. If this is not fixing the issue check the following parts to fix the issue: Control Panel Assembly, part number FIX11757989 and Control Board, part number FIX2581379. We hope this helps! If you need help placing an order, customer service is open 7 days a week. Thanks again for your great question.
Repair was simple. I unscrewed the old grommet which held the old spray arm and screwed-on the new one. About 30 seconds was required. Other people having this problem should note that the spray-arm is made of three pieces which are inseparable when the arm is new. The arm is sold in this form. However, when your machine is having th
... Read moree problem that the arm falls off, the three pieces become separate. When you want to replace the spray arm, only one new part needs to be ordered because this part encompases all three components.
First I opened the door all the way. Second I reached down to the bottom gasket then grabed it on the right end of the seal that is on the right side of the door. Then I pulled the end outward from the bottom of the door toward the heater coil in the bottom of the washer. It came out real easy. You see it just snaps into a little plastic
... Read moregroove under the door. I then cleaned up the area for food and soap particules. I then placed the new gasket in place by lining up the notch toward the right end with the piece of plastic that encloses the right end of the plastic notch on the bottom right end of the door. Then push it in untill it stops going into the notch. It snaps in but does not make a snaping sound. It just won't go in no more.
I removed old tub gasket, which the door presses against to make a seal, and put the new one in. Flat tip screwdriver was used to gently press gasket in.